Every winter, when the first snowflakes start to fall, my kitchen turns into a cozy little wonderland. The smell of vanilla, melted chocolate, and sugar fills the air while the sound of laughter bounces off the walls. It’s our family’s signal that it’s time to start making our favorite festive treats—especially Snowman Cake Pops.
The first time I made these adorable snowmen, it was for my niece’s Christmas school party. I still remember her face lighting up as she held one, saying, “It’s too cute to eat!” (though, of course, she ate it anyway). Ever since then, these little frosted snowmen have become a holiday tradition in my home.
What I love about this recipe is that it’s as fun to make as it is to eat. It’s a blend of crafting and baking—you get to shape, dip, and decorate while creating something that makes everyone smile. And the best part? You don’t have to be a professional baker to pull it off. With just a bit of patience and some creative flair, you’ll end up with snowmen that look straight out of a winter wonderland.
Why I Love This Recipe

I’ve made a lot of desserts over the years, but these Snowman Cake Pops have a special charm. They’re not just another sweet treat—they’re an experience. There’s something incredibly joyful about rolling soft cake crumbs into perfect little spheres, coating them in silky white chocolate, and then transforming them into cheerful snowmen with tiny faces and scarves.
This recipe also offers versatility. You can make them as simple or as detailed as you want. For a quick holiday dessert, you can stick to plain white pops with chocolate eyes and an orange sprinkle nose. But if you’re feeling artistic, go all out—add mini marshmallow hats, colorful fondant scarves, or even sprinkle snow for that frosty finish.
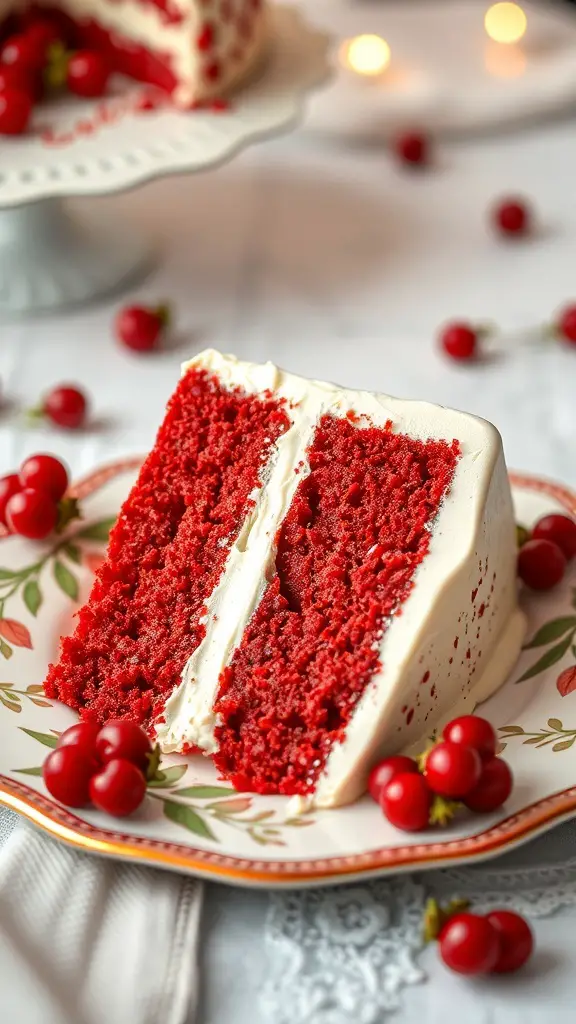
Another reason I adore this recipe is how forgiving it is. Whether you use a homemade cake or leftover boxed mix, the results are equally delightful. You can play with flavors too—classic vanilla for a snowy look, red velvet for a festive surprise inside, or even peppermint chocolate for a wintry twist.
And let’s not forget how much kids love getting involved. I usually set up a little decorating station where everyone gets to “build” their snowman. It turns baking into a family bonding activity, complete with messy hands, laughter, and plenty of taste-testing along the way.
These cake pops are perfect for Christmas parties, winter birthdays, or even as homemade gifts. Once you wrap them in clear cellophane and tie them with a ribbon, they look like something you’d find in a boutique bakery.
Ingredients for Snowman Cake Pops
To make these charming Snowman Cake Pops, you’ll need a mix of basic baking ingredients and a few fun decorative extras. The best part? Most of these items are easy to find at your local grocery store.
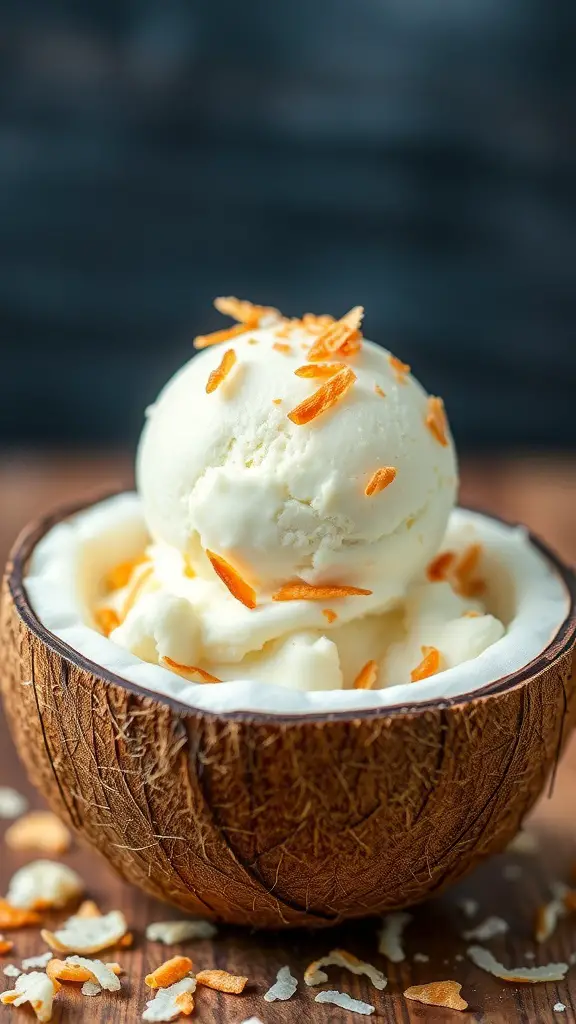
Let’s start with the base—our cake. You can bake your own from scratch or use a box mix to save time. I often use vanilla or white cake because the color pairs beautifully with the white coating, giving the perfect “snowy” look. If you want to surprise your guests, try red velvet—it creates a lovely contrast when you bite in.
For the frosting, you’ll need something creamy and smooth to bind the cake crumbs together. Buttercream, cream cheese frosting, or even store-bought vanilla frosting works beautifully.
Now for the coating—you’ll need white candy melts or white chocolate chips. Candy melts are ideal because they create a smooth, glossy finish and set quickly. If you use white chocolate, make sure to add a tiny bit of coconut oil to help it melt evenly.
Here’s what I typically gather before starting:
- Cake base: 1 baked 9×13-inch cake (vanilla, chocolate, or red velvet)
- Frosting: About ½ cup of buttercream or cream cheese frosting
- Coating: 2 cups of white candy melts or white chocolate chips
- Lollipop sticks or cake pop sticks
- Decorations:
- Mini chocolate chips or edible black pearls (for eyes and buttons)
- Orange sprinkle or fondant (for the carrot nose)
- Candy scarves (fruit leather strips, fondant, or thin licorice)
- Mini marshmallows (for hats, optional)
- Edible markers (for fine details)
It may look like a long list, but once everything is laid out, the process becomes a creative assembly line.
How Much Time Will You Need
This recipe takes a little patience, but it’s worth every minute.
- Baking the cake: About 30–35 minutes (if baking from scratch or box mix)
- Cooling and crumbling: 20 minutes
- Mixing and shaping the cake balls: 25–30 minutes
- Chilling the cake balls: At least 1 hour (to firm them up before dipping)
- Dipping and decorating: 45 minutes to 1 hour (depending on detail)
So, overall, plan for about 3 hours from start to finish, though most of that time is hands-off. You can even bake the cake a day ahead to save time.
How to Make These Snowman Cake Pops
Here’s where the fun really begins! Don’t worry if you’ve never made cake pops before. I’ll walk you through each step in detail so you’ll know exactly what to expect.
Step 1: Bake the Cake
Start by preparing your cake. If using a box mix, follow the package instructions. If making from scratch, go with a moist vanilla or chocolate cake. Once baked, let the cake cool completely. Warm cake will crumble unevenly and make the mixture too sticky.
Step 2: Crumble and Mix
Once your cake has cooled, crumble it into fine crumbs using your hands or a food processor. The texture should resemble breadcrumbs. Add frosting a tablespoon at a time and mix until it holds together like dough. You’ll know it’s ready when you can roll it into a ball without it falling apart.
Step 3: Shape the Snowmen
Roll the mixture into small balls for the snowmen’s bodies and slightly smaller ones for their heads. Gently press one smaller ball onto a larger one to form the snowman shape. Alternatively, you can make single-round pops if you prefer simplicity. Place them on a parchment-lined tray.
Step 4: Insert Sticks
Melt a small amount of candy melts and dip the tip of each stick into the melted coating before inserting it halfway into each snowman. This helps the stick stay secure once the coating hardens. Chill the pops in the refrigerator for about 1 hour or until firm.
Step 5: Dip in White Chocolate
Melt the rest of your white candy melts or white chocolate in a microwave-safe bowl, stirring every 20–30 seconds until smooth. Dip each chilled pop into the melted coating, gently tapping off excess chocolate. Place them upright (you can use a styrofoam block to hold them). Let them set until dry and glossy.
Step 6: Decorate
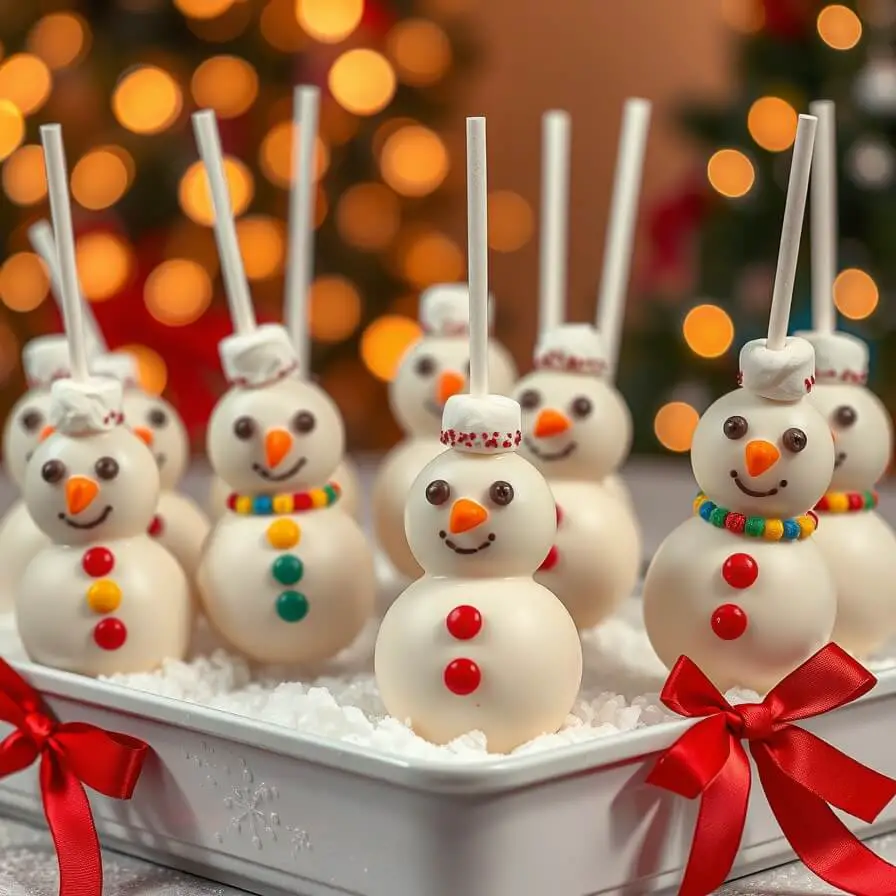
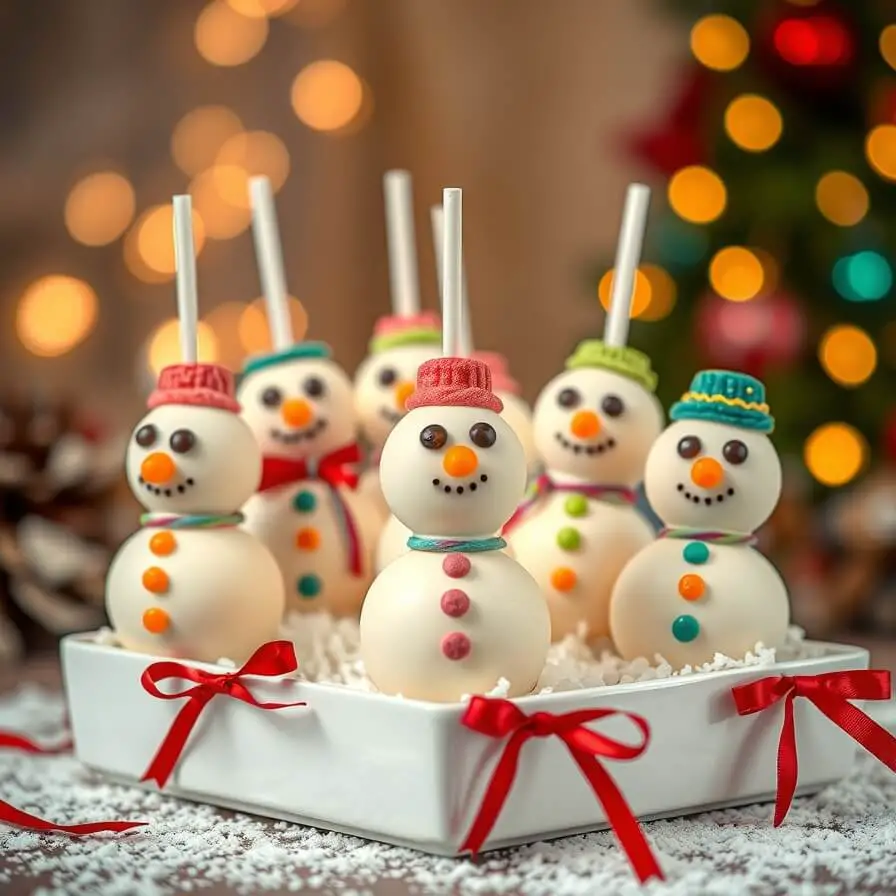
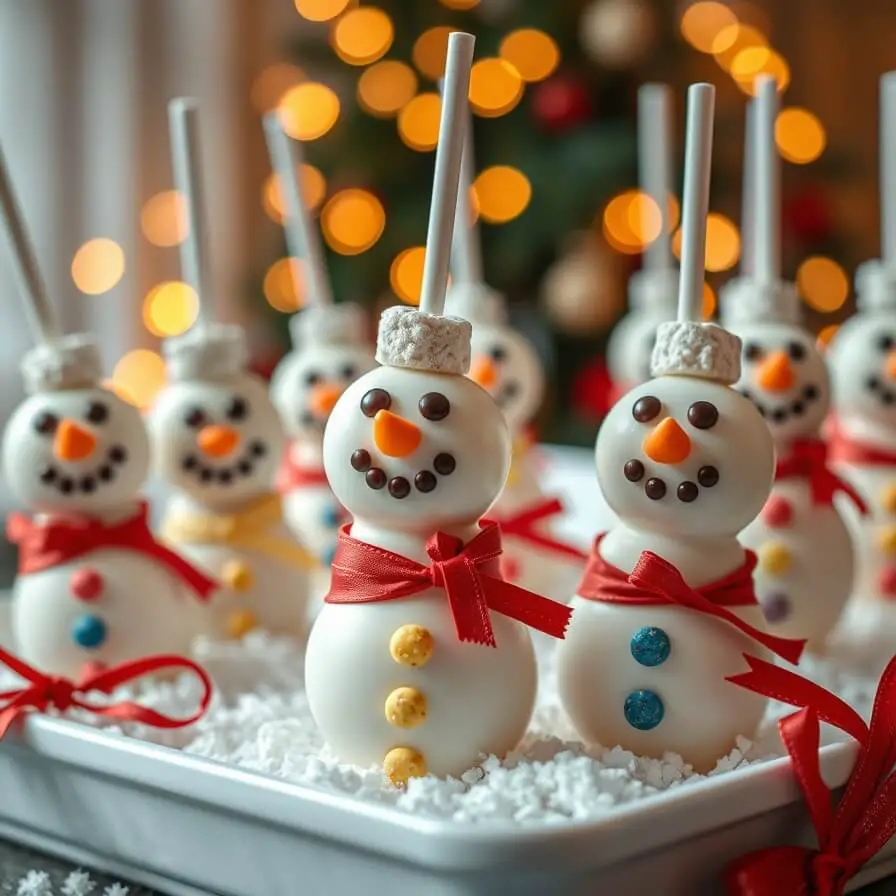
Now comes the creative part! Use mini chocolate chips for the eyes and buttons, a tiny orange sprinkle for the nose, and thin strips of candy for scarves. For hats, cut mini marshmallows in half and stick them on top. You can also use edible markers to draw little smiles or rosy cheeks.
Once decorated, let them dry completely before serving or wrapping.
Substitutions
The beauty of this recipe is how flexible it is. Here are some swaps and ideas to make it fit your preferences or what you already have at home:
- Cake flavor: Don’t feel stuck with vanilla—chocolate, red velvet, or even lemon cake works wonderfully.
- Frosting: If you don’t have buttercream, try whipped frosting or a spoonful of Nutella for a richer flavor. Cream cheese frosting gives a tangy contrast that balances sweetness.
- Coating: Candy melts are easiest to use, but if you prefer real chocolate, use white chocolate chips with a teaspoon of coconut oil for smoothness.
- Decorations: Get creative—pretzel sticks for arms, fondant hats, or mini M&Ms for buttons. Kids especially love customizing their snowmen with different candy “accessories.”
- Vegan option: Use a dairy-free cake, coconut oil instead of butter, and vegan white chocolate. You’ll get the same adorable (and delicious) results.
These swaps let you tailor the recipe to any dietary need, mood, or ingredient availability—because baking should feel joyful, not stressful.
Best Side Dish of Snowman Cake Pops
While these cake pops are a dessert on their own, pairing them with a few treats can make your winter gathering even more magical. Here are a few favorites that complement the sweet, creamy texture perfectly:
- Hot Chocolate with Whipped Cream: There’s nothing cozier than dunking a snowman cake pop into a mug of rich, velvety hot chocolate.
- Cinnamon Sugar Donut Holes: These add a lovely spiced aroma and balance the sweetness of the cake pops.
- Peppermint Bark or Cookies: The minty freshness pairs beautifully with the vanilla and chocolate notes of the snowmen.
Each of these sides enhances the festive, heartwarming feel of winter treats—ideal for a holiday dessert table or cozy family evening.
Serving and Presentation Tips
There’s something about a tray of Snowman Cake Pops that instantly sparks joy. The first time I served them at a holiday dinner, the adults were just as excited as the kids. Everyone reached for one, marveling at how adorable they looked lined up like a little army of snowmen.
Presentation matters as much as taste here—after all, these are showstopper treats. I like to serve them standing upright in a block of styrofoam wrapped in festive paper or placed in a decorative mug filled with sugar (it looks like snow!). If you’re hosting a party, arrange them at different heights on a tiered tray for a charming display.
For gifting, wrap each pop in clear cellophane and tie it with a red or silver ribbon. You can even add a little gift tag—something as simple as “Made with love” adds a personal touch. If you’re bringing them to a potluck, a snowy white platter sprinkled with coconut flakes makes a perfect wintery base.
A final little trick: dust the tops lightly with edible glitter or a tiny bit of powdered sugar for that frosty sparkle. They’ll look magical, almost too cute to eat—almost.
Tips and Tricks to Make This Recipe Even Better
When I first started making cake pops, I learned quickly that the tiniest tweaks can make a world of difference. Here are some tried-and-true tips to ensure your snowmen turn out perfect every time:
- Chill thoroughly before dipping: Cold cake balls are key. If they’re too soft, they’ll slide off the stick or crumble in the chocolate.
- Use a tall, narrow cup for dipping: It makes coating easier and helps achieve that smooth, even finish.
- Tap gently: After dipping, tap the stick on the side of your bowl lightly while rotating the pop. This helps excess chocolate drip off without breaking the ball.
- Work in batches: Keep half your pops in the fridge while decorating the others. Warm cake pops can loosen from their sticks.
- Add a hint of flavor: A few drops of peppermint or almond extract in your cake or coating can elevate the flavor beautifully.
And if you want picture-perfect results, melt your candy coating slowly and stir frequently. Patience truly pays off when it comes to glossy, flawless snowmen.
Common Mistakes to Avoid
I’ve had my fair share of cake pop mishaps (some even headless snowmen!). So here’s a little guide to keep you from running into the same pitfalls:
- Adding too much frosting: It’s tempting to keep adding frosting, but too much makes the mixture overly soft. Start small—you can always add more.
- Skipping the chill time: This step might feel skippable when you’re eager to decorate, but don’t! The coating won’t set properly if your cake balls aren’t cold.
- Overheating your chocolate: If your coating gets too hot, it can seize or crack when it cools. Melt it slowly and gently.
- Sticking to one design: Have fun experimenting! Some of my cutest snowmen have had lopsided smiles or uneven scarves. Imperfections make them more charming.
With a little patience and creativity, you’ll find that even “mistakes” often turn out delightfully unique.
How to Store It
Snowman Cake Pops store wonderfully, making them a great make-ahead treat. After the coating sets, store them in an airtight container at room temperature for up to 3 days or refrigerate for up to a week.
If you’re making them ahead for an event, place them in a single layer between sheets of parchment paper. To prevent condensation, bring refrigerated pops to room temperature before unwrapping.
For long-term storage, you can freeze them for up to a month. Wrap each pop in plastic wrap, then place them in a freezer-safe container. When you’re ready to serve, thaw in the refrigerator overnight—don’t microwave or the coating will melt.
FAQ
Q: Can I make Snowman Cake Pops without candy melts?
Yes! You can use white chocolate chips mixed with a little coconut oil for smooth dipping. It tastes richer and melts beautifully.
Q: How can I make these gluten-free?
Simply use a gluten-free cake mix and check that your frosting and candy melts are gluten-free certified. The rest of the ingredients are naturally gluten-free.
Q: Can I prepare these in advance for a party?
Absolutely. Make them 2–3 days ahead, store them in the refrigerator, and decorate the day before serving.
Q: Why are my cake pops cracking?
Cracks usually happen when cold cake balls meet hot melted chocolate. Let the pops sit out for 5–10 minutes after chilling before dipping.
Q: What’s the best way to transport cake pops?
Place them upright in a sturdy container or foam block. Keep them cool and avoid stacking to prevent smudging or breakage.

Snowman Cake Pops Recipe
- Total Time: 3 hours
- Yield: 24 1x
- Diet: Vegetarian
Description
These Snowman Cake Pops are the ultimate winter treat—adorable, festive, and irresistibly delicious. Soft, moist cake crumbs are mixed with creamy frosting, rolled into perfect spheres, and dipped in a smooth white chocolate coating before being transformed into cheerful snowmen. Perfect for Christmas parties, school events, or edible gifts, they’re as fun to make as they are to eat. Whether you use vanilla for a classic snowy look or red velvet for a holiday surprise, these cake pops are guaranteed to steal the spotlight on any dessert table.
Ingredients
- 1 baked 9×13-inch vanilla or red velvet cake
- ½ cup frosting (buttercream or cream cheese)
- 2 cups white candy melts or white chocolate chips
- Lollipop sticks
- Mini chocolate chips or edible pearls (eyes/buttons)
- Orange sprinkle or fondant (nose)
- Candy or fondant strips (scarves)
- Mini marshmallows (hats, optional)
Instructions
- Bake your cake and let it cool completely.
- Crumble it into fine crumbs and mix in frosting until it forms a dough-like texture.
- Roll into small balls (for heads and bodies) and shape into snowmen.
- Chill for at least 1 hour to firm.
- Melt candy melts or white chocolate, then dip each pop until fully coated.
- Decorate with candies or fondant to create faces, scarves, and hats.
- Let dry completely before serving or wrapping.
Notes
- For a richer flavor, use red velvet cake or add a few drops of peppermint extract to your coating. Always chill before dipping to prevent cracks.
- Prep Time: 1 hour
- Cook Time: 35 minutes
- Category: Dessert
- Method: Baking and Dipping
- Cuisine: American
Nutrition
- Serving Size: 24
- Calories: 180
- Sugar: 18g
- Sodium: 75mg
- Fat: 8g
- Saturated Fat: 4.5g
- Unsaturated Fat: 2.5g
- Trans Fat: 0g
- Carbohydrates: 24g
- Fiber: 0.5g
- Protein: 2g
- Cholesterol: 20mg