Every now and then, I stumble upon a dessert that feels almost too good to be true. Oreo truffles are one of those treasures. They’re rich, creamy, indulgent little bites of happiness that take very little effort yet taste like you spent hours in the kitchen.
I still remember the first time I made them—it was for a holiday gathering where I needed something quick but impressive. I didn’t want to bring another pie or cookie platter, so I decided to try these no-bake Oreo truffles. By the end of the night, every last truffle was gone, and I had multiple people asking for the recipe. That’s when I knew this was more than just a dessert—it’s the kind of treat that instantly wins people over.
Whether you’re making them for a party, a homemade gift, or just a sweet craving, Oreo truffles always deliver. They have that nostalgic flavor we all know and love from Oreos, paired with a silky cream cheese center and a smooth chocolate coating. It’s pure comfort wrapped in a bite-sized indulgence.
And the best part? You don’t need to be an experienced baker to pull them off.
Why I Love This Recipe
I have to admit, what I love most about Oreo truffles is how deceptively simple they are. You only need three core ingredients—Oreos, cream cheese, and chocolate. That’s it. Yet, when you present them on a plate, they look like something you’d find in a high-end bakery.
The texture contrast is what makes them so addictive. The crushed Oreos blend into the cream cheese to create a fudge-like filling that’s smooth and rich. Then the chocolate shell adds a little snap when you bite into it, balancing the creaminess inside.
Another reason I love them is how versatile they are. You can coat them in dark, milk, or white chocolate. You can drizzle them with colorful chocolate or top them with crushed Oreos, sprinkles, or even sea salt. They’re perfect for customizing to any holiday or occasion.
Oreo truffles also have a way of making people feel special. They’re bite-sized but so luxurious, and when I share them, people often think I’ve gone above and beyond. But the truth is, they’re one of the easiest desserts I know. That’s the real beauty of this recipe—it looks fancy without requiring hours of work.
Ingredients for Oreo Truffles
Here’s the best part: the ingredient list is short, simple, and budget-friendly. You don’t need a pantry full of supplies or anything complicated. Just a few basics will do the trick.
The essentials are:
- Oreos – The star of the show. You’ll need a full package of classic Oreos. Don’t use double-stuffed because the extra cream filling can make the mixture too soft. If you love experimenting, you can also try flavored Oreos like mint or peanut butter for a fun twist.
- Cream Cheese – Full-fat cream cheese works best here because it gives that rich, luscious texture. It should be softened so it blends easily with the crushed Oreos.
- Chocolate for Coating – You can use semi-sweet, milk, or white chocolate, depending on your preference. I usually go for semi-sweet because it balances the sweetness of the Oreo filling. White chocolate, however, makes them look extra elegant, especially with a dark drizzle on top.
Optional toppings can really take these truffles to the next level. Crushed Oreos sprinkled on top give extra crunch. Holiday sprinkles can make them festive, and a sprinkle of flaky sea salt adds a lovely gourmet touch.
What I like most is how these ingredients are available everywhere. You can pick them up at any grocery store, which makes Oreo truffles a stress-free recipe for last-minute gatherings.
How Much Time Will You Need
This is one of the quickest desserts you’ll ever make. The prep itself takes about 20 minutes—most of that is crushing Oreos, mixing, and shaping the truffles. After that, they need to chill in the refrigerator for about 30–40 minutes so they can firm up before dipping in chocolate.
Once dipped, I usually let them set in the fridge again for another 15–20 minutes. So in total, you’re looking at just over an hour, but only about 20 minutes of that is hands-on time.
That’s what makes them so perfect for busy days—you can whip them up quickly, and they’re ready before you know it.
How to Make Oreo Truffles

Here’s exactly how I make them step by step:
Step 1: Crush the Oreos
Place the Oreos into a food processor and pulse until they’re fine crumbs. If you don’t have a food processor, you can place them in a zip-top bag and crush them with a rolling pin. The finer the crumbs, the smoother your filling will be.
Step 2: Mix with Cream Cheese
In a mixing bowl, combine the Oreo crumbs with softened cream cheese. Use a spoon, spatula, or your hands to blend everything until it forms a thick, sticky dough-like mixture.
Step 3: Shape into Balls
Line a baking sheet with parchment paper. Scoop small portions of the mixture (about a tablespoon each) and roll them into smooth balls. Place them on the prepared sheet.
Step 4: Chill the Balls
Transfer the baking sheet to the refrigerator or freezer for about 30–40 minutes. This helps firm them up so they hold their shape when dipped in chocolate.
Step 5: Melt the Chocolate
While the truffles are chilling, melt your chosen chocolate. You can do this in the microwave in 30-second intervals, stirring between each, or use a double boiler for more control. The chocolate should be smooth and silky.
Step 6: Dip the Truffles
Using a fork or dipping tool, dip each chilled truffle into the melted chocolate, letting the excess drip off. Place them back on the parchment-lined baking sheet.
Step 7: Add Toppings
Before the chocolate sets, sprinkle on crushed Oreos, sprinkles, or whatever topping you prefer.
Step 8: Let Them Set
Pop the truffles back into the fridge for about 15–20 minutes, or until the chocolate coating is fully hardened.
And there you have it—homemade Oreo truffles that look like they came from a fancy chocolate shop.
Substitutions
The beauty of Oreo truffles is that you can easily swap ingredients to suit your taste or dietary needs.
If you want to make them slightly lighter, you can use reduced-fat cream cheese. For a dairy-free option, there are vegan cream cheese alternatives that work just as well.
You can also switch up the Oreos. Golden Oreos give a vanilla twist, mint Oreos add a refreshing flavor, and peanut butter Oreos create a salty-sweet combo.
For the chocolate coating, you can use almond bark or candy melts if you want a smoother, easier dipping process. White chocolate chips with a drop of food coloring also work beautifully if you want to match a holiday theme.
Best Side Dish of Oreo Truffles
Since Oreo truffles are rich and sweet, they pair beautifully with lighter or contrasting side treats. Here are three ideas:
- Fresh Berries – Strawberries, raspberries, or blueberries balance the richness with a burst of freshness.
- Coffee or Espresso – A hot cup of coffee cuts through the sweetness and makes for a perfect pairing.
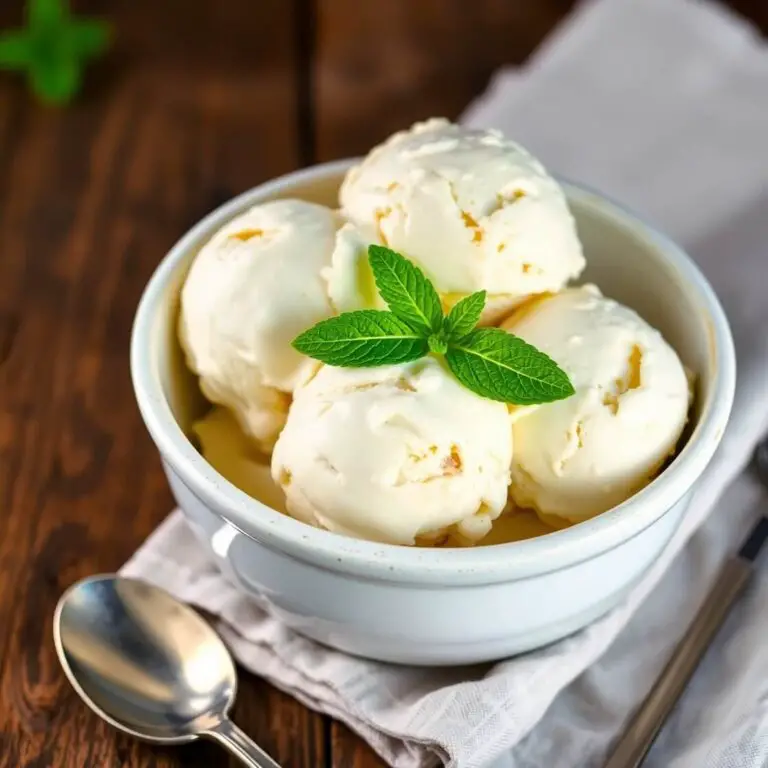
- Vanilla Ice Cream – Serve a few Oreo truffles alongside a scoop of creamy ice cream for a dreamy dessert combo.
Serving and Presentation Tips
What I love about Oreo truffles is how easily they transform into an elegant dessert with just a little presentation effort. Since they’re bite-sized, they naturally lend themselves to gatherings and special occasions.
One of my favorite ways to serve them is on a tiered dessert stand. It makes them look more like little jewels and instantly elevates the table. If I’m hosting a holiday party, I’ll use colored liners—red and green for Christmas, pastel for Easter, or gold foil for New Year’s Eve.
If you’re giving them as gifts, placing the truffles in mini cupcake liners inside a decorative box makes them feel just like gourmet chocolates. You can also drizzle melted chocolate in contrasting colors across the top for a bakery-style finish. A sprinkle of crushed Oreos, edible glitter, or sea salt can also make them look extra special without much effort.
When plated for dessert, I like to arrange them in neat rows on a simple white platter. The contrast between the chocolate truffles and a clean background makes them pop visually.
Tips and Tricks to Make This Recipe Better

The first time I made Oreo truffles, I learned a few things the hard way. Over time, I’ve picked up tricks that make the process smoother and the truffles even more delicious.
- Chill the mixture well before dipping. If the balls are too soft, they’ll fall apart in the melted chocolate. A good 30 minutes in the freezer makes all the difference.
- Use a fork for dipping. A fork or special dipping tool helps excess chocolate drip off, giving a cleaner finish.
- Thin out your chocolate if needed. If the chocolate feels too thick, add a teaspoon of coconut oil or vegetable shortening to make dipping easier.
- Work in small batches. Take a few truffles out of the fridge at a time so they stay firm while you’re dipping.
- Decorate before the chocolate sets. Add toppings right away so they stick properly.
These little adjustments will make your Oreo truffles look neater and taste even better.
Common Mistakes to Avoid
Even though Oreo truffles are simple, there are a few pitfalls that can affect the final result.
- Using double-stuffed Oreos. The extra cream makes the filling too soft and harder to roll. Stick to classic Oreos for best results.
- Skipping the chilling step. If you try dipping warm truffle balls, they’ll crumble and make the chocolate messy.
- Overheating the chocolate. Chocolate burns easily in the microwave. Heat in short intervals and stir often for smooth, glossy results.
- Making truffles too large. Bite-sized is the goal here. Too big, and they’ll be heavy and hard to coat.
- Not storing them properly. Leaving them out at room temperature for too long can cause the chocolate to sweat or soften.
Avoiding these mistakes ensures your Oreo truffles come out perfectly every time.
How to Store It
Oreo truffles are best stored in the refrigerator. Place them in an airtight container lined with parchment paper to prevent sticking. They’ll stay fresh for up to two weeks.
If you want to make them ahead for a party, you can also freeze them. Just place the dipped truffles in a single layer on a baking sheet, freeze until solid, and then transfer to a freezer-safe container. They can last up to three months this way. When you’re ready to enjoy them, let them thaw in the fridge overnight.
FAQ
Can I make Oreo truffles without cream cheese?
Yes, you can use mascarpone cheese or a dairy-free cream cheese substitute. Some people even use sweetened condensed milk for a different texture.
Do Oreo truffles need to be refrigerated?
Yes, because of the cream cheese, they should always be stored in the fridge when not being served.
Can I use different Oreo flavors?
Absolutely. Mint, peanut butter, golden, or even seasonal Oreos all work wonderfully for unique variations.
Can I coat them in something other than chocolate?
Yes, you can roll the truffles in cocoa powder, powdered sugar, or crushed nuts if you prefer a lighter finish.
How far in advance can I make Oreo truffles?
They’re perfect for making ahead. You can prepare them up to two weeks in advance and store them in the fridge or freeze them for longer.

Oreo Truffles
- Total Time: 1 hour (including chilling)
- Yield: 30 1x
- Diet: Vegetarian
Description
These Oreo truffles are rich, creamy, and decadent bite-sized treats that require no baking and only three main ingredients. Crushed Oreos combine with cream cheese to create a fudgy filling, then get dipped in smooth chocolate for a dessert that looks elegant yet couldn’t be easier to make. They’re perfect for holidays, parties, or gifting. With endless variations, from classic chocolate coatings to colorful sprinkles, Oreo truffles are the ultimate crowd-pleaser that always disappears fast.
Ingredients
- 36 classic Oreos (1 standard package)
- 8 oz cream cheese, softened
- 12 oz semi-sweet or white chocolate, for coating
- Optional: crushed Oreos, sprinkles, or sea salt for topping
Instructions
- Crush Oreos into fine crumbs using a food processor.
- Mix the crumbs with softened cream cheese until fully combined.
- Roll the mixture into small balls and place on a parchment-lined tray.
- Chill in the refrigerator or freezer for 30–40 minutes.
- Melt chocolate until smooth.
- Dip each truffle into chocolate, letting excess drip off, and place back on the tray.
- Add toppings before the chocolate sets.
- Chill again until firm, about 15–20 minutes.
Notes
- Use full-fat cream cheese for the best texture.
- Work with small batches to keep truffles firm while dipping.
- Add a teaspoon of coconut oil to thin chocolate if needed.
- Prep Time: 20 minutes
- Cook Time: 0 minutes
- Category: Dessert
- Method: No-Bake
- Cuisine: American
Nutrition
- Serving Size: 30
- Calories: 120
- Sugar: 9g
- Sodium: 75mg
- Fat: 7g
- Saturated Fat: 4g
- Unsaturated Fat: 2g
- Trans Fat: 0g
- Carbohydrates: 13g
- Fiber: 1g
- Protein: 2g
- Cholesterol: 10mg

