Cherry cheesecake no bake is one of those delightful desserts that feels like a slice of heaven without the fuss of turning on your oven. I created this recipe during a hot summer afternoon when the thought of heating up the kitchen was unbearable, yet my craving for something creamy and indulgent was undeniable. There’s something truly special about the combination of tangy cream cheese with the sweet, bright cherries that makes this no bake cheesecake irresistible. Whether you’re new to cheesecake or a seasoned dessert lover, this recipe offers a fresh, easy, and satisfying way to enjoy a classic treat without any baking stress. Keep reading, and I promise you’ll find yourself reaching for the ingredients before you know it!
Why I Love This Recipe

The magic of cherry cheesecake no bake lies in its simplicity and fresh flavors. Unlike traditional cheesecakes, which require baking and sometimes hours of cooling, this version is quick, convenient, and perfect for any season. The silky smooth cream cheese filling, combined with the crunch of the graham cracker crust and topped with luscious cherry compote, creates a balance of textures and flavors that’s hard to resist.
What really makes this recipe stand out for me is how approachable it is. You don’t need to be an expert baker to pull this off, and the ingredients are straightforward and easy to find. It’s perfect for last-minute guests or when you want a no-fuss dessert that still looks and tastes like you spent hours on it.
The cherry topping adds a burst of natural sweetness and a beautiful pop of color that makes this dessert as pretty as it is delicious. Plus, the no bake method means you avoid any risk of overbaking or cracking, something many people worry about with traditional cheesecakes.
Ingredients for Cherry Cheesecake No Bake
Before you get started, it’s important to gather fresh and quality ingredients, as they make a big difference in the final result.
For the crust, you’ll need:
- Graham cracker crumbs (for that perfect crunchy base)
- Melted butter (to bind the crust and add richness)
- A little sugar (to enhance sweetness)
For the filling, the stars of the show are:
- Cream cheese, softened to room temperature (for that creamy texture)
- Powdered sugar (to sweeten gently and avoid graininess)
- Heavy whipping cream or whipping cream (to whip to fluffy peaks and lighten the filling)
- Vanilla extract (for subtle flavor depth)
For the topping:
- Cherry pie filling or fresh cherries cooked down with a bit of sugar and lemon juice (to add that tart and sweet finishing touch)
Each ingredient plays a crucial role—cream cheese is the creamy base, the whipped cream lightens it, and the crust gives a satisfying crunch. The cherry topping provides a fresh, fruity contrast that makes every bite delightful.
How Much Time Will You Need
One of the best parts about this cherry cheesecake no bake is how quickly it comes together. The prep itself takes about 20 to 30 minutes, depending on how quickly you can whip the cream and mix everything. However, to achieve that perfect firm yet creamy texture, you’ll need to chill it in the refrigerator for at least 4 hours, preferably overnight.
So, in total, expect about 4 to 6 hours from start to finish. This might sound like a long wait, but the active work time is minimal, and the chilling time lets all the flavors meld beautifully.
How to Make This Cherry Cheesecake No Bake
Step – 1: Prepare the crust
Start by crushing your graham crackers into fine crumbs. You can do this quickly by placing them in a zip-top bag and rolling over them with a rolling pin or pulsing them in a food processor.
Next, mix the crumbs with melted butter and a small amount of sugar. Stir until the mixture resembles wet sand and holds together when pressed.
Press this mixture evenly into the base of a springform pan or any 9-inch round pan with a removable bottom. Use the back of a spoon or the bottom of a glass to compact it tightly. Place the crust in the fridge while you prepare the filling so it firms up.
Step – 2: Make the cream cheese filling
In a large mixing bowl, beat the softened cream cheese until smooth and free of lumps. Add the powdered sugar gradually, beating well after each addition.
In a separate bowl, whip the heavy cream with vanilla extract until stiff peaks form. This whipped cream is what makes the filling light and fluffy.
Gently fold the whipped cream into the cream cheese mixture. Take your time folding so you don’t lose the airiness.
Step – 3: Assemble the cheesecake
Pour the creamy filling over the chilled crust and smooth the top with a spatula. Make sure it’s even to get a neat slice later.
Refrigerate the cheesecake for at least 4 hours or overnight so it sets well.
Step – 4: Add the cherry topping
Once the cheesecake is firm, spoon the cherry pie filling or homemade cherry compote evenly over the top. Spread it gently to cover the surface but be careful not to mix it into the filling.
Step – 5: Serve and enjoy
Before serving, let the cheesecake sit at room temperature for about 10 minutes to make slicing easier. Use a sharp knife dipped in hot water and wiped dry for clean cuts.
Serve chilled and enjoy that creamy, fruity, no-bake delight.
Substitutions
If you want to customize or tweak the recipe, there are some excellent substitutions to consider that keep the integrity and deliciousness intact.
Instead of graham cracker crumbs, crushed digestive biscuits or vanilla wafers can be used for the crust. They add a slightly different flavor but maintain the crunch.
For a lighter option, you can substitute the heavy whipping cream with full-fat coconut cream. It adds a subtle tropical note and keeps the filling dairy-free.
If you prefer a different fruit topping, fresh strawberries or blueberries cooked down with sugar make a lovely alternative to cherries.
For a less sweet version, reduce the powdered sugar in the filling or try using a sugar substitute suitable for baking.
These substitutions allow you to tailor the recipe to your preferences or dietary needs without sacrificing taste or texture.
Best Side Dish of Cherry Cheesecake No Bake
To elevate your cherry cheesecake experience, consider pairing it with these side dishes:
- Fresh mixed berry salad: The fresh acidity and juiciness of berries complement the creamy cheesecake beautifully.
- A cup of hot espresso or black coffee: The bitterness balances the sweetness and refreshes the palate.
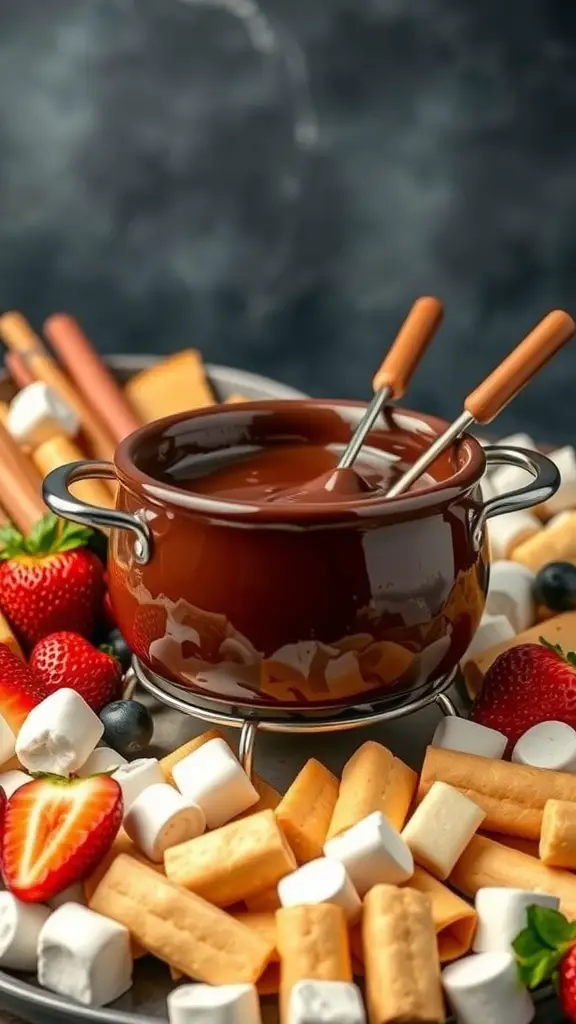
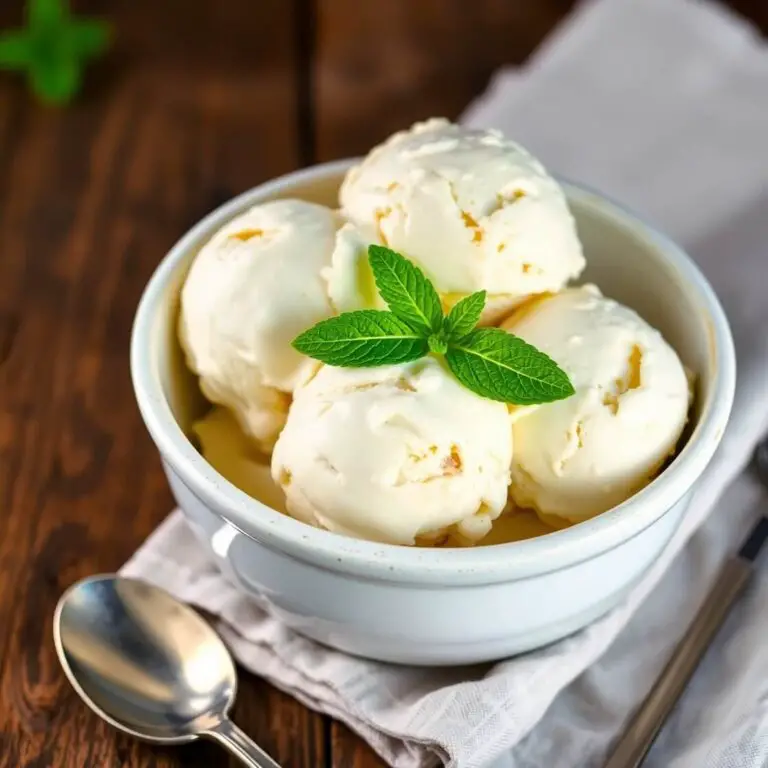
- Light lemon sorbet: A small scoop adds a citrusy brightness and contrasts the richness of the dessert.
These sides make the eating experience well-rounded and even more enjoyable.
Serving and Presentation Tips
Serving cherry cheesecake no bake is as much about the look as it is about the taste. Presentation can turn a simple dessert into a showstopper that impresses your guests or makes your family feel extra special.
For a polished look, serve the cheesecake chilled and slice it with a sharp, clean knife. To get smooth slices, dip the knife in hot water and wipe it dry between cuts. This little trick prevents the filling from sticking and ensures each slice looks perfect.
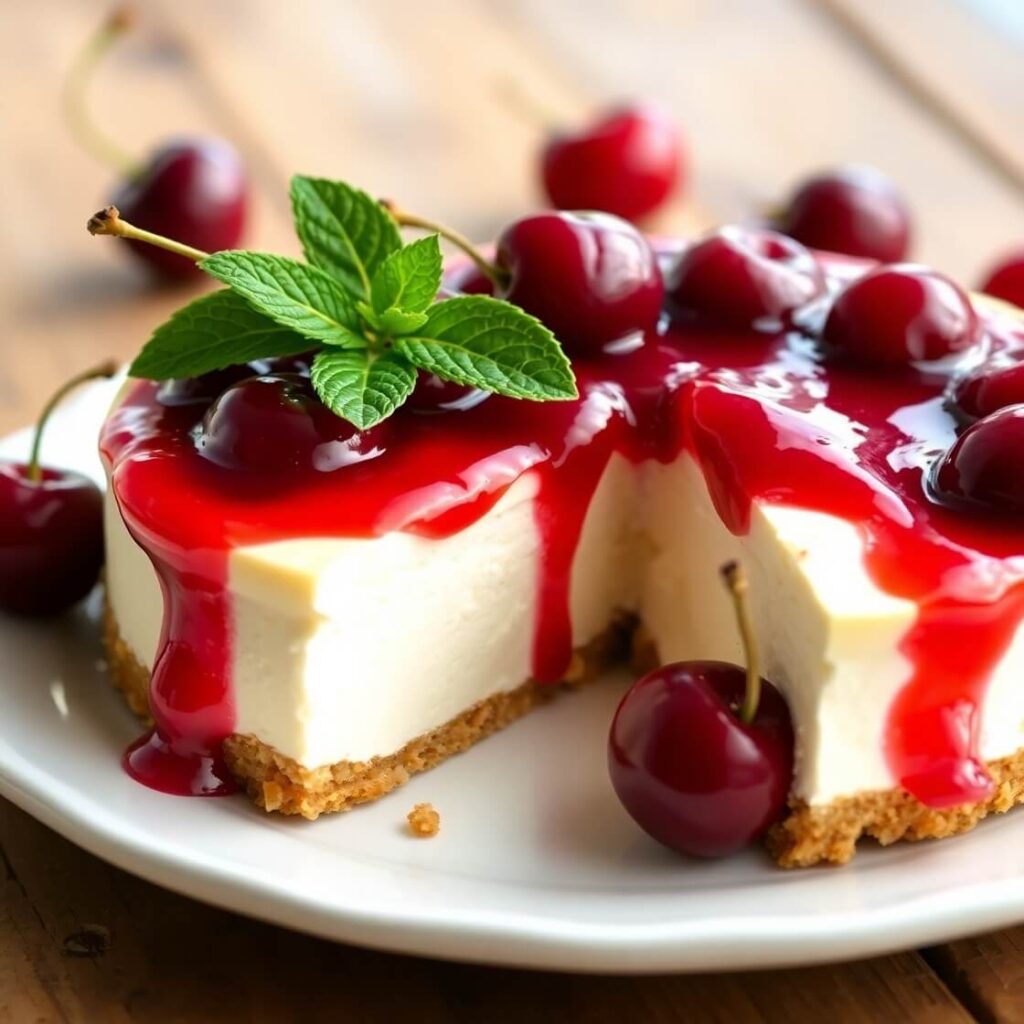
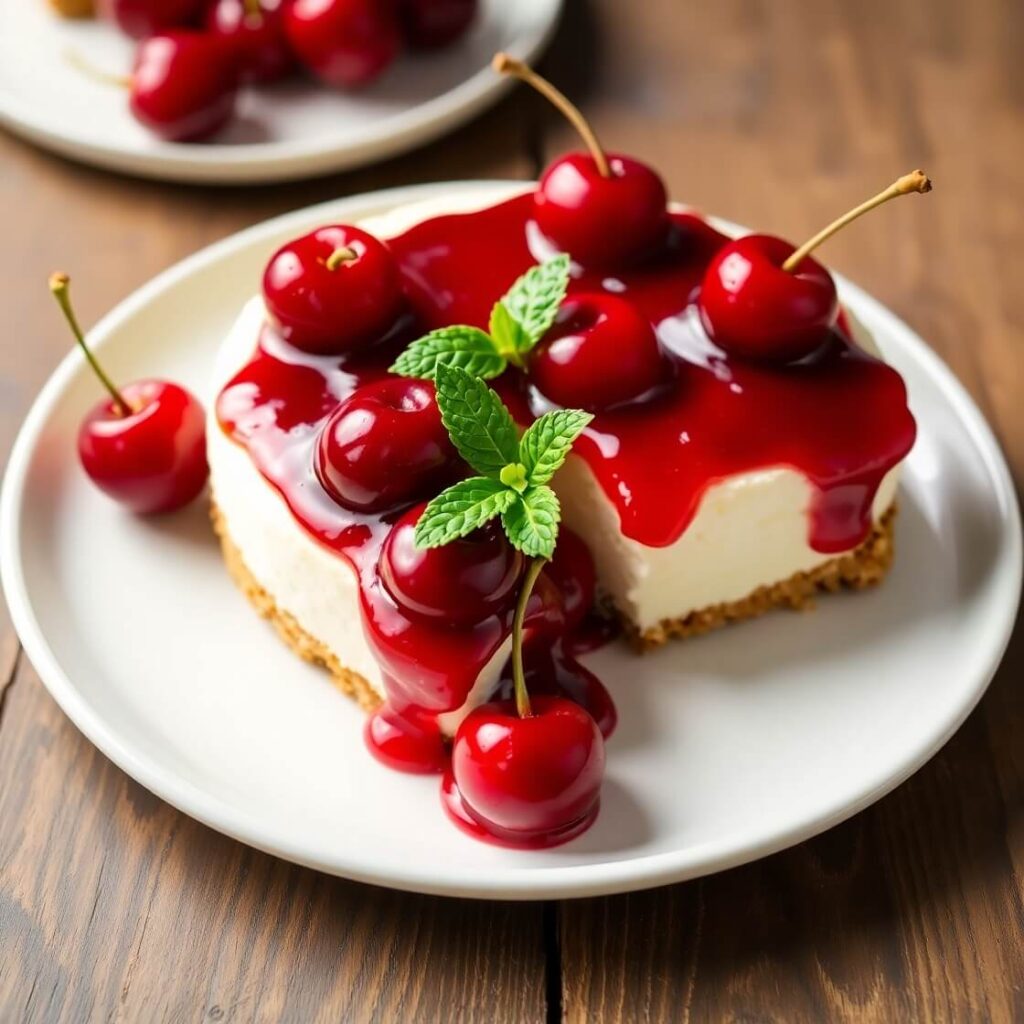
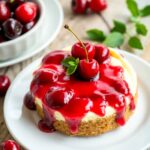
You can garnish each slice with a few fresh cherries or a sprig of mint to add color and freshness. For an extra touch, dust the plate lightly with powdered sugar or drizzle a bit of chocolate sauce or cherry syrup around the slice. Serving the cheesecake on a white or neutral-colored plate helps the vibrant cherry topping stand out.
If you’re hosting, consider plating individual slices with a small dollop of whipped cream on the side or even a scoop of vanilla ice cream. It adds a creamy contrast and makes each portion feel like a special treat.
Tips and Tricks to Make This Recipe Even Better
Making a no bake cheesecake can be wonderfully simple, but a few small tips can elevate your results every time.
First, make sure your cream cheese is fully softened before mixing. Cold cream cheese causes lumps and makes the filling less smooth.
When whipping the cream, aim for stiff peaks but avoid overwhipping, which can turn the cream grainy or even start to separate.
Folding the whipped cream gently into the cream cheese mixture is key to keeping that light and airy texture. Use a spatula and fold with care rather than stirring vigorously.
For the crust, pressing it firmly and evenly into the pan helps it hold together and supports the filling well.
Chilling time is crucial — don’t rush it. Let the cheesecake set at least 4 hours or overnight if possible. This allows the filling to firm up nicely and the flavors to meld.
If you like a slightly tangier cheesecake, add a teaspoon of lemon juice or zest to the filling for a subtle citrus kick.
Finally, when adding the cherry topping, spread it gently on top to keep the layers distinct.
Common Mistakes to Avoid
Even a simple recipe can go sideways if you’re not careful. Here are common pitfalls to watch out for:
Adding cold cream cheese to the mix. Always soften it completely to avoid lumps and a grainy texture.
Overmixing the cream cheese mixture. Mix until smooth, but don’t overbeat or you’ll introduce too much air and the texture may suffer.
Whipping cream incorrectly — underwhipping results in a runny filling, while overwhipping can make it grainy or curdled.
Not chilling the cheesecake long enough. Skipping or shortening the refrigeration time leads to a runny cheesecake that doesn’t hold shape.
Pressing the crust too lightly, which can cause it to crumble when serving.
Rushing the slicing process without warming the knife, resulting in messy edges and crumbling.
Ignoring ingredient temperatures — ingredients at inconsistent temperatures won’t blend well and affect the smoothness.
How to Store It
Cherry cheesecake no bake keeps well in the refrigerator. Once assembled and topped, cover it tightly with plastic wrap or place it in an airtight container to prevent it from absorbing other odors.
It’s best consumed within 3 to 4 days for optimal freshness and flavor.
If you want to store it longer, you can freeze it. Wrap the whole cheesecake or individual slices tightly in plastic wrap and then foil. Thaw it overnight in the fridge before serving. Keep in mind that freezing might slightly affect the texture of the whipped cream, making it a bit less fluffy.
Always avoid leaving the cheesecake out at room temperature for extended periods to keep it safe and delicious.
FAQ
Can I use low-fat cream cheese or cream?
Yes, but be aware the texture might be less creamy and more dense. Full-fat versions give the best rich and smooth results.
Do I have to use cherry pie filling?
No, fresh cherries cooked with sugar and lemon juice make an excellent homemade topping. You can also use other fruit toppings like strawberry or blueberry.
Can I make this dessert vegan or dairy-free?
With substitutions like vegan cream cheese and coconut cream, you can make a dairy-free version, but the texture and flavor will differ slightly.
How do I avoid cracks on my cheesecake?
No bake cheesecakes usually don’t crack, but if your filling is too thin or the crust isn’t firm, the cheesecake may not hold its shape. Proper chilling helps prevent this.
Can I double this recipe?
Absolutely! Just double all ingredients and use a larger pan or two smaller pans. Make sure to adjust chilling time if needed.
Cherry Cheesecake No Bake
- Total Time: Approximately 4 hours 20 minutes
- Yield: 8 1x
- Diet: Vegetarian
Description
A luscious, creamy cherry cheesecake that comes together quickly without any baking. Perfect for warm days or when you want an impressive dessert without the hassle. This no bake version combines a crunchy graham cracker crust, fluffy cream cheese filling, and a sweet cherry topping to create a delightful balance of flavors and textures. Whether for family gatherings or casual treat, it’s easy, elegant, and always a crowd-pleaser.
Ingredients
- 1 ½ cups graham cracker crumbs
- 5 tbsp unsalted butter, melted
- 2 tbsp granulated sugar
- 16 oz (450g) cream cheese, softened
- 1 cup powdered sugar
- 1 tsp vanilla extract
- 1 ½ cups heavy whipping cream
- 1 cup cherry pie filling (or homemade cherry compote)
Instructions
- Mix graham cracker crumbs, melted butter, and sugar until combined. Press into a 9-inch pan and chill.
- Beat softened cream cheese until smooth, add powdered sugar gradually, and mix well.
- Whip heavy cream with vanilla extract to stiff peaks.
- Fold whipped cream gently into cream cheese mixture.
- Spread filling evenly over chilled crust and refrigerate for at least 4 hours.
- Top with cherry pie filling just before serving.
- Slice with a warm, clean knife and enjoy.
Notes
- Ensure cream cheese is fully softened to avoid lumps.
- Fold whipped cream gently to maintain lightness.
- Chill adequately for the best texture.
- For extra flavor, add lemon zest to the filling.
- Use a hot knife for clean slicing.
- Prep Time: 20 minutes
- Cook Time: 4+ hours (preferably overnight)
- Category: Dessert
- Method: No Bake
- Cuisine: American
Nutrition
- Serving Size: 8
- Calories: 380
- Sugar: 28g
- Sodium: 190mg
- Fat: 27g
- Saturated Fat: 16g
- Unsaturated Fat: 8g
- Trans Fat: 0g
- Carbohydrates: 25g
- Fiber: 1g
- Protein: 5g
- Cholesterol: 85mg