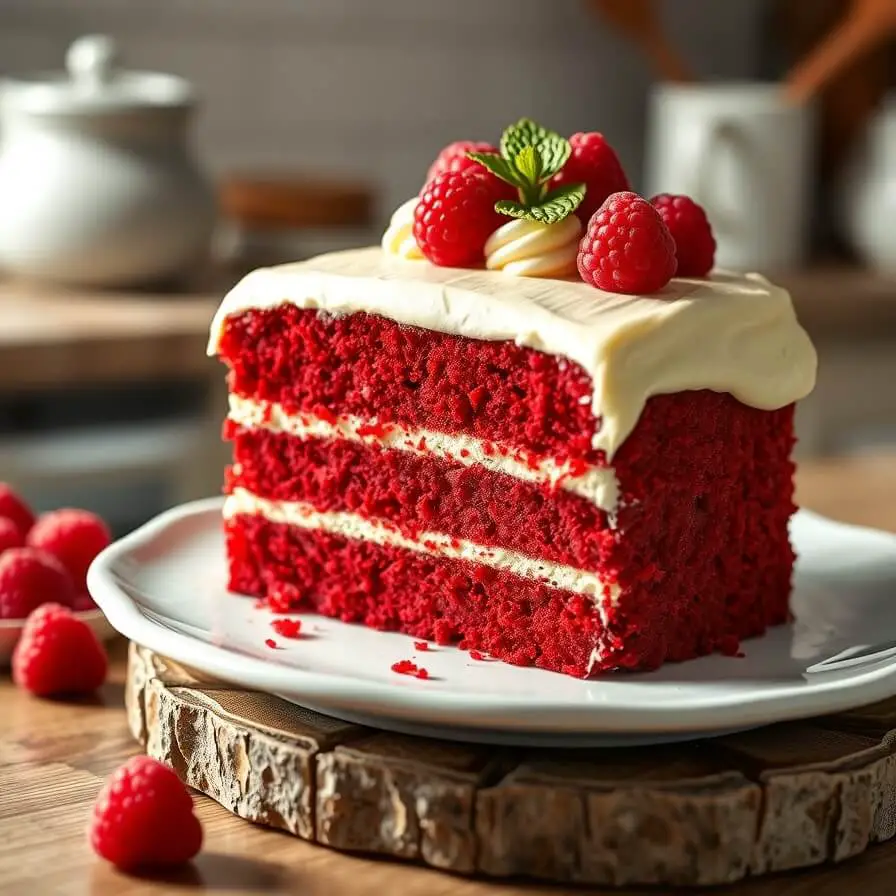
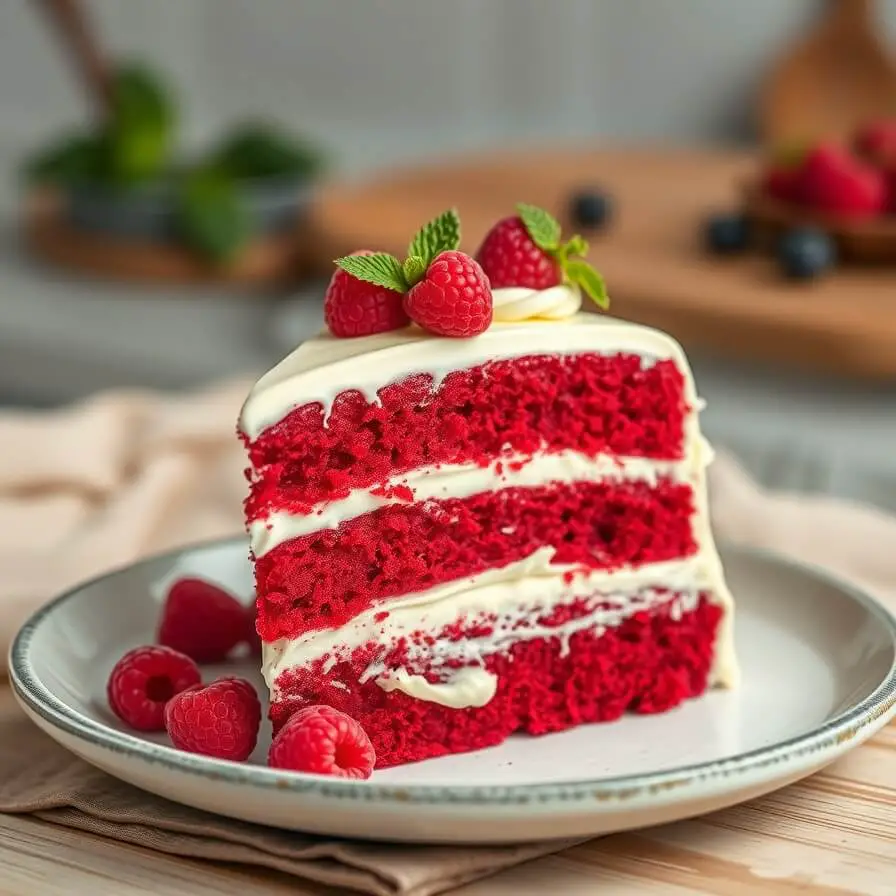
There’s something about red velvet cake that just feels like a celebration on a plate. I remember the first time I baked it myself—it was for my niece’s birthday. I was nervous because, let’s be honest, red velvet has a reputation. People expect it to be perfect: tender, moist, and luxuriously red. But as soon as I pulled that cake out of the oven and let that cream cheese frosting touch it for the first time, I knew I had a winner. The kitchen smelled of cocoa and sweetness, and the vibrant red layers peeked out from under that smooth frosting like a little slice of joy.
Baking red velvet cake isn’t just about mixing ingredients—it’s about creating moments. The way the batter folds together, the hint of cocoa balancing the sweetness, the cream cheese frosting that melts into the crumb—it’s an experience. Every bite reminds me of family gatherings, laughter, and the little indulgences that make life sweeter. If you’ve been hesitant to try red velvet at home, I promise this recipe will make it approachable, even if you’re a beginner.
Why I Love This Recipe

This isn’t just any red velvet cake. What makes this recipe special is its balance of flavors and textures. The cake is soft and tender, yet it holds together beautifully, making it perfect for layering or serving as a simple single-layer treat. Many red velvet recipes can end up dry or overly sweet, but this one has just the right amount of cocoa to give it a subtle chocolate undertone without overpowering the signature tang from the buttermilk.
Another reason I love it is the cream cheese frosting. It’s rich, silky, and slightly tangy, cutting through the sweetness of the cake and creating that perfect harmony that everyone raves about. When I make this cake, I’m not just baking; I’m creating a dessert that feels luxurious but is actually quite easy to prepare. The best part? It brings people together. I’ve watched family members, friends, and even casual guests light up with each bite, and honestly, that’s why I keep coming back to this recipe.
Ingredients for Red Velvet Cake
When I first started baking red velvet, I was surprised at how simple the ingredient list really is. You don’t need anything exotic—just high-quality basics and a few special touches to get that signature flavor.
You’ll need all-purpose flour for structure, unsweetened cocoa powder for that subtle chocolate depth, and baking soda and salt to help the cake rise perfectly. Sugar is essential, of course, but I like to use a combination of granulated sugar and a little bit of brown sugar to add extra moisture.
Then comes the magic: buttermilk. It’s what makes the cake so tender and gives that slight tang that pairs beautifully with the cream cheese frosting. Vegetable oil keeps the cake moist, and I always use large eggs for richness. Vanilla extract is a must—don’t skip it, it really rounds out the flavor. And finally, the star of the show: red food coloring. I prefer gel coloring because it gives a vibrant hue without altering the consistency of the batter.
For the frosting, you’ll need cream cheese and unsalted butter, both softened for easy mixing, powdered sugar for sweetness, and a touch of vanilla extract. These ingredients are simple, but combined, they create that dreamy, spreadable frosting everyone loves.
How Much Time Will You Need?
This red velvet cake is surprisingly quick to pull together. From start to finish, you’re looking at about two hours, including baking and frosting. Preparing the batter takes roughly 20–25 minutes, baking each layer is about 25–30 minutes, and while the cake cools, you can whip up the frosting in about 10 minutes. If you’re layering or decorating the cake, allow an additional 20–30 minutes.
The beauty of this recipe is that you don’t have to spend all day in the kitchen. It’s perfect for when you want something impressive but don’t have hours to commit. The reward is a stunning, moist, and flavorful cake that looks like it came from a bakery.
How to Make This Red Velvet Cake
Step – 1: Preheat your oven to 350°F (175°C) and prepare two 9-inch round cake pans. Grease them well and line the bottoms with parchment paper to ensure your cakes come out perfectly.
Step – 2: In a medium bowl, sift together 2½ cups of all-purpose flour, 1½ tablespoons of unsweetened cocoa powder, 1 teaspoon baking soda, and ½ teaspoon salt. Set aside. This ensures your cake layers are light and airy without lumps.
Step – 3: In a large mixing bowl, combine 1½ cups granulated sugar, 1 cup vegetable oil, 2 large eggs, and 1 teaspoon vanilla extract. Beat until smooth and slightly fluffy.
Step – 4: Mix in 1 cup of buttermilk gradually, alternating with the dry ingredients. This step is crucial—overmixing can make the cake dense, so fold gently until just combined.
Step – 5: Add 2 tablespoons red gel food coloring and 1 teaspoon white vinegar. The vinegar reacts with the baking soda to give your cake its signature tenderness and subtle rise. Mix until the color is uniform.
Step – 6: Divide the batter evenly between the prepared pans and smooth the tops with a spatula. Bake for 25–30 minutes or until a toothpick inserted in the center comes out clean.
Step – 7: Allow the cakes to cool in the pans for 10 minutes, then transfer them to a wire rack to cool completely before frosting.
Step – 8: For the frosting, beat together 8 ounces of softened cream cheese and ½ cup unsalted butter until smooth. Gradually add 4 cups powdered sugar and 1 teaspoon vanilla extract, beating until creamy and spreadable.
Step – 9: Frost the cooled cake layers generously. If stacking, spread frosting evenly between layers and on the top and sides.
Substitutions
One of my favorite things about this recipe is how adaptable it is. You can swap out buttermilk for plain yogurt or milk with a teaspoon of lemon juice if you’re in a pinch. For the oil, light olive oil or melted coconut oil works beautifully.
If you prefer a slightly healthier option, you can replace some sugar with coconut sugar or a sugar substitute designed for baking. For the frosting, Greek yogurt mixed with cream cheese creates a lighter version that’s still creamy and delicious. Experimenting with substitutes allows you to adjust the cake to your taste without sacrificing that classic red velvet experience.
Best Side Dishes for Red Velvet Cake
Red velvet cake pairs beautifully with light and complementary flavors. Here are three side dishes that enhance the experience:
- Fresh berries, such as raspberries or strawberries, for a tart contrast.
- Whipped cream, lightly sweetened, to add extra fluffiness.
- Vanilla ice cream, which balances the richness of the cream cheese frosting.
Serving and Presentation Tips
Serving red velvet cake is almost as fun as baking it. One thing I always do is let the cake sit at room temperature for at least 15–20 minutes before slicing. This ensures the frosting softens slightly, making it easier to cut clean layers without tearing.
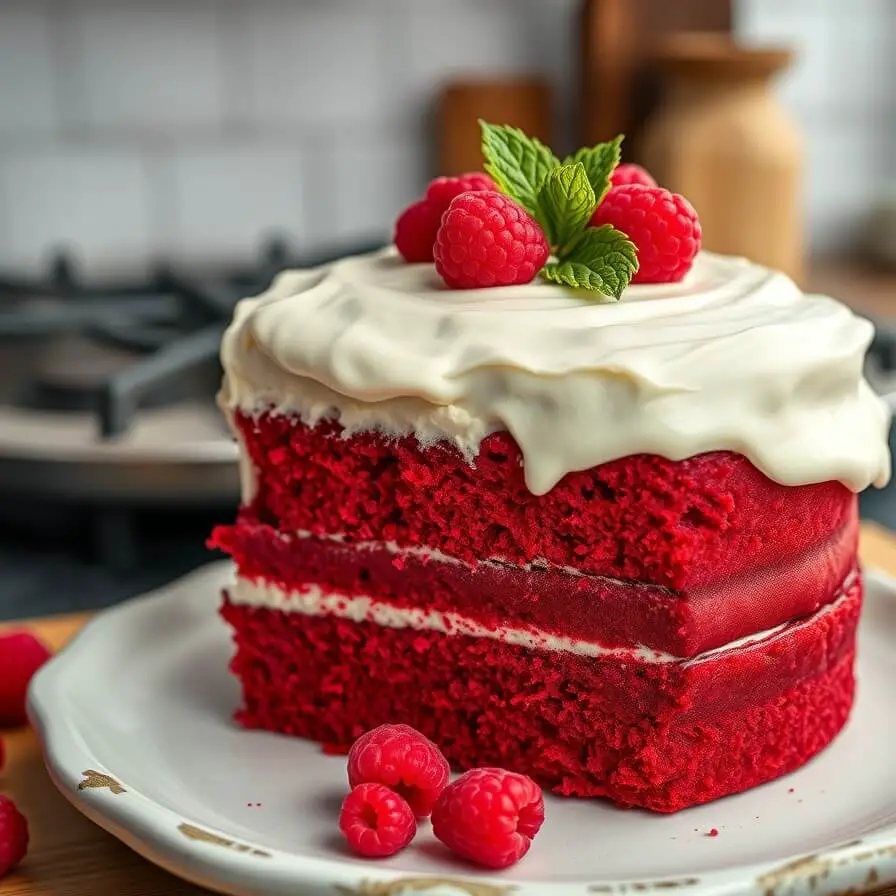
For presentation, I love a rustic yet elegant approach. If it’s a layered cake, a simple swirl of frosting on top, paired with a few fresh berries or a light dusting of cocoa powder, makes it look bakery-worthy. You can also pipe rosettes or simple dots along the edges to add a professional touch. For a more casual gathering, cut the cake into squares or rectangles and serve on a platter with a dollop of whipped cream or a scoop of ice cream on the side. Even small touches like a sprig of mint or a few edible flowers elevate the experience.
One trick I’ve learned over the years is to serve it on a contrasting plate—white or pastel colors make the vibrant red pop beautifully, and it instantly catches everyone’s eye.
Tips and Tricks to Make This Recipe Even Better
Red velvet cake may look intimidating, but a few simple tricks can make it flawless every time. First, always measure your flour carefully. Too much flour can make the cake dry, so spoon it into the cup and level it off with a knife.
Next, don’t overmix your batter once you add the dry ingredients. Fold gently until combined. Overmixing develops gluten, which can lead to a denser texture than you want.
Using high-quality cocoa powder and fresh buttermilk also makes a big difference. I’ve tried it with lower-quality cocoa, and the flavor just doesn’t have that subtle chocolate depth.
For frosting, make sure both the butter and cream cheese are at room temperature. Cold ingredients can cause the frosting to be lumpy or difficult to spread. If you want a lighter frosting, whip it a little longer to incorporate more air—it makes spreading easier and gives the frosting a creamier texture.
Finally, don’t skip chilling the cake for a short while after frosting if you’re stacking layers. A brief chill firms the frosting, making it easier to decorate or slice cleanly.
Common Mistakes to Avoid
Even experienced bakers make mistakes with red velvet, so here are some things I always watch out for.
One common error is overbaking. Red velvet is naturally moist, so pulling it out too late can dry it out. Check with a toothpick at the center—if it comes out with a few crumbs but no wet batter, it’s perfect.
Another mistake is using too much food coloring. It can alter the flavor slightly and make the cake appear artificially red. I prefer a deep, natural red achieved with gel coloring.
Skipping the vinegar or using regular milk instead of buttermilk can affect the cake’s tenderness and rise. These small ingredients work together to create that signature crumb.
Also, frosting too early on a warm cake can cause it to melt and slide off. Always let the cake cool completely before frosting. Lastly, don’t be tempted to overmix the frosting—it should remain creamy, not airy or grainy.
How to Store It
Red velvet cake stores beautifully if done right. For short-term storage, keep it at room temperature in an airtight container for up to two days. This keeps the cake moist and the frosting soft.
If you want to keep it longer, cover the cake tightly with plastic wrap and refrigerate for up to five days. Just allow the cake to come to room temperature before serving—it helps restore the soft texture.
For freezing, wrap individual slices or whole layers in plastic wrap, then place them in a freezer-safe container. Frozen cake lasts up to three months. Thaw overnight in the fridge and bring to room temperature before serving. This is perfect if you want to bake ahead for a celebration.
FAQ
Can I make this cake gluten-free?
Yes! Substitute the all-purpose flour with a gluten-free flour blend designed for baking. Make sure it includes xanthan gum for structure.
Can I use a different frosting?
Absolutely. While cream cheese frosting is classic, a simple whipped cream frosting or buttercream works beautifully as well.
Can I bake this as cupcakes?
Yes! Adjust baking time to 18–22 minutes depending on your oven. Use a toothpick to check doneness.
Can I use cocoa powder instead of chocolate?
Yes, unsweetened cocoa powder is ideal for red velvet. It gives the subtle chocolate flavor without making the cake dense.
Why is my cake not red enough?
Use gel food coloring instead of liquid for vibrant color. Overmixing can also lighten the color, so fold gently.

Red Velvet Cake Recipe
- Total Time: 55 minutes
- Yield: 8–10 1x
- Diet: Vegetarian
Description
A classic red velvet cake with tender layers, subtle cocoa flavor, and silky cream cheese frosting. Perfect for birthdays, celebrations, or just a special treat at home, this cake combines a beautiful red hue with a delicate, moist crumb that melts in your mouth. Every bite offers the perfect balance of sweetness and tang, making it an unforgettable dessert.
Ingredients
- 2½ cups all-purpose flour
- 1½ tablespoons unsweetened cocoa powder
- 1 teaspoon baking soda
- ½ teaspoon salt
- 1½ cups granulated sugar
- 1 cup vegetable oil
- 2 large eggs
- 1 teaspoon vanilla extract
- 1 cup buttermilk
- 2 tablespoons red gel food coloring
- 1 teaspoon white vinegar
2. For Frosting
- 8 ounces cream cheese, softened
- ½ cup unsalted butter, softened
- 4 cups powdered sugar
- 1 teaspoon vanilla extract
Instructions
- Preheat oven to 350°F (175°C). Grease and line two 9-inch round cake pans.
- In a bowl, sift together flour, cocoa powder, baking soda, and salt. Set aside.
- Beat sugar, oil, eggs, and vanilla until smooth. Gradually fold in dry ingredients alternating with buttermilk.
- Add red food coloring and vinegar, mixing gently.
- Divide batter evenly and bake 25–30 minutes or until a toothpick comes out clean. Cool completely.
- For frosting, beat cream cheese and butter until smooth. Gradually add powdered sugar and vanilla.
- Frost cooled cake layers, stacking as desired. Decorate with fresh berries or swirls of frosting.
Notes
- Ensure all ingredients are at room temperature for best results.
- Fold dry ingredients gently to keep the cake light.
- Chill frosting slightly if stacking layers to prevent sliding.
- Prep Time: 25 minutes
- Cook Time: 30 minutes
- Category: Dessert
- Method: Baking
- Cuisine: American
Nutrition
- Serving Size: 8–10
- Calories: 450
- Sugar: 35g
- Sodium: 220mg
- Fat: 25g
- Saturated Fat: 10g
- Unsaturated Fat: 12g
- Trans Fat: 0g
- Carbohydrates: 50g
- Fiber: 1g
- Protein: 4g
- Cholesterol: 55mg