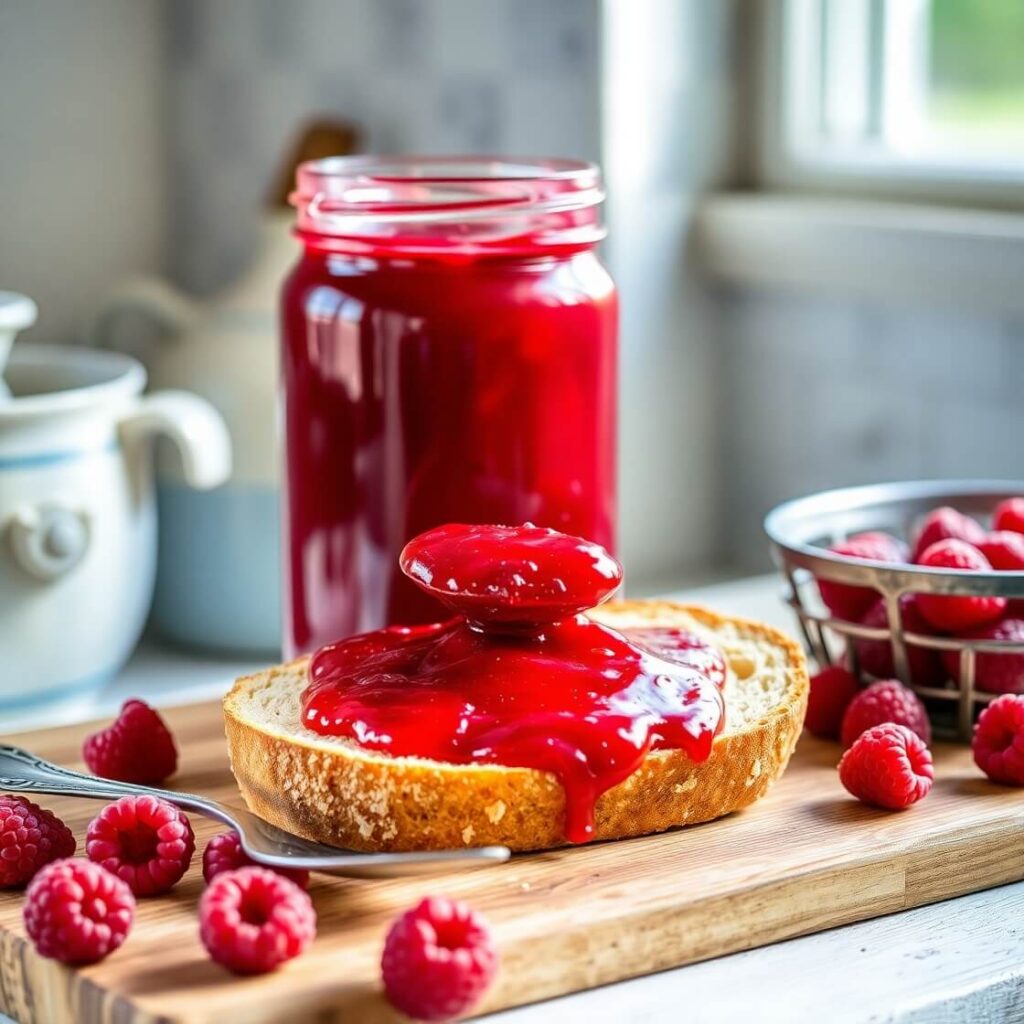
There’s something undeniably nostalgic about homemade raspberry jam. For me, the recipe was born on a summer morning when I found myself with a basket overflowing with ripe, ruby-red raspberries from the local farmers’ market. Their sweet-tart fragrance filled my kitchen, and I knew I couldn’t let them go to waste. That’s when I decided to bring back a little tradition and make jam just like my grandmother used to—simple, rustic, and bursting with real berry flavor.
If you’ve ever tasted homemade jam, you’ll know it’s nothing like what you find on store shelves. This raspberry jam recipe is pure and honest, made with just a few ingredients and a whole lot of love. Whether you’re spooning it over toast, swirling it into yogurt, or layering it into a cake, it brings a touch of summer sunshine to every bite.
Why I Love This Recipe

What truly makes this raspberry jam special is how it manages to capture the essence of raspberries in their peak form—ripe, juicy, and slightly tart. Unlike overly sweet commercial jams, this recipe allows the berries to shine through with a balanced, bright flavor.
One of the main reasons I return to this recipe over and over again is its simplicity. With just three main ingredients—raspberries, sugar, and lemon juice—you get an incredibly vibrant jam that feels homemade in the best way. There’s no added pectin, which means you’re relying on the natural pectin in the fruit and the right balance of heat and time. It’s a rewarding process, and it makes you feel connected to your food in a hands-on way.
This recipe is also incredibly versatile. You can use fresh berries at their peak or even frozen raspberries when they’re out of season. It doesn’t require a lot of fancy equipment—just a saucepan, a spoon, and a little patience. Plus, it’s a beautiful gift idea that people actually love receiving. Homemade raspberry jam in a glass jar with a handwritten label? That’s heartwarming and delicious.
Ingredients for Raspberry Jam
Before we dive in, let’s talk about what you need—and why it matters. This recipe doesn’t hide behind a long list of complicated ingredients. It’s all about getting the right balance of fruit, sweetness, and acidity to create something magical.
Here’s what you’ll need to make a classic, naturally thickened raspberry jam that spreads like a dream and bursts with fresh berry flavor:
- Raspberries – Fresh or frozen. Choose plump, ripe raspberries with a deep red color. They’re the star of the show, so quality matters. Frozen berries work beautifully too, especially when fresh ones are out of season. Just don’t thaw them before cooking.
- Granulated sugar – This not only sweetens the jam but also helps in thickening and preserving it. It draws out the juices from the berries and creates that lovely syrupy texture. Don’t reduce the sugar too much or your jam may not set properly.
- Fresh lemon juice – A touch of acidity helps balance the sweetness and brings out the brightness of the raspberries. It also plays a key role in activating the natural pectin found in the fruit for a better set.
Optional (but helpful): A tiny pat of unsalted butter can be added to reduce foaming during cooking. It won’t change the flavor but will give you a cleaner, clearer finish.
How Much Time Will You Need
This raspberry jam recipe is relatively quick, especially for something that feels so artisanal. Here’s a breakdown of the time you’ll need from start to finish:
- Prep time: 10 minutes (washing and measuring ingredients)
- Cook time: 20–25 minutes
- Cooling & jar time: 30–40 minutes
So you’re looking at just a little over an hour from fresh raspberries to sealed jars of jewel-toned jam. For something this delicious, that’s time well spent.
How to Make This Raspberry Jam
Here’s your step-by-step guide to making small-batch raspberry jam at home. Follow along and you’ll have perfectly set jam without using pectin or fancy equipment.
Step – 1: Prepare the berries
If you’re using fresh raspberries, rinse them gently under cool water and let them drain well. Pat them dry with a clean towel to remove any excess moisture. If using frozen berries, measure them straight from the freezer—no need to thaw.
Step – 2: Combine the ingredients
In a large, heavy-bottomed saucepan, combine your raspberries, sugar, and lemon juice. Stir everything together gently, making sure the sugar is well distributed. Let the mixture sit for about 5–10 minutes to allow the sugar to draw out some juice from the berries. This step also helps prevent the sugar from scorching once the heat is on.
Step – 3: Bring to a boil
Place the saucepan over medium-high heat. Stir occasionally as the sugar begins to dissolve. Once the mixture comes to a rolling boil—bubbling steadily across the surface—reduce the heat to medium. You want to maintain a steady simmer, not a rapid boil.
Step – 4: Cook and stir frequently
Let the jam simmer for about 15–20 minutes, stirring often to prevent sticking. The mixture will begin to thicken as the water evaporates. Around the 10-minute mark, you’ll notice the bubbles getting smaller and glossier—that’s a good sign.
Step – 5: Check the set
To test if your jam is ready, place a small spoonful on a chilled plate and let it sit for 30 seconds. Push your finger through the jam—if it wrinkles slightly and doesn’t flood back, it’s ready. If not, simmer for another 2–3 minutes and test again.
Step – 6: Skim and jar
Once your jam has reached the perfect consistency, remove the pot from the heat. If there’s any foam on top, skim it off with a spoon. Carefully ladle the hot jam into sterilized jars, leaving about ¼ inch of headspace. Seal tightly with lids and let them cool to room temperature. Store in the refrigerator for up to 3 weeks, or process in a water bath for longer storage.
Substitutions
Sometimes you may want to tweak the recipe to fit your preferences or pantry. Here are a few substitutions that work well and still give you excellent results:
- Sweeteners: You can substitute granulated sugar with raw cane sugar or a mix of white and brown sugar for a deeper flavor. Avoid liquid sweeteners like honey or maple syrup unless you’re experienced, as they can change the consistency.
- Fruit combinations: Mix in blackberries, strawberries, or blueberries with your raspberries for a multi-berry jam. Just keep the total fruit amount the same and adjust sugar to taste.
- Lemon juice alternatives: If you’re out of lemons, bottled lemon juice works in a pinch. Or try lime juice for a tangy twist. You need that acidity to help the jam set properly.
- No sugar versions: If you’re reducing sugar for dietary reasons, try using a no-sugar pectin. Keep in mind that lower sugar versions won’t last as long in the fridge and may not have the same shelf-stable properties.
Best Side Dishes of Raspberry Jam
Raspberry jam may be a condiment, but it can absolutely elevate a simple dish into something special. Here are three perfect pairings to enjoy alongside it:
- Buttermilk biscuits – Flaky, buttery biscuits are the perfect warm hug for a spoonful of raspberry jam. Fresh out of the oven, they soak up the fruitiness and make for a cozy breakfast.
- Vanilla yogurt parfait – Layer your jam with thick Greek yogurt, granola, and fresh fruit. It’s a great way to brighten up your mornings with something creamy, crunchy, and tangy-sweet.
- Cream scones – Classic British-style scones and raspberry jam are a timeless pairing. Add a dollop of clotted cream and you’ve got an afternoon tea treat worthy of royalty.
Serving and Presentation Tips
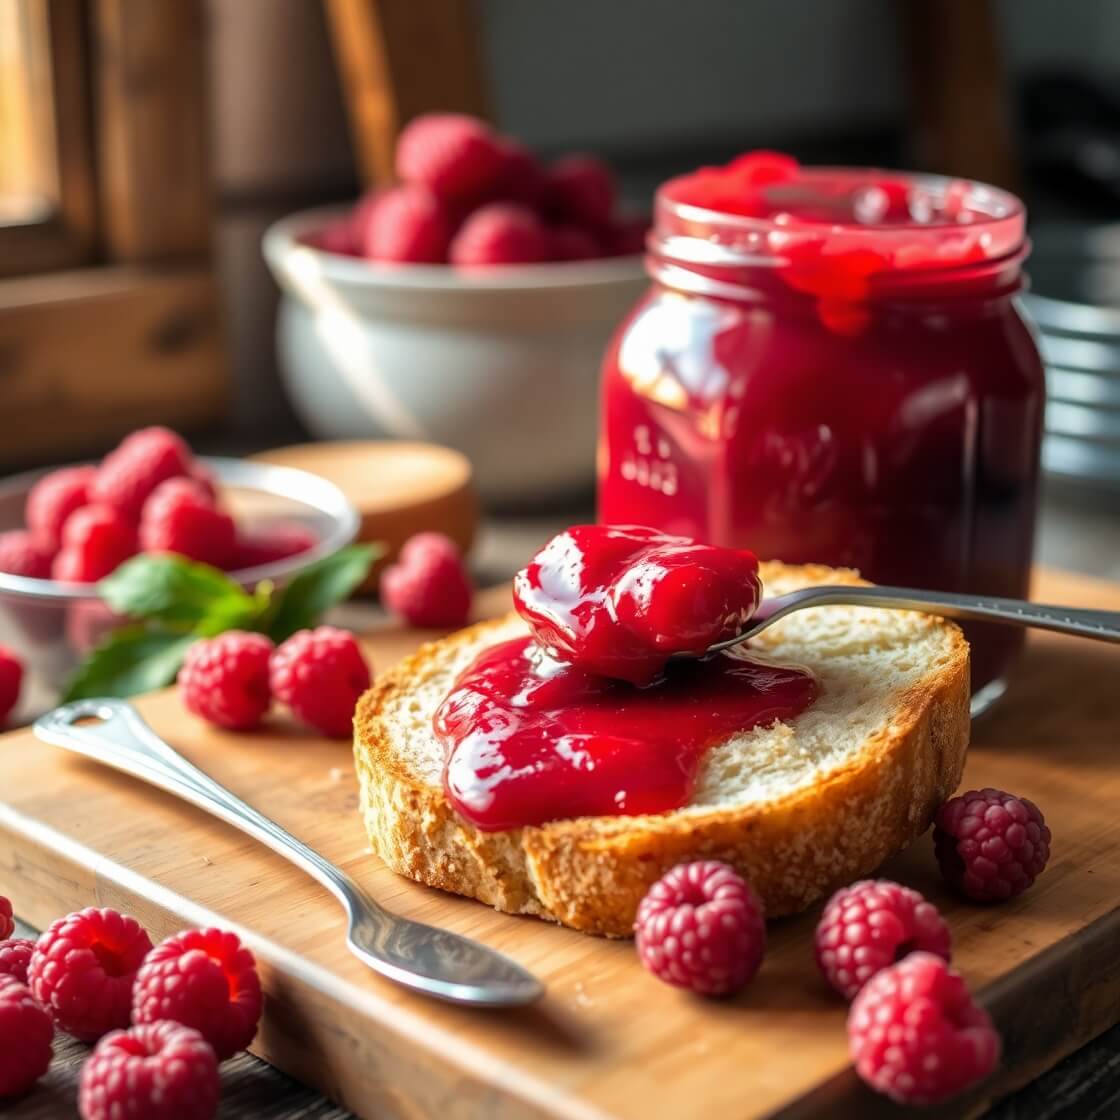
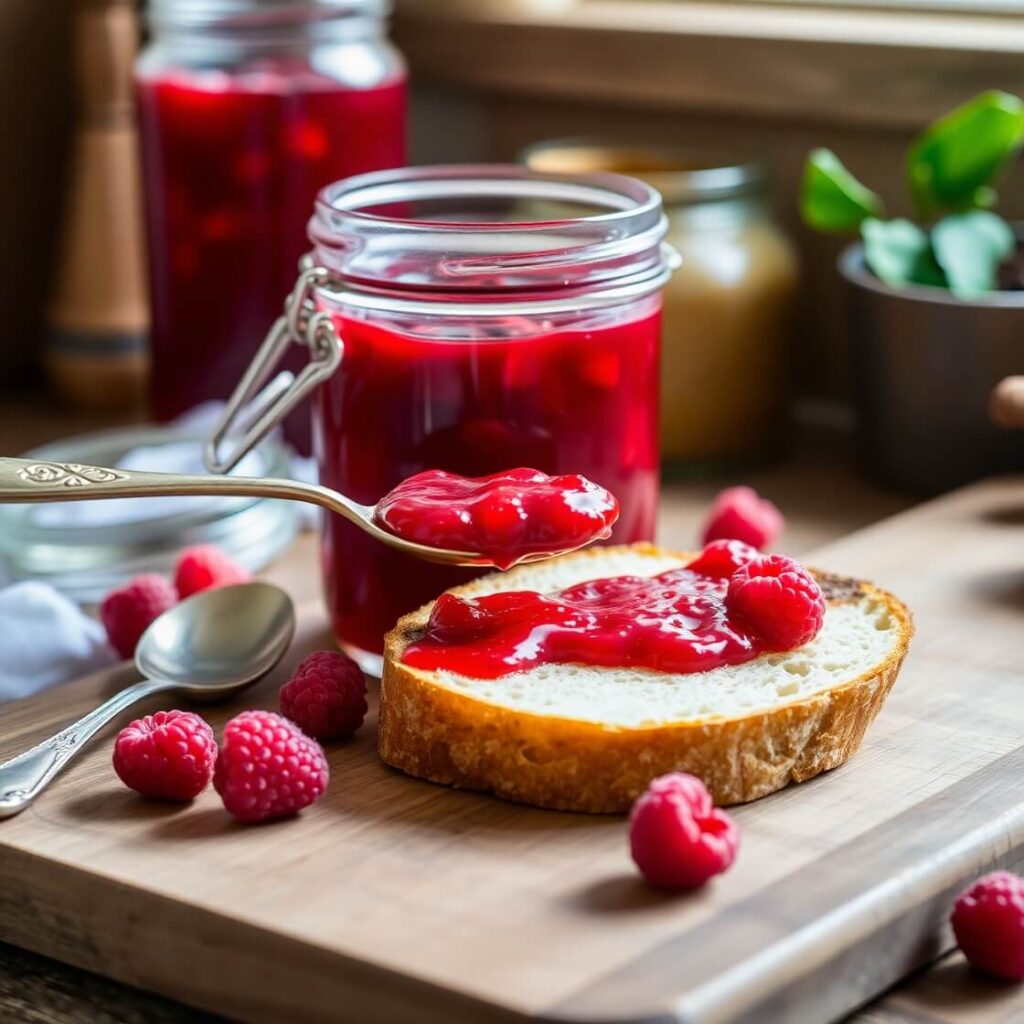
Serving raspberry jam is more than just scooping it out of a jar—it’s an opportunity to make every dish look and taste a little more special. The vibrant color and jewel-like texture of raspberry jam deserve to be highlighted.
One of my favorite ways to serve it is in small glass bowls alongside a breakfast spread. Place it next to warm croissants, sourdough toast, or pancakes, and it immediately adds a touch of homemade elegance.
For gatherings, try spreading it into a shallow dish and topping with a few fresh raspberries and a sprig of mint—it looks lovely and signals that this jam was made with care. When gifting, label your jars with handwritten tags, tie a bit of twine around the top, and watch them disappear faster than any store-bought jam ever would.
If you’re using it in desserts—like thumbprint cookies, swirl cakes, or even as a cheesecake topping—let its bold red hue shine through by keeping the presentation minimal. A dusting of powdered sugar or a dollop of whipped cream is often all you need.
Tips and Tricks to Make This Recipe Better
Making jam at home might feel intimidating at first, but with the right techniques, it becomes second nature. These tips will help you make consistently beautiful raspberry jam every time.
- Use a wide, shallow pan: A broader surface area allows the moisture to evaporate more quickly, which thickens your jam faster and helps preserve the bright color of the berries.
- Stir frequently: This keeps the sugar from burning on the bottom and helps everything cook evenly. As the jam thickens, be even more attentive to prevent scorching.
- Chill your test plate: Keep a small plate in the freezer while the jam cooks. This makes testing the set so much more accurate.
- Skim the foam: A bit of foam is natural when cooking fruit and sugar, but skimming it off will give your jam a glossy, professional finish.
- Don’t overcook: It’s tempting to keep cooking for extra thickness, but overcooking can make the jam stiff or dull the flavor. Once it passes the wrinkle test, take it off the heat.
Common Mistakes to Avoid
Even the simplest recipes can go sideways without a few precautions. Here are the pitfalls you’ll want to steer clear of:
- Using underripe berries: Raspberries that aren’t fully ripe lack the flavor and natural pectin needed to make a flavorful, well-set jam. Always use ripe, juicy berries for best results.
- Reducing sugar too much: Sugar isn’t just for sweetness—it helps the jam set and preserves it. Too little sugar, and your jam may turn out runny or spoil faster.
- Skipping the acid: Lemon juice isn’t optional. It helps balance the sweetness and also assists with the natural gelling process.
- Not sterilizing jars: If you’re planning to store your jam longer than a few weeks, always sterilize your jars. Otherwise, you risk contamination and spoilage.
- Guessing the set time: Always use the chilled plate test to check if the jam is ready. Don’t rely on just the clock—each batch is a little different.
How to Store It
If you’re making a small batch for immediate use, let the jam cool completely, then transfer it to a clean, airtight glass jar. Store it in the refrigerator, and it’ll stay fresh for up to three weeks.
For longer-term storage, you’ll need to can your jam using the water bath method. Sterilize your jars and lids, fill them with hot jam, wipe the rims clean, and seal. Process in boiling water for 10 minutes. Once cooled, check that the lids have sealed (they should not flex when pressed).
Properly canned jam can last up to a year in a cool, dark pantry. Always label your jars with the date and batch—homemade jam is a joy to eat, and it’s even more enjoyable when you know it’s safe and fresh.
FAQ
Can I use frozen raspberries instead of fresh?
Yes! Frozen raspberries work beautifully. Just use them straight from the freezer without thawing first. The jam may take a few extra minutes to reach the proper set.
Do I need pectin for this recipe?
No, this recipe is naturally set thanks to the pectin found in raspberries and the added lemon juice. No commercial pectin is needed.
Why is my jam too runny?
It likely didn’t cook long enough, or you may have used underripe berries. You can reboil the jam with a bit more lemon juice or sugar to thicken it.
Can I double this recipe?
It’s best to make jam in small batches so it cooks evenly and sets properly. If you need a larger amount, make two separate batches rather than doubling.
How can I make it seedless?
After cooking, press the jam through a fine mesh sieve to remove seeds. It’s a bit more work but results in a silky, smooth spread.
Raspberry Jam Recipe
- Total Time: 1 hour
- Yield: 2 1x
- Diet: Vegetarian
Description
This homemade raspberry jam is the perfect way to preserve the bright, tangy sweetness of summer berries. With just three simple ingredients and no added pectin, it’s a naturally thick, intensely flavored jam that spreads like a dream. Whether you spoon it over toast, swirl it into desserts, or gift it in jars, this small-batch raspberry jam will quickly become your go-to recipe. It’s easy enough for beginners, yet impressive enough to share. This recipe celebrates everything that’s lovely about homemade preserves—pure fruit flavor, beautiful color, and a texture that feels like a little kitchen magic.
Ingredients
- 4 cups fresh or frozen raspberries
- 2 cups granulated sugar
- 2 tablespoons fresh lemon juice
- (Optional) ½ teaspoon unsalted butter, to reduce foaming
Instructions
- Rinse raspberries and gently pat dry if using fresh. No need to thaw if using frozen.
- In a large saucepan, combine raspberries, sugar, and lemon juice. Let sit 5–10 minutes.
- Bring mixture to a boil over medium-high heat. Stir often as sugar dissolves.
- Lower heat to a simmer and cook for 15–20 minutes, stirring frequently.
- Test the jam by placing a spoonful on a chilled plate. If it wrinkles when pushed, it’s ready.
- Skim off any foam, remove from heat, and ladle into sterilized jars.
- Let jars cool to room temperature before sealing or processing for longer storage.
Notes
- For seedless jam, strain the mixture through a fine sieve after cooking.
- Add a teaspoon of vanilla or a splash of Chambord for a flavor twist.
- Use a wide, shallow pan for quicker evaporation and better consistency.
- Prep Time: 10 minutes
- Cook Time: 25 minutes
- Category: Jam/Preserves
- Method: Stovetop
- Cuisine: American
Nutrition
- Serving Size: 2
- Calories: 50
- Sugar: 11g
- Sodium: 0mg
- Fat: 0g
- Saturated Fat: 0g
- Unsaturated Fat: 0g
- Trans Fat: 0g
- Carbohydrates: 13g
- Fiber: 1g
- Protein: 0g
- Cholesterol: 0mg