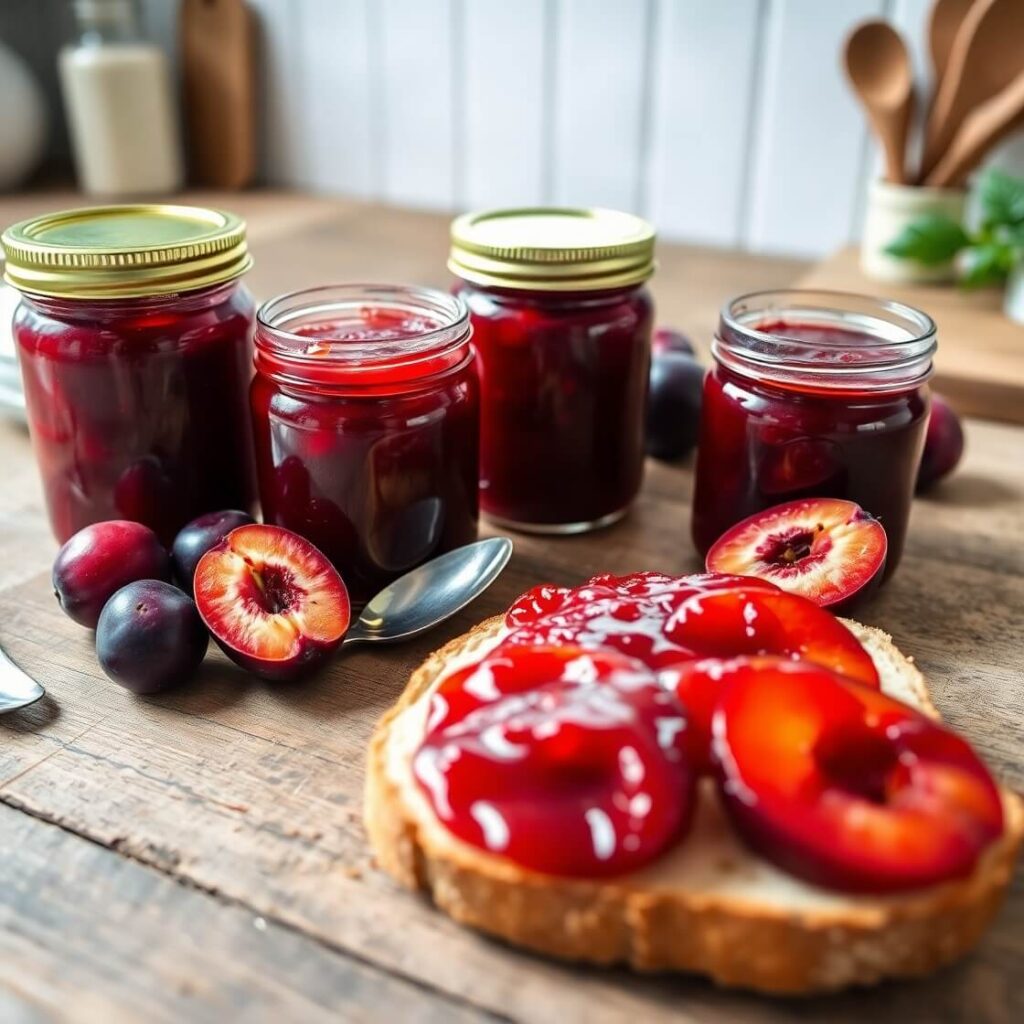
There’s something deeply satisfying about making jam from scratch—especially when it’s plum jam. The rich color, the sweet-tart flavor, and the comforting scent that fills the kitchen make it one of those recipes you return to every season. I first made this plum jam one late summer when a friend dropped off a basket of overripe plums from her backyard tree. I didn’t want those beautiful fruits to go to waste, so I turned them into jars of sunshine I could enjoy all year round.
Plum jam is one of those recipes that’s perfect for beginners and experienced canners alike. It’s forgiving, flavorful, and incredibly versatile. Spread it on toast, swirl it into yogurt, or use it as a glaze for meats—there’s no wrong way to enjoy it.
If you’ve never made jam before, don’t worry—I’ll walk you through it step by step. This guide is packed with everything you need to know to make a luscious, jewel-toned plum jam that tastes like summer in a jar.
Why I Love This Recipe

What I adore most about this plum jam recipe is how accessible it is. Whether you’re working with store-bought plums or a backyard bounty, this jam transforms humble fruit into something truly luxurious. The process is deeply nostalgic and grounding—you get to slow down, stir a bubbling pot, and watch something simple become extraordinary.
This jam has just the right balance of sweetness and tang, with a texture that spreads beautifully without being overly stiff. Unlike store-bought versions, it doesn’t rely on artificial preservatives or unnecessary additives. You’re in control of the flavor, the texture, and the quality.
Another reason this recipe stands out? It’s incredibly versatile. You can add a hint of cinnamon for warmth, a splash of vanilla for depth, or even a dash of chili flakes if you’re feeling adventurous. Once you get the base recipe down, the variations are endless.
There’s also something quite special about giving a jar of homemade plum jam as a gift. It’s personal, thoughtful, and always appreciated. Whether you’re preserving a summer harvest or making a cozy treat for the holidays, this plum jam delivers every time.
Ingredients for Plum Jam Recipe
Before we dive in, let’s talk about what you’ll need. The great news is that plum jam doesn’t require any fancy or hard-to-find ingredients. It’s just a handful of fresh, simple items that work together beautifully.
The star of the show, of course, is plums. You’ll want ripe, juicy plums—any variety will do, but the riper, the better. Ripe plums yield more juice, richer flavor, and a smoother consistency.
Here’s what you’ll need:
- Fresh ripe plums: Washed, pitted, and chopped. You can leave the skin on—it’s packed with natural pectin, which helps the jam set.
- Granulated sugar: This sweetens the jam and helps preserve it. You can adjust the amount depending on how sweet your plums are.
- Lemon juice: Freshly squeezed is best. It balances the sweetness and helps the jam set properly.
- Water: Just a splash to get things started in the pot.
Optional additions you can try:
- A cinnamon stick or a pinch of ground cinnamon
- A touch of vanilla extract
- A small piece of fresh ginger for a hint of spice
That’s it—no commercial pectin needed. The natural pectin in the plums and the acidity of the lemon do all the work for you.
How Much Time Will You Need
This plum jam doesn’t take all day, but it does ask for your attention in parts. Here’s how the timing breaks down:
- Prep time: 20 minutes
(Washing, pitting, and chopping the plums) - Cook time: 45–60 minutes
(This includes boiling the fruit and sugar, simmering it down, and achieving the proper gel consistency) - Cooling and canning time: 30 minutes
(If you’re canning, you’ll need time to sterilize jars and let them cool)
So, in total, set aside about 1 hour and 30 minutes to 2 hours from start to finish. Not bad for a dozen jars of homemade jam!
How to Make This Plum Jam Recipe
Here’s your step-by-step guide to making a rich, fruity plum jam with gorgeous color and unbeatable flavor.
Step – 1: Prep Your Plums
Start by washing your plums thoroughly under cool running water. Slice them in half, remove the pits, and then chop them into smaller pieces. You don’t need to peel them—the skins add color, flavor, and natural pectin.
Measure out your chopped fruit—you’ll want about 4 cups of chopped plums for a medium batch of jam.
Step – 2: Combine Ingredients in a Pot
Place the chopped plums in a large, heavy-bottomed pot. Add 2½ to 3 cups of sugar, depending on your sweetness preference, ¼ cup of water, and 2 tablespoons of lemon juice.
Stir everything together, and let the mixture sit for about 15 minutes. This gives the sugar time to start drawing out the juice from the fruit.
Step – 3: Cook the Fruit Mixture
Place the pot over medium-high heat and bring it to a boil. Stir frequently to prevent sticking or scorching. Once boiling, reduce the heat to medium-low and simmer the mixture.
As the fruit breaks down, use a potato masher or the back of a spoon to mash it to your desired consistency. You can leave it chunky or make it smoother—it’s totally up to you.
Step – 4: Watch for the Gel Point
This is the part where patience pays off. Continue simmering the jam, stirring occasionally. As it thickens, it will start to coat the back of a spoon.
To check if it’s ready, place a spoonful of jam on a chilled plate and let it sit for 30 seconds. Push it gently with your finger—if it wrinkles and holds its shape, it’s done. If not, keep cooking and test again in 5-minute intervals.
Step – 5: Skim the Foam (Optional)
Sometimes, a bit of foam will rise to the surface. You can skim this off with a spoon—it’s harmless, but removing it gives your jam a clearer finish.
Step – 6: Jar the Jam
Once the jam has reached the perfect consistency, remove it from the heat. Ladle the hot jam into sterilized jars, leaving about ¼ inch of headspace.
Wipe the rims clean, add the lids, and either refrigerate for immediate use or process in a boiling water bath for 10 minutes if you want to store it longer.
Substitutions
If you’re short on certain ingredients or want to experiment with flavors, here are a few clever substitutions:
- Plums: Try apricots, peaches, or even nectarines if plums aren’t in season.
- Sugar: Swap white sugar for honey, maple syrup, or coconut sugar—just note that the flavor and setting time will vary slightly.
- Lemon juice: Bottled lemon juice works in a pinch, but lime juice is a great alternative too, offering a slightly different citrus note.
- Water: Instead of plain water, you can use a splash of apple juice or white wine to add subtle complexity to the flavor.
These swaps won’t compromise the quality of the jam—in fact, they may lead you to a new favorite variation!
Best Side Dish of Plum Jam Recipe
Plum jam isn’t just for toast. It can elevate everyday meals into something memorable. Here are three fantastic ways to enjoy it:
- Buttermilk Biscuits – A warm, flaky biscuit slathered with plum jam is pure heaven. It’s sweet, buttery, and perfect for brunch.
- Cheese Board – Add a dollop of plum jam to a cheese platter with brie, aged cheddar, and crackers. The sweet-tart contrast is irresistible.
- Grilled Pork Chops – Brush plum jam over grilled pork for a quick glaze. It adds a beautiful shine and a rich, fruity tang.
This jam is incredibly flexible—you’ll be reaching for it far more often than you expect.
Serving and Presentation Tips
There’s something truly elegant about serving plum jam—it’s vibrant, glossy, and adds a pop of color to any spread. But it’s not just about flavor—it’s about creating a moment around it.
One of my favorite ways to present plum jam is in a small vintage-style jar with a ribbon tied around the lid. Whether I’m setting it out at brunch or giving it as a gift, it always looks charming and thoughtful.
When serving, pair your plum jam with a small spoon or a decorative butter knife. If you’re adding it to a cheese board, spoon it into a ramekin so guests can easily help themselves. For breakfast, it’s lovely served alongside croissants, scones, or warm toast with a pat of salted butter.
And don’t forget about dessert—swirl it into cheesecake batter before baking, or drizzle it over vanilla ice cream. A simple dollop on a slice of pound cake can make even the most basic dessert feel special.
Tips and Tricks to Make This Recipe Even Better
Making jam is part technique, part intuition. Here are some tips I’ve learned along the way that can help elevate your plum jam to the next level:
- Use ripe plums: The riper the fruit, the sweeter and more flavorful your jam will be. Slightly overripe plums are perfect.
- Taste your fruit first: All plums aren’t equally sweet or tart. Adjust your sugar based on how your plums taste naturally.
- Cook slowly and stir often: Jam thickens best over medium heat with consistent stirring. Don’t rush it—this helps preserve the fresh fruit flavor.
- Use a wide, heavy pot: This allows the jam to cook down more evenly and reduces the risk of burning.
- Sterilize your jars properly: Even if you plan to refrigerate the jam, clean, sterilized jars are key to safe storage.
- Label your jars: Especially if you’re experimenting with flavors or gifting them. A simple date and name tag goes a long way.
Common Mistakes to Avoid
Making jam at home is easier than you think, but here are a few pitfalls to avoid:
- Skipping the lemon juice: It’s not just for flavor—it helps the jam set and ensures it’s safe for storage. Don’t leave it out.
- Using too little sugar: Sugar isn’t just for sweetness—it’s a natural preservative. Reducing it too much can lead to spoilage.
- Overcooking the jam: This can result in a rubbery texture. Always test for doneness with the plate test or by using a thermometer (220°F/104°C is the magic number).
- Not skimming the foam: While harmless, foam can cloud the final jam and make it look less appetizing.
- Improper sealing or jar handling: Always use sterilized jars, and make sure your seals are tight if you’re water-bath canning. A loose seal could lead to spoilage.
How to Store It
Storage is key to making your jam last. If you’ve properly sealed your jars in a boiling water bath, you can store them in a cool, dark place (like a pantry) for up to one year. Once opened, refrigerate and use within 3 to 4 weeks.
If you’re skipping the canning process, just ladle the hot jam into sterilized jars and let them cool at room temperature before refrigerating. These will last about 3 weeks in the fridge.
For longer-term storage, plum jam also freezes well. Just use freezer-safe containers, leave a little headspace, and freeze for up to 6 months.
FAQ
Can I use frozen plums for this jam?
Yes, absolutely! Just thaw them completely and drain excess liquid before starting. The flavor remains beautifully intact.
Do I need to peel the plums?
Nope! The skins actually help the jam set thanks to their natural pectin. Plus, they add color and depth of flavor.
Can I reduce the sugar?
To a degree, yes—but reducing sugar too much may prevent the jam from setting and shorten its shelf life. You can experiment, but don’t skip it entirely.
Is this jam suitable for diabetics?
It’s not sugar-free, so it’s not ideal for diabetics. However, you can explore recipes using low glycemic sweeteners or make a small batch for immediate use with a sugar substitute.
How do I know when the jam is done?
Use the cold plate test: drop a spoonful on a chilled plate, let it sit 30 seconds, and run your finger through it. If it wrinkles and holds its shape, it’s ready.
Plum Jam Recipe
- Total Time: 1 hour 30 minutes
- Yield: 4 1x
- Diet: Vegetarian
Description
This homemade plum jam is bursting with rich fruit flavor, balanced with a touch of lemon, and just the right amount of sweetness. Perfect on toast, paired with cheese, or swirled into yogurt, it’s a versatile pantry staple that’s as beautiful as it is delicious. Whether you’re preserving a backyard harvest or making a sweet gift from the heart, this jam captures the essence of summer in every spoonful. And the best part? No store-bought pectin required—just a few simple ingredients and a bit of stovetop magic.
Ingredients
- 4 cups ripe plums, chopped (skins on, pits removed)
- 2½ to 3 cups granulated sugar
- 2 tablespoons fresh lemon juice
- ¼ cup water
- (Optional) Cinnamon stick, vanilla extract, or grated ginger
Instructions
- Wash, pit, and chop plums (leave skins on).
- Combine plums, sugar, lemon juice, and water in a heavy pot. Let sit 15 minutes.
- Bring to a boil over medium-high heat, then reduce to a simmer.
- Stir regularly, mashing fruit as it softens.
- Cook for 45–60 minutes until thickened. Use the plate test to check for doneness.
- Skim foam if needed, then ladle hot jam into sterilized jars.
- Seal and refrigerate, or process in a water bath for longer storage.
Notes
- Taste your plums before cooking to gauge how much sugar to use.
- Always sterilize your jars to prevent spoilage.
- For deeper flavor, try adding a cinnamon stick during cooking and remove before jarring.
- Want a smoother jam? Use an immersion blender after cooking.
- Prep Time: 20 minutes
- Cook Time: 60 minutes
- Category: Preserves & Spreads
- Method: Stovetop
- Cuisine: American
Nutrition
- Serving Size: 4
- Calories: 45
- Sugar: 10g
- Sodium: 1mg
- Fat: 0g
- Saturated Fat: 0g
- Unsaturated Fat: 0g
- Trans Fat: 0g
- Carbohydrates: 12g
- Fiber: 0.3g
- Protein: 0g
- Cholesterol: 0mg