There’s something deeply satisfying about baking your own bread—and pita, with its magical puff and warm, chewy texture, brings an added sense of joy. I started making homemade pita bread during a cozy weekend at home, craving something soft, fresh, and perfect for scooping hummus or stuffing with grilled meats. It became a little ritual, filling the kitchen with the smell of yeasty dough and the sight of little pockets puffing up in the oven like edible balloons.
This recipe is perfect for anyone who loves to bake or wants to dip their toes into the world of bread-making without feeling overwhelmed. With just a few simple ingredients and some basic technique, you’ll be rewarded with pillowy, golden pita breads that beat anything store-bought.
Keep reading—this might become your favorite go-to bread recipe.
Why I Love This Recipe

There’s nothing quite like warm pita straight out of the oven.
What makes this recipe so special is how approachable it is. You don’t need a bread machine or fancy tools—just a bowl, a pan, and an oven. The dough is forgiving, the process is therapeutic, and the results are consistently impressive.
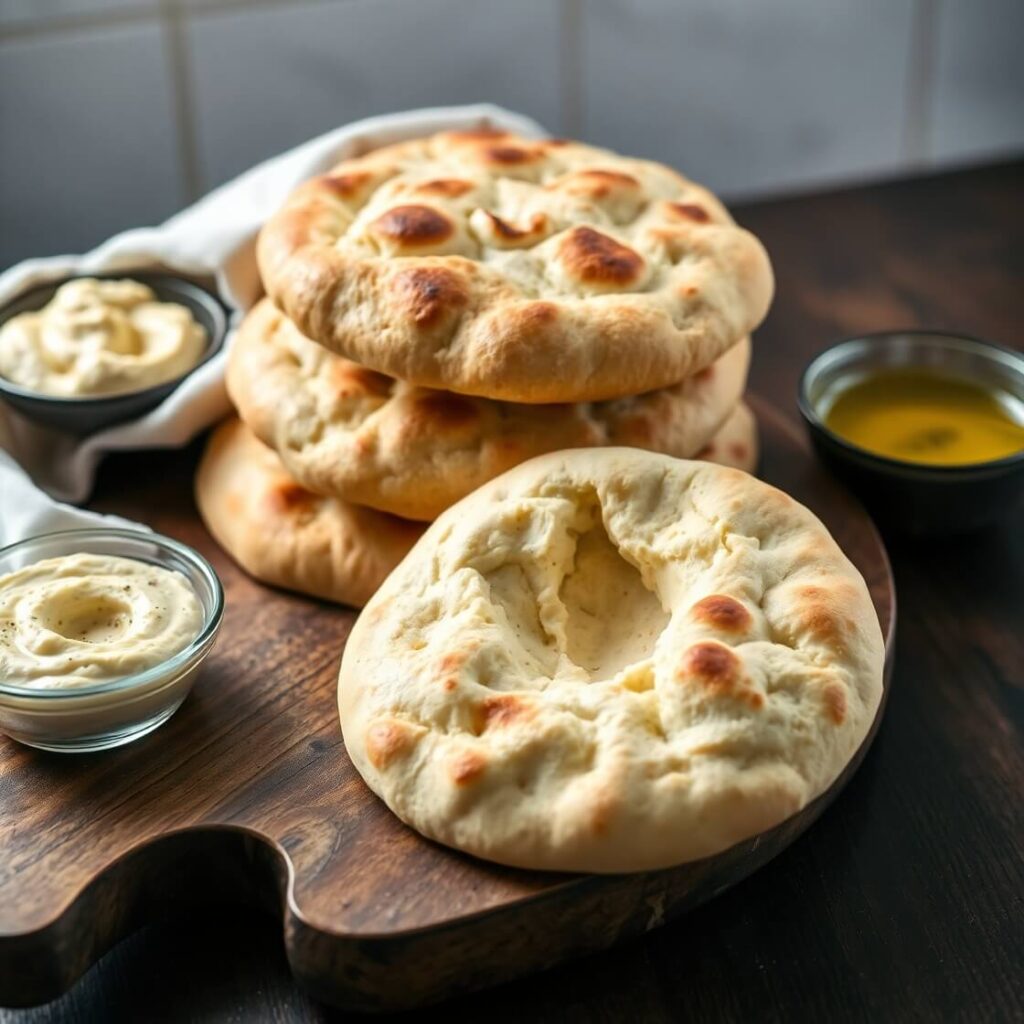
Pita is unique among flatbreads because it puffs up in the oven, creating a pocket. That puff happens because of the moisture in the dough turning to steam—making it not only fun to watch but incredibly functional. You can stuff the pocket with falafel, veggies, meat, or even sweet fillings like honey and banana.
Unlike many bread recipes that take hours of kneading or complex steps, pita is relatively quick and manageable for beginners. It’s also endlessly versatile. Serve it with mezze, alongside soup, or even as a base for mini pizzas.
Plus, making it from scratch means you get that tender chewiness and toasty flavor that just doesn’t exist in packaged versions. It’s fresh, honest food.
Ingredients for Pita Bread Recipe
The magic of this recipe is in its simplicity.
You only need pantry staples—flour, yeast, salt, water, and a touch of olive oil. No preservatives, no additives, just real ingredients that come together to create a bread that feels both rustic and refined.
Here’s what you’ll need and why each matters:
- All-purpose flour – This gives the dough its structure and chewiness. You can use bread flour for slightly more puff, but all-purpose is more accessible and works beautifully.
- Instant yeast – This is your rising agent. It helps the dough develop air pockets and that light, puffy texture. You can also use active dry yeast, but it will need to be activated first.
- Warm water – Helps activate the yeast and bind the ingredients. The temperature should be warm to the touch but not hot (about 100°F to 110°F).
- Salt – Balances the flavor and strengthens the gluten structure.
- Olive oil – Adds a bit of richness and helps keep the dough soft. It also brings a subtle Mediterranean flavor.
Optional but nice to have:
- A pinch of sugar – Helps activate the yeast a little faster and gives a slight golden hue during baking.
Every ingredient in this list plays a role, and together, they create a dough that’s smooth, pliable, and perfect for puffing in the oven or skillet.
How Much Time Will You Need
From start to finish, this recipe takes about 2 hours and 15 minutes.
- Preparation & mixing – 15 minutes
- First rise – 1 hour
- Shaping & resting – 20 minutes
- Cooking (oven or skillet) – 30–40 minutes total, depending on how many you make at once
Most of the time is inactive, allowing the dough to rise or rest. You can also prep the dough earlier and refrigerate it overnight for even more flexibility.
This makes it a great weekend project or even a mid-week treat if you’ve got a few hours to spare.
How to Make This Pita Bread Recipe
Follow these steps carefully and you’ll have beautifully puffed, soft pita every time.
Step – 1: Activate Your Yeast (If Needed)
If using instant yeast, you can skip this and mix it directly with the dry ingredients.
For active dry yeast, dissolve it in warm water with a pinch of sugar. Let it sit for 5–10 minutes until frothy. This step ensures your yeast is alive and ready to go.
Step – 2: Mix the Dough
In a large mixing bowl, combine flour, salt, and instant yeast (if using). Add the warm water and olive oil.
Mix with a spoon until a shaggy dough forms, then turn it onto a floured surface.
Knead for 8–10 minutes by hand (or 5–6 minutes in a stand mixer with a dough hook) until the dough is smooth and elastic. It should be slightly tacky but not sticky.
Step – 3: First Rise
Form the dough into a ball and place it in a lightly oiled bowl.
Cover with a clean kitchen towel or plastic wrap. Let it rise in a warm, draft-free area for about 1 hour, or until doubled in size.
Step – 4: Divide and Shape
Punch down the risen dough gently and transfer it to a floured surface.
Divide it into 8 equal pieces. Roll each piece into a ball, cover them with a cloth, and let them rest for 10 minutes. This makes shaping easier.
Then, use a rolling pin to roll each ball into a round about 6–7 inches wide and ¼ inch thick. Avoid pressing out all the air—you want those pockets!
Step – 5: Second Rest
Let the rolled-out dough rounds rest for 10 more minutes while your oven or skillet preheats. This helps encourage puffing.
Step – 6: Bake or Cook
Oven method (preferred):
Preheat oven to 475°F (245°C). Place a baking stone or heavy sheet pan upside down in the oven to heat.
Once hot, place 1–2 pitas on the surface. Bake for 3 minutes—watch them puff! Flip if needed and cook 1 more minute.
Skillet method:
Heat a heavy cast-iron skillet over medium-high heat. Place a pita in the dry pan, cook for 1–2 minutes on one side (until bubbles form), flip and cook another minute. Flip once more and press gently to encourage puffing.
Remove and wrap warm pitas in a clean towel to keep soft.
Repeat with all dough rounds.
Substitutions
No need to panic if you’re out of one ingredient—this recipe is adaptable.
- Flour substitutes – You can use whole wheat flour for a nuttier, more wholesome version. Try half all-purpose and half whole wheat to keep the softness.
- Yeast options – Both instant and active dry yeast work. Just make sure to bloom the active dry yeast in warm water first.
- Gluten-free option – Pita relies heavily on gluten for that pocket. However, you can try gluten-free bread flour mixes, though they may not puff. The taste can still be excellent!
- Olive oil – Substitute with any neutral oil like avocado or grapeseed. Even melted butter can work in a pinch.
Small tweaks can tailor the pita to your dietary needs or pantry situation without losing its magic.
Best Side Dish of Pita Bread Recipe
Pita bread is a perfect vehicle for so many delicious sides. Here are three that truly shine:
- Classic Hummus – Creamy, garlicky, and smooth. Nothing beats warm pita dipped into homemade hummus.
- Tabbouleh Salad – A fresh, herby Lebanese salad with parsley, mint, and bulgur. Bright and tangy, it’s the perfect contrast to warm bread.
- Grilled Chicken Shawarma – Rich, spiced chicken slices tucked into the pita for a satisfying and hearty meal.
These combinations make your meal feel complete and give the pita a purpose beyond just being bread—it becomes the star of the plate.
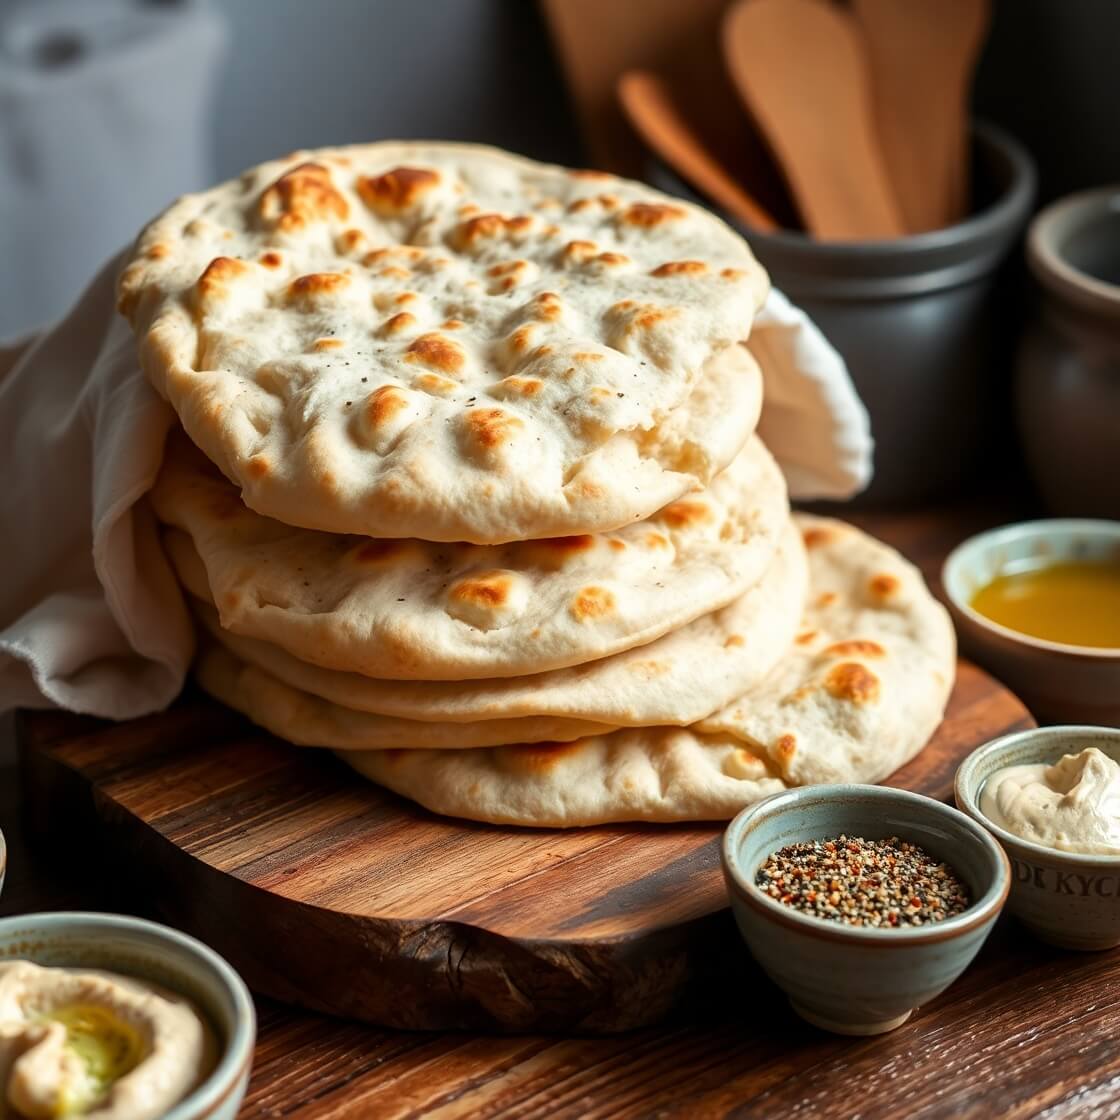
Serving and Presentation Tips
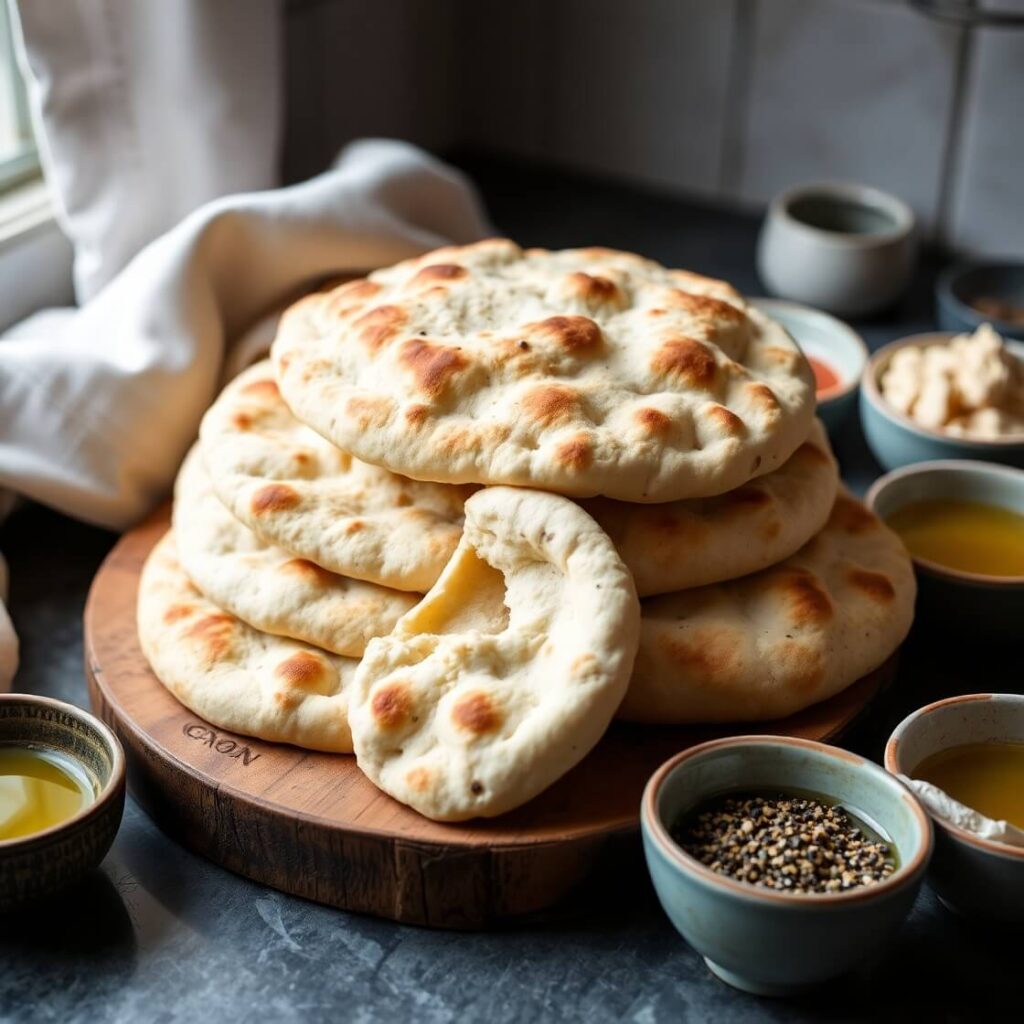
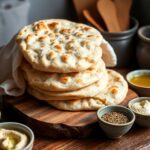
There’s something incredibly inviting about warm, fresh pita stacked in a soft towel or presented on a wooden board.
To make your homemade pita bread shine, think about how you serve it. Lay the warm breads slightly overlapping in a cloth-lined basket, allowing them to stay warm and tender for longer. That soft, pillowy texture is part of the experience—don’t let it cool too quickly.
When serving with dips, slice the pita into wedges and toast lightly for texture contrast. For pocket sandwiches, cut cleanly across the edge to create that pocket and stuff it generously. Try wrapping the filled pita in parchment for a charming, café-style presentation that also keeps fillings neatly in place.
Drizzling with olive oil and a sprinkle of za’atar before serving adds extra visual and flavor appeal. And if you’re pairing with a mezze spread, keep it rustic—earthy ceramics, colorful vegetables, and rustic wooden boards complement the homemade nature of pita.
Tips and Tricks to Make This Recipe Even Better
Every great recipe has its secrets—and here are a few to take your pita to the next level.
- High heat is key. Whether you’re using a skillet or oven, preheating the surface is critical for that dramatic puff. Don’t rush this step.
- Rest the dough after shaping. A short 10-minute rest after rolling allows gluten to relax, leading to better puffing during cooking.
- Don’t over-flour. Excess flour can prevent the pita from sticking to the hot surface, which is crucial for puffing. Lightly flour your rolling area, but don’t overdo it.
- Use a baking stone or steel. These tools retain intense heat and mimic a traditional clay oven—perfect for authentic pita.
- Keep them warm. Stack cooked pitas under a clean towel immediately. The trapped steam keeps them soft and chewy.
These small touches make a big difference, turning your pita from good to unforgettable.
Common Mistakes to Avoid
Pita is simple—but there are a few common slip-ups that can keep it from reaching perfection.
- Dough too dry. A dry dough won’t puff. If your dough feels stiff, add a tablespoon of water at a time until it’s soft and slightly tacky.
- Under-proofing. Let the dough rise until truly doubled in size. If it’s rushed, you’ll lose that airy texture.
- Thick rolling. If the rounds are too thick, they won’t puff. Aim for about ¼ inch—thick enough to handle, thin enough to rise quickly.
- Cold oven/skillet. Puffing requires shock heat. A lukewarm cooking surface won’t generate the steam needed for a pocket.
- Over-flipping. If using a skillet, keep your flipping to a minimum. Too much movement can collapse the air pocket as it forms.
Avoiding these missteps will help you bake consistent, puffy pitas every time.
How to Store It
Homemade pita stores surprisingly well—and even freezes beautifully.
Short-term storage (1–2 days):
Let the pitas cool completely. Wrap in foil or place in a zip-top bag with the air pressed out. Store at room temperature. Avoid the fridge—it can make them tough.
Reheating tip:
To revive softness, wrap in a damp paper towel and microwave for 10–15 seconds. Alternatively, heat in a dry skillet for 30 seconds per side.
Freezing:
Once cooled, layer pitas with parchment paper between each and seal in a freezer-safe bag. They’ll keep well for up to 2 months.
To reheat, place directly in a hot oven for 3–5 minutes or thaw at room temperature, then warm in a skillet.
FAQ
Can I use whole wheat flour instead of all-purpose?
Yes! Substitute up to 50% of the flour with whole wheat for a nuttier flavor and heartier texture. Full whole wheat can be used, but the pitas may be denser.
Why didn’t my pita puff up?
This usually happens due to low oven/skillet heat, thick dough, or under-proofed dough. Make sure your heat is high and your dough is rolled thin enough.
Can I make the dough ahead of time?
Yes. You can refrigerate the dough after the first rise. Cover it tightly and use within 24 hours. Let it come to room temperature before shaping.
Can I bake them in the air fryer?
Technically yes, though results vary. You’ll need to cook at 400°F for about 3–4 minutes per side, and may not get the full puff, but they still taste great.
Is pita bread vegan?
Absolutely. This recipe is 100% plant-based with no dairy or eggs. Just make sure your sugar (if used) is vegan-friendly if you’re strict.
Pita Bread Recipe
- Total Time: 2 hours 15 minutes (including rise)
- Yield: 8 1x
- Diet: Vegan
Description
There’s something magical about watching your own pita bread puff up in the oven, turning a simple circle of dough into a fluffy pocket ready to be filled, dipped, or devoured. This homemade pita bread recipe is soft, slightly chewy, and full of flavor. With just a few pantry ingredients, you can make bakery-quality pitas right in your own kitchen. No preservatives, no fuss—just honest, fresh bread you’ll want to make again and again.
Ingredients
- 3 ½ cups all-purpose flour (plus extra for dusting)
- 2 teaspoons instant yeast (or 2 ¼ tsp active dry yeast)
- 1 ½ teaspoons salt
- 1 tablespoon olive oil
- 1 ¼ cups warm water (100–110°F)
- Optional: 1 teaspoon sugar (if using active dry yeast)
Instructions
- If using active dry yeast, dissolve in warm water with sugar and let sit 5–10 minutes until frothy.
- In a large bowl, mix flour, salt, and yeast (if instant). Add olive oil and warm water.
- Mix until a shaggy dough forms. Knead for 8–10 minutes by hand or 5–6 minutes with a mixer until smooth.
- Place dough in an oiled bowl, cover, and let rise for 1 hour or until doubled.
- Divide into 8 equal balls. Cover and let rest 10 minutes.
- Roll each ball into a 6–7 inch circle, about ¼ inch thick.
- Let rolled dough rest for 10 minutes while you heat your oven or skillet.
- Bake at 475°F on a hot baking stone for 3 minutes or cook in a dry skillet for 1–2 minutes per side until puffed and golden.
- Wrap warm pitas in a clean towel to keep soft.
Notes
- For extra flavor, brush with olive oil and sprinkle with za’atar after cooking.
- Store cooled pitas in a sealed bag at room temp for 2 days or freeze for up to 2 months.
- To make gluten-free, use a commercial gluten-free bread flour blend (note: puffing may be limited).
- For meal prep, freeze dough rounds after shaping and thaw before cooking.
- Prep Time: 15 minutes
- Cook Time: 30 minutes
- Category: Breads
- Method: Baking or skillet
- Cuisine: Mediterranean, Middle Eastern
Nutrition
- Serving Size: 8
- Calories: 210
- Sugar: 0.5g
- Sodium: 330mg
- Fat: 2.5g
- Saturated Fat: 0.4g
- Unsaturated Fat: 2.1g
- Trans Fat: 2.1g
- Carbohydrates: 40g
- Fiber: 1.8g
- Protein: 5.8g
- Cholesterol: 0mg