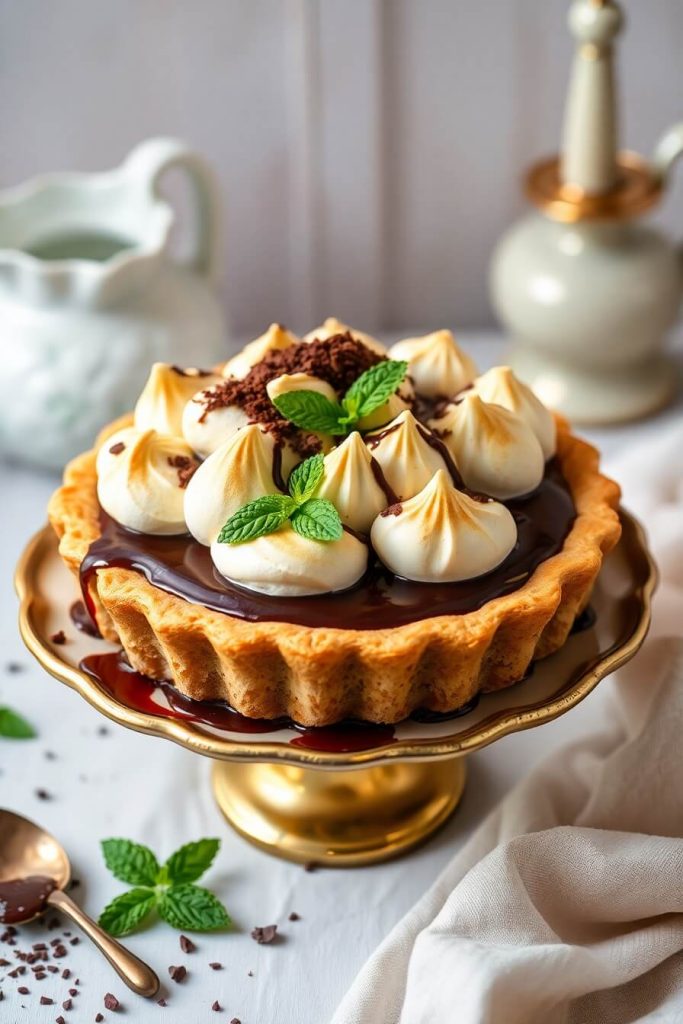
There’s something special about an old-fashioned chocolate pie topped with golden meringue. It’s the kind of dessert that immediately takes you back to a simpler time, evoking memories of grandmothers’ kitchens and the warmth of family gatherings. This pie, with its rich, silky chocolate filling and delicate, fluffy meringue, is the perfect balance of sweetness and comfort. I first discovered this recipe from an old family cookbook, and since then, it has become a staple at our holiday gatherings. Whether it’s for a special occasion or simply to indulge in a treat that speaks to nostalgia, this chocolate pie with meringue is a showstopper that never fails to impress.
You might wonder, “Why is this dessert so beloved?” In this recipe guide, I’ll walk you through every step of making this delicious pie, so you can recreate it and impress your loved ones with your baking skills. Ready to learn why this dessert is worth every minute of effort? Let’s get started.
Why I Love This Recipe

The Old-Fashioned Chocolate Pie with Golden Meringue holds a unique place in many kitchens, especially because of its nostalgic appeal. The smooth and velvety chocolate filling pairs perfectly with the crisp, airy meringue topping that lightly melts in your mouth. Unlike many modern desserts that can feel overly complicated or overly sweet, this pie is a harmonious blend of flavors and textures that simply work.
But what truly makes this pie special is the balance of comfort and elegance. It’s a dessert that feels homey yet sophisticated. Whether you’re baking it for a family dinner or to impress guests at a holiday party, it’s a pie that always brings joy. The simplicity of the ingredients, combined with the skill of bringing them together in such a flawless way, is what makes this dessert timeless.
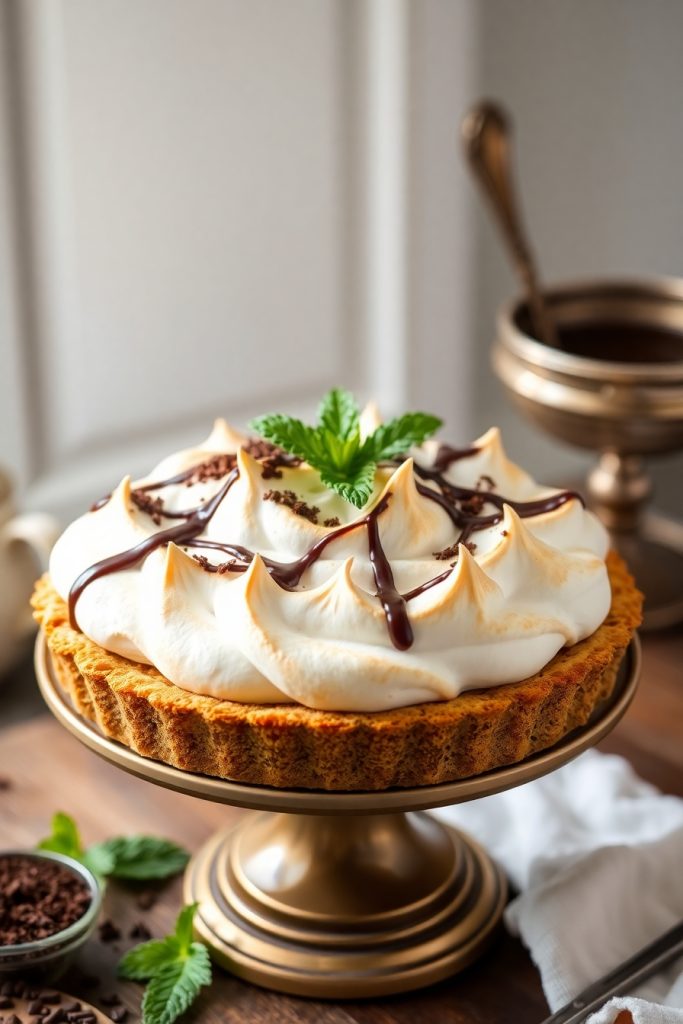
The addition of the meringue is the real showstopper. Achieving the perfect meringue that is golden brown on top and soft yet firm beneath is both an art and a science. That’s what makes this recipe so rewarding – the challenge of creating a perfect pie that delivers both in flavor and presentation.
Ingredients for Old-Fashioned Chocolate Pie with Golden Meringue
To make this classic pie, you’ll need to gather a few essential ingredients. Don’t worry – nothing too exotic here. The ingredients are staples you likely already have in your kitchen. Here’s a detailed list to help you prepare:
For the Chocolate Filling:
- Whole milk: The creamy base of the chocolate filling, ensuring a smooth and silky texture.
- Granulated sugar: Sweetens the filling to balance the rich, deep flavor of the chocolate.
- Cocoa powder: The key ingredient to creating that deep chocolate flavor. Use a high-quality unsweetened cocoa powder for the best taste.
- Cornstarch: Thickens the filling, giving it the right consistency without being too runny.
- Salt: Just a pinch to enhance the flavors of the chocolate and balance the sweetness.
- Egg yolks: These add richness to the filling and help create a smooth, velvety texture.
- Butter: Adds richness and a luxurious feel to the chocolate.
- Vanilla extract: The hint of vanilla enhances the chocolate and brings all the flavors together.
For the Meringue:
- Egg whites: The main ingredient in the meringue, providing the light, airy texture that contrasts with the rich chocolate.
- Cream of tartar: Helps stabilize the egg whites, ensuring the meringue holds its shape and doesn’t collapse.
- Sugar: Sweetens the meringue, giving it the right texture and slight crunch on top.
- Vanilla extract: Enhances the flavor of the meringue.
How Much Time Will You Need
Making Old-Fashioned Chocolate Pie with Golden Meringue is an investment in time, but the results are well worth it. Here’s a rough breakdown of the time required to prepare and bake the pie:
- Preparation time: 30 minutes
- Cook time: 25 minutes for the filling and 10 minutes for the meringue.
- Chilling time: 2-3 hours for the pie to fully set before serving.
This means you’ll need about 3 hours total, including cooling and chilling time. While the pie does require a bit of patience, it’s the kind of recipe where the end result is so satisfying that every minute feels like it’s worth it.
How to Make This Old-Fashioned Chocolate Pie with Golden Meringue
Let’s get to the fun part – the step-by-step guide! Below, I’ll walk you through each phase of making this dessert.
Step 1: Prepare the Pie Crust
If you’re using a store-bought pie crust, bake it according to package instructions. If you’re making your own, roll out your dough and fit it into a pie dish. Bake it at 375°F for 10-12 minutes or until it’s golden brown. Let it cool while you prepare the filling.
Step 2: Make the Chocolate Filling
- In a medium saucepan, whisk together the whole milk, granulated sugar, cocoa powder, cornstarch, and salt over medium heat.
- Cook, whisking constantly, until the mixture begins to thicken and bubbles gently, about 5-7 minutes.
- In a separate bowl, whisk together the egg yolks. Gradually pour a small amount of the hot cocoa mixture into the yolks to temper them, stirring constantly to avoid curdling.
- Slowly add the egg yolk mixture back into the saucepan with the remaining cocoa mixture. Continue to cook for another 2-3 minutes until it becomes even thicker.
- Remove from heat and stir in the butter and vanilla extract. Mix until the butter has melted and the filling is smooth.
- Pour the chocolate filling into the cooled pie crust and set aside while you prepare the meringue.
Step 3: Prepare the Meringue
- In a clean, dry mixing bowl, beat the egg whites and cream of tartar on medium-high speed until soft peaks form.
- Gradually add the sugar, a tablespoon at a time, beating constantly until stiff peaks form. This will take about 5-7 minutes.
- Spread the meringue evenly over the chocolate filling, making sure it touches the edges of the crust to seal it.
Step 4: Bake the Pie
- Preheat your oven to 350°F (175°C).
- Bake the pie for 8-10 minutes or until the meringue is golden brown. Keep a close eye on it to avoid over-browning.
- Once done, remove the pie from the oven and allow it to cool for about 30 minutes on the counter. Then, place it in the refrigerator to chill for 2-3 hours to set completely.
Substitutions
This recipe is quite versatile, and if you don’t have all the ingredients on hand, here are a few substitutions you can try:
- Cornstarch: If you don’t have cornstarch, you can substitute it with an equal amount of all-purpose flour. This will still thicken the filling but may alter the texture slightly.
- Whole milk: For a creamier filling, you can use heavy cream or half-and-half instead of whole milk. This will give the pie a richer taste.
- Butter: If you’re looking for a dairy-free version, you can substitute butter with a dairy-free margarine or coconut oil.
- Eggs: If you need an egg-free meringue, you can use aquafaba (the liquid from canned chickpeas) as a substitute for the egg whites. Just whip it to stiff peaks as you would with egg whites.
Best Side Dishes for Old-Fashioned Chocolate Pie with Golden Meringue
To complement the rich flavors of this dessert, here are three side dishes that pair beautifully with the chocolate pie:
- Fresh Berry Salad: A light and refreshing side to balance the sweetness of the pie. The tartness of fresh berries such as raspberries, strawberries, and blueberries offers a pleasant contrast.
- Vanilla Ice Cream: A scoop of vanilla ice cream adds a creamy, cool element that pairs perfectly with the warm, rich chocolate filling.
- Whipped Cream: A dollop of fresh, lightly sweetened whipped cream brings an extra touch of decadence without overpowering the pie.
Serving and Presentation Tips
When it comes to serving Old-Fashioned Chocolate Pie with Golden Meringue, presentation is just as important as the flavor. This dessert has a beautiful, rustic charm, but with a few presentation tips, you can take it to the next level.
- Serve in Style: After chilling the pie for a few hours, remove it from the fridge and slice it carefully using a sharp knife dipped in warm water. This will help ensure smooth slices, keeping the meringue intact.
- Garnish with Chocolate Shavings: To enhance the visual appeal and add an extra layer of flavor, consider sprinkling some finely grated chocolate or chocolate curls over the meringue just before serving.
- Add a Fresh Touch: A light drizzle of chocolate sauce or a few fresh mint leaves can add a pop of color and contrast against the golden meringue.
- Pie Stand or Cake Plate: For an elegant touch, serve the pie on a decorative cake stand or pie plate. This gives it a professional look that’s perfect for family gatherings or special occasions.
Remember, the beauty of this pie lies in its simplicity, so don’t overdo the garnishes. A subtle, thoughtful presentation will let the rich chocolate and delicate meringue shine.
Tips and Tricks to Make This Recipe Better
Here are a few extra tips to ensure your Old-Fashioned Chocolate Pie with Golden Meringue turns out perfectly every time:
- Chill the Pie Crust: Before baking your pie crust, make sure to chill it for 20-30 minutes. This helps the dough maintain its structure during baking and results in a crispier crust.
- Achieving the Perfect Meringue: When whipping the egg whites, make sure your mixing bowl and beaters are completely clean and dry. Any trace of fat or water can prevent the egg whites from whipping to stiff peaks.
- Don’t Rush the Filling: Take your time to cook the chocolate filling. Whisk it continuously and carefully to avoid lumps and ensure a smooth consistency.
- Sweeten to Taste: If you like your chocolate filling a little less sweet, feel free to reduce the sugar by a tablespoon or two. The meringue is sweet enough to balance it out.
- Let the Pie Set: Although the temptation to dig into this pie immediately is strong, it’s important to let the pie chill and set for at least 2-3 hours. This allows the filling to firm up and makes it easier to slice.
These small tips can make a big difference in achieving the perfect chocolate pie with meringue. With a little attention to detail, you’ll impress everyone at your next gathering.
Common Mistakes to Avoid
While making Old-Fashioned Chocolate Pie with Golden Meringue can be straightforward, there are a few common mistakes you should watch out for:
- Under or Overbaking the Meringue: Keep a close eye on the meringue as it bakes. If it turns too brown or overcooked, it can become dry and unpleasant. Ideally, it should be a light golden color with a soft, airy texture.
- Not Tempering the Egg Yolks: When adding the hot chocolate mixture to the egg yolks, it’s essential to temper them slowly. Adding the hot liquid too quickly can cause the eggs to scramble, ruining the filling.
- Not Letting the Pie Cool Completely: Patience is key. If you cut into the pie too soon, the filling may still be runny. Always give the pie enough time to cool and set before serving.
- Using Room Temperature Egg Whites for Meringue: Egg whites whip up best when they’re at room temperature. If you forget to bring them out before starting the recipe, they may not reach their full volume.
- Skipping the Chilling Step: The pie needs to chill for several hours for the filling to fully set. Skipping this step may result in a runny filling that’s hard to slice.
Avoiding these common mistakes will make your pie-making experience much smoother and help ensure that your dessert turns out just like the one you envisioned.
How to Store It
If you find yourself with leftover pie or want to make it ahead of time, here’s how to store your Old-Fashioned Chocolate Pie with Golden Meringue:
- Refrigerate: Always store the pie in the refrigerator, especially since the filling contains milk and eggs. It should be kept covered with plastic wrap or in an airtight container to prevent it from absorbing any unwanted odors in the fridge.
- Storage Duration: The pie can be stored for up to 2-3 days in the fridge. However, the meringue may start to lose its texture and become less crisp the longer it sits.
- Freezing: While freezing isn’t ideal for the meringue (it may lose its texture), you can freeze the chocolate filling separately. If you’re freezing the whole pie, wrap it tightly in plastic wrap and foil. To serve, let it thaw in the refrigerator for a few hours before serving.
For the freshest flavor and best texture, it’s best to enjoy this pie within a day or two after making it. But if you need to store it longer, the refrigerator is your best bet.
FAQ
1. Can I use a store-bought pie crust for this recipe?
Yes! If you’re short on time or prefer convenience, a store-bought pie crust works perfectly for this recipe. Just be sure to bake it according to package instructions before adding the filling.
2. Can I use dark chocolate instead of cocoa powder?
Yes, you can substitute cocoa powder with melted dark chocolate, but be sure to adjust the amount. Use about 4 oz of dark chocolate for every 1/2 cup of cocoa powder.
3. Can I make this pie in advance?
Absolutely! This pie can be made up to a day ahead. Just store it in the refrigerator to allow the filling to fully set and prevent the meringue from becoming soggy.
4. Why did my meringue shrink or weep?
Meringue can shrink or weep if it’s not cooked properly or if the egg whites were under-beaten. Be sure to beat the egg whites until stiff peaks form and bake the pie until the meringue is golden brown.
5. Can I make the meringue without cream of tartar?
While cream of tartar helps stabilize the meringue and gives it volume, you can skip it in a pinch. Just be sure to beat the egg whites well and use a little lemon juice or vinegar as an alternative stabilizer.

Old-Fashioned Chocolate Pie with Golden Meringue: A Timeless Classic
- Total Time: 3 hours (including chilling)
- Yield: 8 1x
- Diet: Vegetarian
Description
This classic dessert features a silky chocolate filling topped with a fluffy, golden meringue. It’s the perfect treat for holidays or family gatherings, with its perfect balance of sweetness and texture.
Ingredients
- 1 prepared pie crust (store-bought or homemade)
- 2 cups whole milk
- 3/4 cup granulated sugar
- 1/2 cup unsweetened cocoa powder
- 1/4 cup cornstarch
- Pinch of salt
- 3 large egg yolks
- 2 tablespoons butter
- 1 teaspoon vanilla extract
- 3 large egg whites
- 1/4 teaspoon cream of tartar
- 1/2 cup granulated sugar
- 1 teaspoon vanilla extract
Instructions
- Preheat the oven to 350°F (175°C).
- Prepare your pie crust and bake it according to instructions, then set aside.
- For the filling, whisk together milk, sugar, cocoa powder, cornstarch, and salt in a saucepan. Cook over medium heat, whisking constantly, until the mixture thickens.
- Temper the egg yolks by slowly adding some of the hot mixture into the yolks, then whisk the yolks back into the saucepan.
- Cook for another 2-3 minutes, then stir in butter and vanilla. Pour into the prepared crust.
- For the meringue, beat egg whites with cream of tartar until soft peaks form. Gradually add sugar until stiff peaks form. Spread over the chocolate filling.
- Bake for 8-10 minutes, or until the meringue is golden.
- Let cool for 30 minutes, then refrigerate for 2-3 hours before serving.
Notes
- Chill the pie for at least 2-3 hours to allow the filling to set.
- For best results, store the pie in the fridge and consume within 2-3 days.
- Prep Time: 30 minutes
- Cook Time: 25 minutes
- Category: Dessert
- Method: Baking
- Cuisine: American
Nutrition
- Serving Size: 8
- Calories: 300
- Sugar: 28g
- Sodium: 85mg
- Fat: 14g
- Saturated Fat: 5g
- Unsaturated Fat: 9g
- Trans Fat: 0g
- Carbohydrates: 38g
- Fiber: 2g
- Protein: 4g
- Cholesterol: 80mg