There’s something truly magical about a cheesecake that doesn’t require an oven — no heat, no hassle, just pure creamy bliss. I created this no bake cherry cheesecake recipe because I wanted a dessert that’s both elegant and easy to prepare, especially for those busy days when you crave something sweet but don’t want to turn on the oven.
Plus, cherries and cheesecake are a classic match made in dessert heaven. The tartness of the cherries perfectly balances the richness of the cheesecake filling. If you’re someone who loves quick but impressive desserts, or if you’re new to cheesecake-making and want to start simple, this recipe is for you.
Keep reading — I promise, once you try this, it might just become your go-to dessert for gatherings, special occasions, or just a little self-indulgence.
Why I Love This Recipe

What makes this no bake cherry cheesecake truly special is its simplicity combined with an irresistible flavor. Unlike traditional baked cheesecakes that require hours of baking and cooling, this one is ready in no time, allowing you to enjoy the creamy texture without waiting forever.
The smooth cream cheese filling mixed with whipped cream results in a light and airy consistency that melts in your mouth. The cherry topping adds a burst of natural sweetness and a beautiful pop of color, making the cheesecake both delicious and visually stunning.
I also love that it’s forgiving. You don’t have to be an expert baker to make it — anyone can follow these steps and end up with a dessert that tastes like it came from a fancy bakery.
So, whether you’re preparing a last-minute treat for guests or looking for a dessert that’s kid-friendly, this no bake cherry cheesecake checks all the boxes. It’s refreshing, creamy, and the perfect balance between sweet and tart.
Ingredients for No Bake Cherry Cheesecake
To make this dessert, you’ll need just a handful of ingredients that you can easily find in most grocery stores or even in your pantry.
The base is a simple graham cracker crust, made with crushed graham crackers, butter, and a little sugar. This crust adds a satisfying crunch and buttery flavor that complements the creamy filling.
For the filling, cream cheese is the star — softened to make it smooth and creamy. It’s combined with powdered sugar to sweeten it gently and vanilla extract for that extra warmth of flavor. Whipped cream (or heavy cream whipped to soft peaks) is folded in to lighten the texture, making the cheesecake delightfully fluffy.
Finally, the crowning glory is the cherry topping. You can use store-bought cherry pie filling or make your own fresh cherry topping by simmering fresh or frozen cherries with a little sugar and lemon juice.
Every ingredient plays an essential role in making this no bake cherry cheesecake so delicious. Using quality cream cheese and fresh cherries will elevate the flavor to the next level.
How Much Time Will You Need
One of the biggest perks of this no bake cherry cheesecake is how quickly it comes together.
Preparation takes about 20 minutes — that’s from crushing the crust to folding the filling and assembling everything.
After that, the cheesecake needs to chill in the refrigerator for at least 4 hours, or ideally overnight. This resting time helps the crust set firmly and allows the flavors to meld together perfectly.
So while active prep time is minimal, you should plan ahead to give the cheesecake enough time to chill and set.
How to Make This No Bake Cherry Cheesecake
Step – 1: Prepare the crust
Start by crushing graham crackers into fine crumbs. You can do this by placing them in a sealed plastic bag and crushing with a rolling pin or by pulsing in a food processor.
Mix the crumbs with melted butter and a little sugar until well combined. Press this mixture firmly into the bottom of a springform pan or any pie dish. Use the back of a spoon to smooth it out evenly.
Pop the crust into the fridge to chill while you prepare the filling.
Step – 2: Make the cheesecake filling
In a large mixing bowl, beat the softened cream cheese until smooth and creamy. Add powdered sugar and vanilla extract, and continue beating until well incorporated.
In a separate bowl, whip the heavy cream until soft peaks form.
Gently fold the whipped cream into the cream cheese mixture using a spatula. Take care not to deflate the airy texture.
Step – 3: Assemble the cheesecake
Pour the creamy filling over the chilled crust, spreading it out evenly with a spatula.
Refrigerate the cheesecake for at least 4 hours or overnight to allow it to firm up.
Step – 4: Add the cherry topping
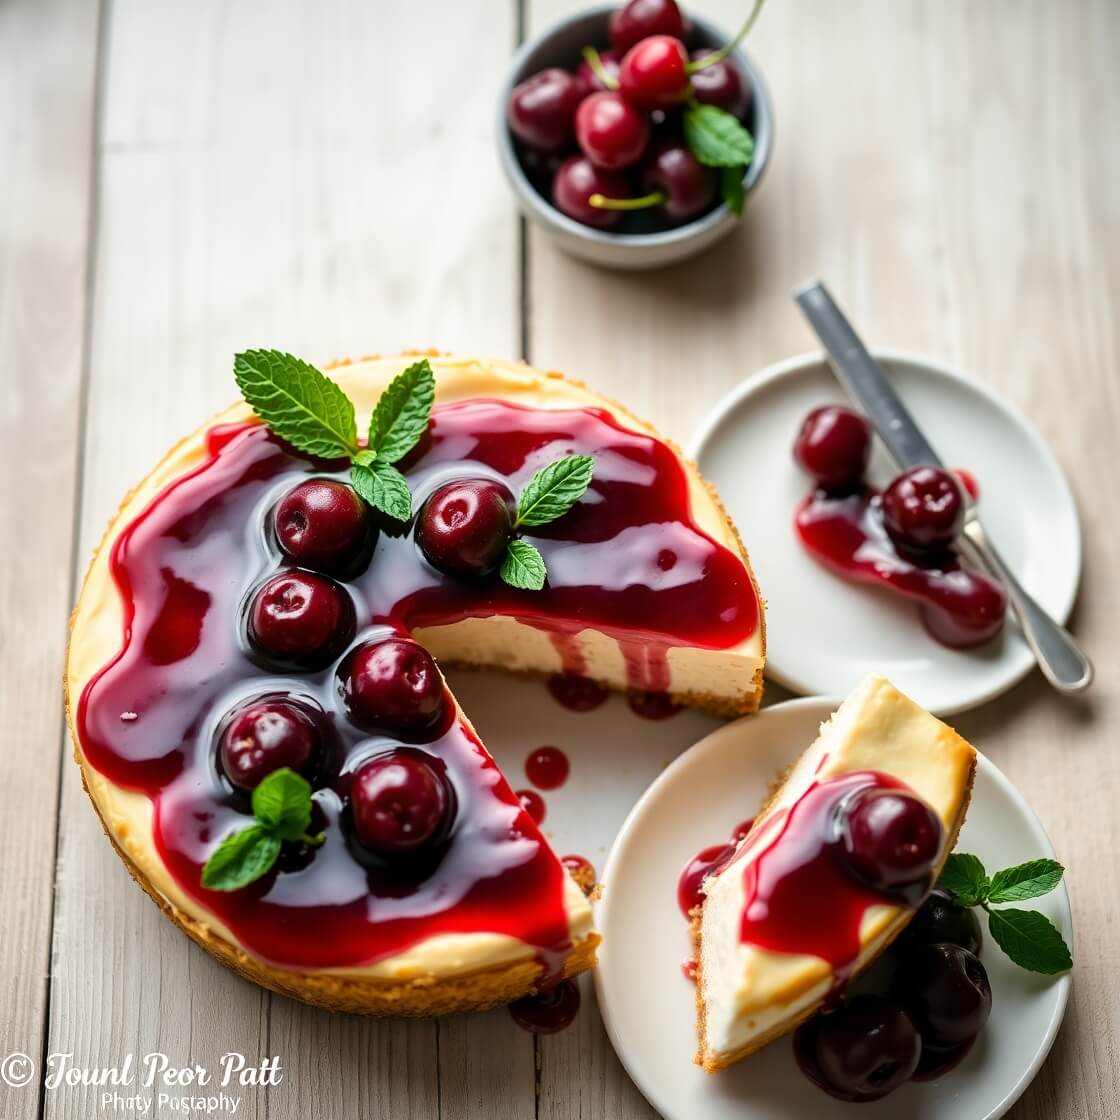
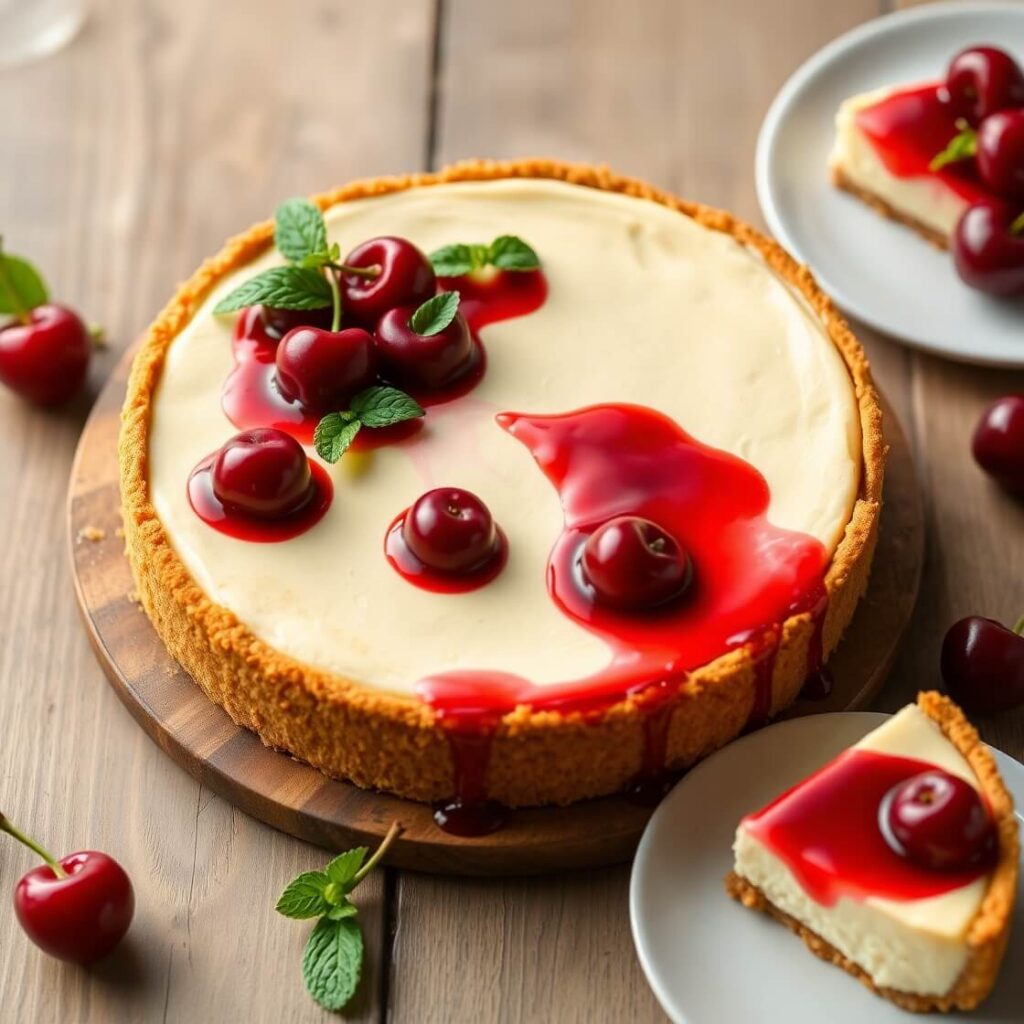
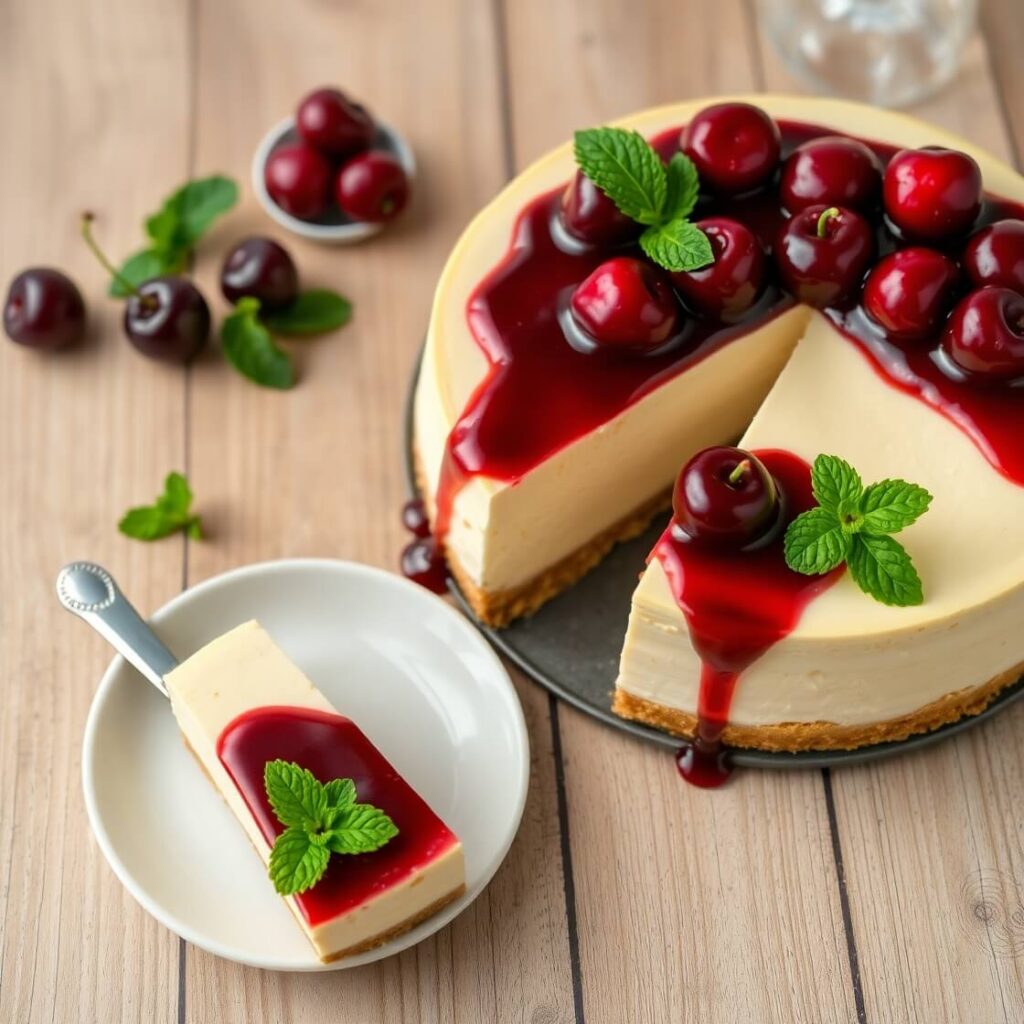
Before serving, spoon cherry pie filling over the cheesecake. Spread it evenly or leave it slightly rustic for a more homemade look.
Step – 5: Serve and enjoy
Slice the cheesecake using a sharp knife dipped in hot water to get clean cuts. Serve chilled for the best texture and flavor.
Substitutions
If you want to customize or adjust this recipe, there are several substitutions that work beautifully.
For the crust, you can swap graham crackers with digestive biscuits, vanilla wafers, or even crushed pretzels if you want a salty-sweet twist.
If you’re dairy-free or prefer a lighter version, try using vegan cream cheese and coconut cream whipped to peaks instead of heavy cream.
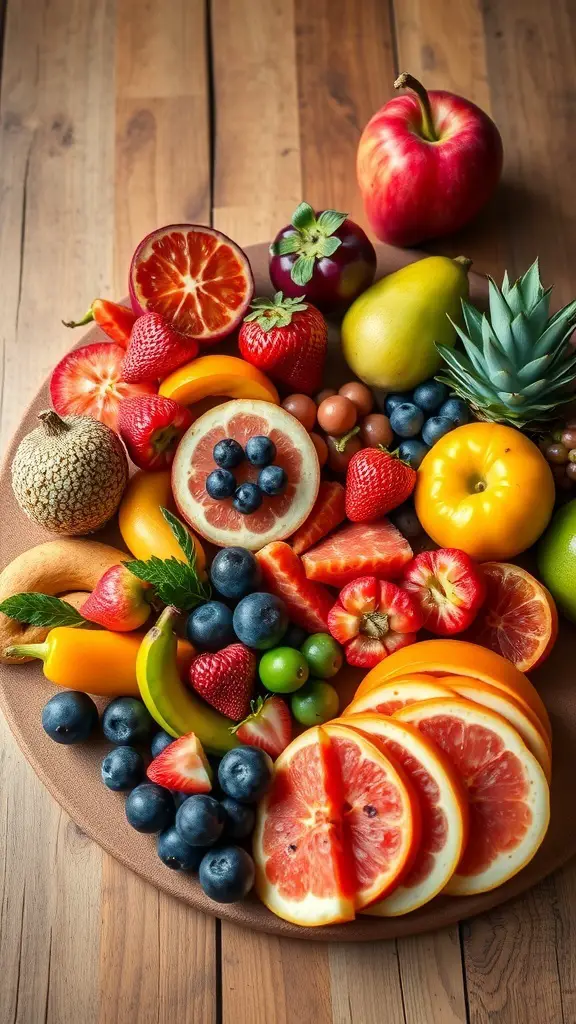
For the cherry topping, fresh cherries cooked down with a little sugar and lemon juice work just as well and give you control over the sweetness. You can even try other fruit toppings like blueberries, raspberries, or mixed berries for a different flavor profile.
If powdered sugar isn’t available, you can substitute it with superfine granulated sugar, but be sure to mix it well to avoid graininess.
Best Side Dishes for No Bake Cherry Cheesecake
To make your cheesecake experience even more delightful, consider pairing it with some simple, complementary sides.
Freshly brewed coffee or espresso is always a classic match, cutting through the richness of the cheesecake.
A scoop of vanilla ice cream on the side adds extra indulgence without overpowering the cherry flavor.
Lightly toasted almonds or pecans sprinkled over the top or on the side can add a satisfying crunch and nutty contrast.
Serving and Presentation Tips
Serving a no bake cherry cheesecake is a chance to showcase its beautiful layers and vibrant colors. To impress your guests or simply elevate your dessert experience, consider these simple presentation tips.
First, use a clean, sharp knife dipped in warm water to slice the cheesecake. This technique prevents the filling from sticking and helps you achieve neat, elegant slices.
Arrange each slice on a dessert plate and add a few whole cherries or fresh mint leaves on the side for a fresh, eye-catching garnish.
You can also drizzle a little extra cherry syrup or a light dusting of powdered sugar on top for a professional finish.
If you’re serving at a party, placing the whole cheesecake on a cake stand adds height and presence to your dessert table, making it the centerpiece of your spread.
Tips and Tricks to Make This Recipe Even Better
To elevate your no bake cherry cheesecake even further, here are some tips I’ve learned from experience.
Make sure the cream cheese is softened to room temperature before you begin. This will make the mixing process smoother and ensure a silky texture.
When whipping the cream, avoid over-whipping. Stop as soon as soft peaks form to keep the filling light and airy.
Press the crust firmly into the pan so it sets well and holds together when sliced.
If you want an extra layer of flavor, try folding in a teaspoon of lemon zest or a splash of almond extract into the filling. Both add a subtle brightness that pairs wonderfully with cherries.
Chill the cheesecake overnight if possible — it really helps the flavors meld and the texture firm up for a perfect slice.
Common Mistakes to Avoid
The biggest mistake is rushing the chilling time. If you don’t give the cheesecake enough time to set, it will be too soft and won’t slice nicely.
Another common pitfall is not softening the cream cheese enough. This can result in lumps in the filling that detract from the smooth, creamy texture.
Be careful not to over-whip the cream — over-whipping can cause it to turn grainy or separate, ruining the lightness of the filling.
Also, don’t skimp on pressing the crust firmly. A loose crust will crumble when cutting or serving.
Finally, avoid adding too much cherry topping before chilling. The moisture from the topping can seep into the crust and make it soggy. It’s best to add the cherries right before serving.
How to Store It
No bake cherry cheesecake keeps well in the refrigerator for up to 3-4 days. Store it in an airtight container or cover it tightly with plastic wrap to prevent it from absorbing other fridge odors.
If you want to prepare it in advance, you can assemble it without the cherry topping and add that fresh just before serving.
Avoid freezing the cheesecake as the texture may become grainy and the crust soggy when thawed.
When storing, keep the cheesecake chilled and serve it cold for the best taste and texture.
Frequently Asked Questions
Can I use fresh cherries instead of canned cherry pie filling?
Absolutely! You can simmer fresh or frozen cherries with a bit of sugar and lemon juice until they thicken slightly, then cool before topping the cheesecake.
Can I make this cheesecake gluten-free?
Yes, just swap the graham cracker crust for gluten-free graham crackers or crushed gluten-free cookies.
Is this recipe suitable for vegans?
This version is not vegan, but you can try using vegan cream cheese and coconut cream whipped to peaks to create a similar texture.
Can I use whipped topping instead of heavy cream?
Whipped topping can work in a pinch, but it might make the filling a bit less stable and fluffy.
How long does the cheesecake last?
Stored properly in the fridge, it lasts 3-4 days best. Avoid freezing.

No Bake Cherry Cheesecake
- Total Time: 4 hours 20 minutes
- Yield: 8 1x
- Diet: Vegetarian
Description
This no bake cherry cheesecake is a creamy, dreamy dessert that comes together quickly without turning on the oven. With a buttery graham cracker crust, a luscious cream cheese filling folded with whipped cream, and a bright cherry topping, it’s a perfect balance of flavors and textures. Ideal for warm days, last-minute guests, or anyone looking for an effortless yet impressive dessert. Enjoy a classic favorite with minimal fuss!
Ingredients
- 1 1/2 cups graham cracker crumbs
- 1/4 cup granulated sugar
- 6 tablespoons unsalted butter, melted
- 16 oz (450 g) cream cheese, softened
- 1 cup powdered sugar
- 1 teaspoon vanilla extract
- 1 cup heavy whipping cream
- 1 cup cherry pie filling (or fresh cherry topping)
Instructions
- Combine graham cracker crumbs, sugar, and melted butter in a bowl. Press firmly into the bottom of a springform pan or pie dish. Chill.
- Beat softened cream cheese until smooth. Add powdered sugar and vanilla, mix well.
- Whip heavy cream to soft peaks. Fold into cream cheese mixture gently.
- Spread filling over crust evenly. Refrigerate 4+ hours.
- Top with cherry pie filling before serving.
Notes
- For best results, chill overnight.
- Use softened cream cheese to avoid lumps.
- Add lemon zest to filling for extra brightness.
- Use fresh cherry topping for a homemade touch.
- Prep Time: 20 minutes
- Cook Time: 4 hours (minimum)
- Category: Dessert
- Method: No Bake
- Cuisine: American
Nutrition
- Serving Size: 8
- Calories: 350
- Sugar: 28g
- Sodium: 150mg
- Fat: 24g
- Saturated Fat: 14g
- Unsaturated Fat: 8g
- Trans Fat: 0g
- Carbohydrates: 30g
- Fiber: 1g
- Protein: 4g
- Cholesterol: 70mg