There are days when I want dessert without turning the oven on, without planning ahead, and without committing to a full-sized cake that stares at me from the fridge for days. That’s usually when these no bake cheesecake cups happen.
The first time I made them, it was a quiet afternoon, the kind where everyone is hungry but no one wants anything “heavy.” I remember scraping the last bit of cream cheese from the bowl and thinking this felt too easy to be this good. When I handed out the cups later that night, there was that familiar pause after the first spoonful. You know the one. No talking, just nodding.
These cheesecake cups are creamy, light, and surprisingly satisfying. They feel a little fancy because they’re served in individual cups, but the process itself is relaxed and forgiving. No water baths. No cracked tops. No stress.
If you’ve ever wanted cheesecake flavor without the baking drama, this is the kind of recipe that slips into your routine and stays there. It’s simple, comforting, and adaptable, which is probably why I keep coming back to it.
Why I Love This Recipe
What I love most about these no bake cheesecake cups is how effortlessly they deliver that classic cheesecake experience. You still get the creamy richness, the slight tang from the cream cheese, and the buttery crumb base, but without the long wait or technical steps that baked cheesecakes demand.

This recipe works beautifully because it respects real life. You don’t need special equipment, fancy techniques, or hours of patience. Everything comes together in a few bowls, and the texture is incredibly forgiving. If your cream isn’t whipped perfectly stiff or your crumbs aren’t perfectly even, the dessert still turns out lovely.
Another reason this recipe stands out is its versatility. You can dress it up for guests with fruit, sauces, or chocolate, or keep it plain for a quiet night dessert. It scales easily, making it just as suitable for a single craving as it is for a small gathering.
I also love that it feels lighter than traditional cheesecake. Because it’s portioned into cups, it satisfies without feeling overwhelming. People finish one cup and feel content, not weighed down. That’s a rare quality in desserts that taste this indulgent.
Most importantly, this recipe invites confidence. It’s the kind of dessert that makes someone think, “I can actually do this,” and that feeling alone makes it special.
Ingredients for No Bake Cheesecake Cups
The ingredient list is short, but each item has a clear purpose, which is what makes this recipe shine.
Cream cheese is the heart of the cheesecake layer. I always use full-fat cream cheese because it gives the best texture and flavor. Letting it soften fully before mixing is crucial. Cold cream cheese will fight you and create lumps, while softened cream cheese blends smoothly and effortlessly.
Heavy cream is what gives these cups their light, airy structure. When whipped and folded into the cream cheese mixture, it creates that classic cheesecake mousse-like texture. This isn’t something you want to rush. Properly whipped cream makes all the difference between dense and dreamy.
Sugar sweetens the filling, but it also balances the tang of the cream cheese. I prefer powdered sugar here because it dissolves easily and keeps the texture silky. Granulated sugar can work, but it needs more mixing time.
Vanilla extract adds warmth and depth. It’s subtle, but without it, the cheesecake tastes flat. A good-quality vanilla really shows up in a simple recipe like this.
For the base, crushed graham crackers bring that familiar cheesecake crunch. Mixed with melted butter, they create a soft but structured layer that anchors the creamy filling. The butter holds everything together and adds richness.
A pinch of salt might seem small, but it’s essential. It sharpens the sweetness and makes all the flavors pop.
Together, these ingredients create a dessert that tastes complex while staying wonderfully approachable.
How Much Time Will You Need
This is one of those recipes that fits neatly into a busy day.
Active preparation time is about twenty minutes. That includes crushing the crackers, whipping the cream, and mixing the filling.
After assembling the cups, they need time in the refrigerator to set. Two to three hours is ideal, though they’re often spoonable sooner if you’re impatient. The chilling time allows the layers to firm up and the flavors to settle into each other.
From start to finish, you’re looking at under three hours total, most of which is hands-off. It’s the kind of dessert you can make in the afternoon and forget about until dinner.
How to Make This No Bake Cheesecake Cups
Step – 1: Prepare the base
Start by crushing the graham crackers until they resemble fine crumbs. You can do this in a food processor or by placing them in a bag and gently rolling with a rolling pin. Transfer the crumbs to a bowl, add the melted butter, and mix until the texture looks like damp sand. Spoon the mixture into serving cups and press it down lightly to create an even base. Place the cups in the refrigerator while you prepare the filling.
Step – 2: Whip the cream
Pour the cold heavy cream into a clean bowl and whip it until soft peaks form. You’re looking for a texture that holds its shape but still looks smooth and plush. Over-whipping will make it grainy, so stop as soon as it thickens.
Step – 3: Mix the cheesecake filling
In another bowl, beat the softened cream cheese until smooth and lump-free. Add the powdered sugar, vanilla extract, and salt, and continue mixing until everything is well combined. Take your time here. A smooth base leads to a smoother final texture.
Step – 4: Combine gently
Fold the whipped cream into the cream cheese mixture in two or three additions. Use a gentle hand and a spatula, turning the mixture over itself rather than stirring. This keeps the filling light and airy.
Step – 5: Assemble the cups
Spoon or pipe the cheesecake mixture over the chilled crusts. Smooth the tops lightly, then return the cups to the refrigerator to set. Let them chill until firm and cold before serving.
Substitutions
One of the strengths of this recipe is how flexible it is.
If you don’t have graham crackers, digestive biscuits or vanilla cookies work just as well. Each brings its own subtle flavor, which can change the personality of the dessert in a nice way.
For a slightly lighter version, you can use reduced-fat cream cheese, though the texture will be softer. It’s still delicious, just less rich.
If powdered sugar isn’t available, granulated sugar can be used, but it should be beaten thoroughly into the cream cheese to avoid graininess.
You can also play with flavor by adding lemon zest, a splash of coffee, or a swirl of melted chocolate into the filling. These small changes make the recipe feel new without complicating it.
Best Side Dish of No Bake Cheesecake Cups
Fresh berry salad pairs beautifully with the creamy texture and adds a refreshing contrast.
A small plate of butter cookies or shortbread complements the cheesecake without overpowering it.
Lightly sweetened whipped cream with a hint of vanilla makes a simple but elegant addition on the side.
Serving and Presentation Tips
This is the part where no bake cheesecake cups really get to shine.
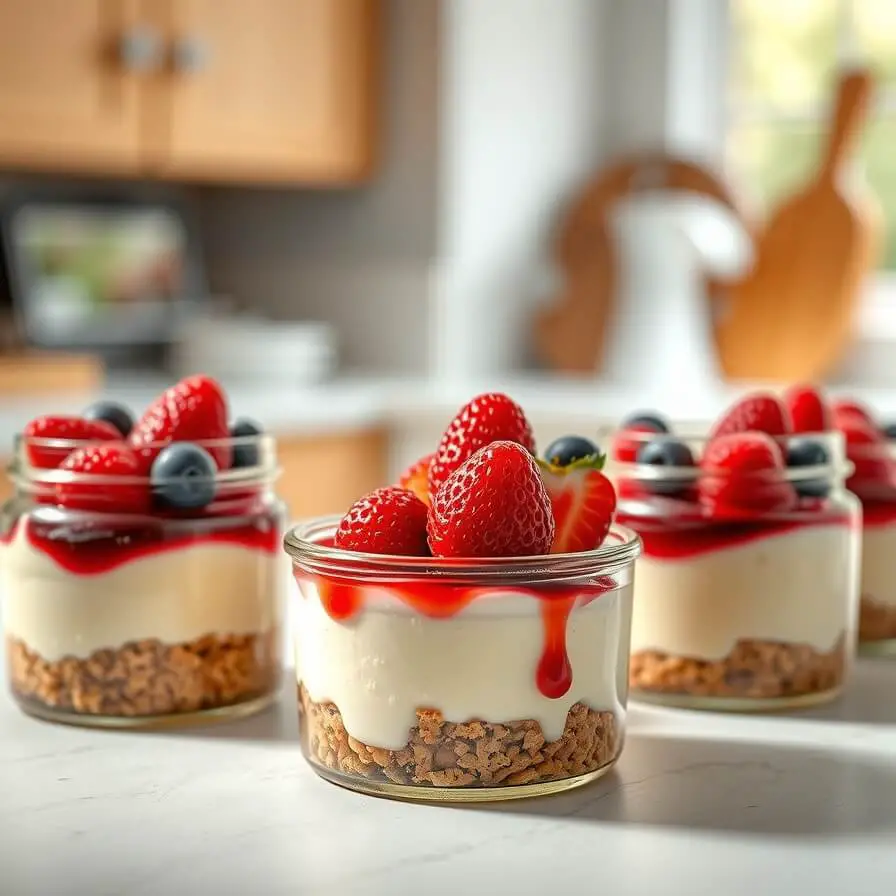
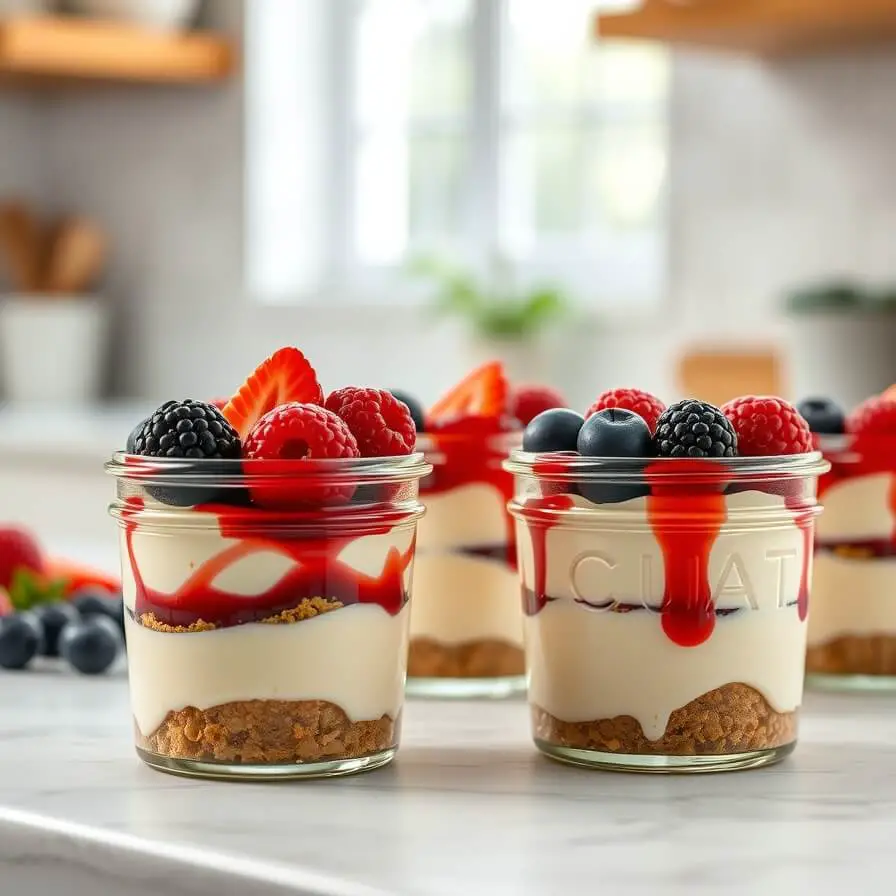
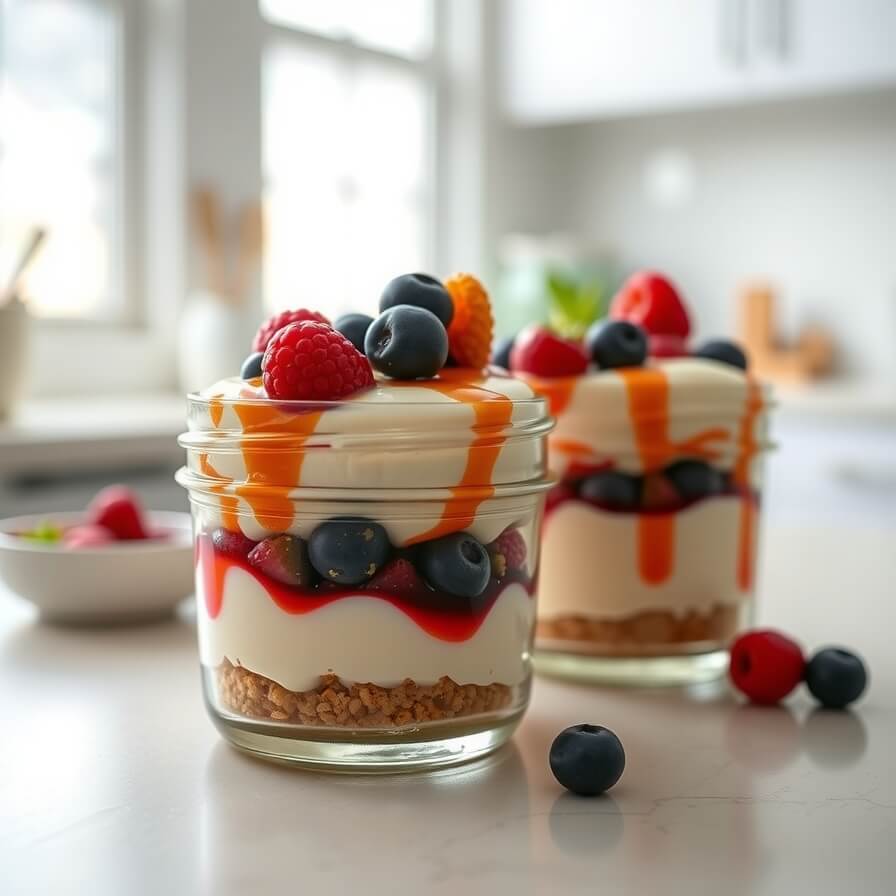
Because they’re served individually, presentation becomes effortless. Clear glass cups or jars are my favorite because you can see the layers, and that visual contrast between crumb base and creamy filling already does most of the work for you.
Before serving, I like to wipe the rims of the cups clean so everything looks neat and intentional. A simple topping added right before serving makes them feel special without adding effort. Fresh berries, a spoonful of fruit compote, or a light drizzle of chocolate sauce instantly elevate the dessert.
If you’re serving guests, chilling the cups well is key. Cold cheesecake holds its shape better and tastes cleaner and more refreshing. For a more elegant finish, you can pipe the filling using a piping bag instead of spooning it in. That extra detail makes a big visual impact, especially for dinner parties or holidays.
These cups don’t need heavy decoration. Their charm is in their simplicity. Let the creamy texture and clean layers speak for themselves.
Tips and Tricks to Make This Recipe Better
A few small details can take these cheesecake cups from good to unforgettable.
Always start with fully softened cream cheese. This one step prevents lumps and saves you from over-mixing later. If you rush this, the texture will never be quite right.
Chill your mixing bowl before whipping the cream. Cold equipment helps the cream whip faster and hold its structure better, which gives the final cheesecake a lighter feel.
Taste the filling before assembling. Everyone’s sweetness preference is different, and this is your moment to adjust. A little more sugar or a touch more vanilla can make the recipe feel perfectly tailored.
Let the cups chill longer if you can. While they’re technically ready after a couple of hours, overnight chilling deepens the flavor and improves the texture.
Lastly, don’t overwork the mixture once the cream is folded in. Gentle folding keeps everything airy and smooth.
Common Mistakes to Avoid
One common mistake is using cream cheese straight from the fridge. Cold cream cheese leads to lumps, and trying to fix them usually means over-mixing.
Another issue is over-whipping the cream. Once cream becomes grainy, it won’t fold smoothly into the cheesecake mixture, and the texture will suffer.
Skipping the chilling time is also tempting but risky. The cups need time to set, and serving them too soon can result in a loose, messy dessert.
Using too much butter in the crust can make it greasy rather than structured. The crumbs should hold together lightly, not feel soaked.
Avoid these pitfalls, and the recipe becomes almost foolproof.
How to Store It
These no bake cheesecake cups store beautifully, which makes them ideal for make-ahead desserts.
Cover each cup tightly with plastic wrap or store them in an airtight container in the refrigerator. They stay fresh for up to three days without losing texture or flavor.
If you’ve added fresh fruit on top, it’s best to do that just before serving. Toppings added too early can release moisture and soften the cheesecake layer.
Freezing is possible, but the texture changes slightly once thawed. If you do freeze them, wrap each cup well and thaw slowly in the refrigerator overnight.
FAQ
Can I make these cheesecake cups ahead of time?
Yes, they’re perfect for making ahead. In fact, they taste even better after a full night in the refrigerator.
Can I use low-fat cream cheese?
You can, but the texture will be softer and less rich. Full-fat cream cheese gives the best result.
Do these cups need gelatin to set?
No gelatin is needed. The whipped cream and chilling time provide enough structure.
Can I add flavors to the cheesecake filling?
Absolutely. Lemon zest, cocoa powder, or even a swirl of caramel can be mixed in without changing the base recipe.
What can I use instead of graham crackers?
Digestive biscuits, vanilla wafers, or even chocolate cookies work well as substitutes.
No Bake Cheesecake Cups Recipe
- Total Time: 2 hours 20 minutes
- Yield: 6 1x
- Diet: Vegetarian
Description
These no bake cheesecake cups are everything I want in a dessert when I don’t feel like baking. Creamy, lightly sweet, and perfectly portioned, they deliver classic cheesecake flavor with none of the stress. The buttery crumb base anchors the soft filling, while the chilled texture makes each bite feel refreshing rather than heavy. This recipe is ideal for beginners, busy days, or anytime you want something comforting yet elegant. Whether served plain or dressed up with toppings, these cheesecake cups are reliable, adaptable, and always crowd-pleasing.
Ingredients
- Cream cheese, softened
- Heavy cream
- Powdered sugar
- Vanilla extract
- Graham cracker crumbs
- Melted butter
- Salt
Instructions
- Prepare the crumb base and press it into serving cups.
- Whip the heavy cream until soft peaks form.
- Beat the cream cheese with sugar, vanilla, and salt until smooth.
- Fold the whipped cream gently into the cheesecake mixture.
- Spoon the filling over the crust and chill until set.
Notes
- For best results, chill overnight and add toppings just before serving. Always use softened cream cheese for a smooth filling.
- Prep Time: 20 minutes
- Cook Time: No cooking required
- Category: Dessert
- Method: No bake
- Cuisine: American
Nutrition
- Serving Size: 6
- Calories: 320
- Sugar: 18g
- Sodium: 210mg
- Fat: 24g
- Saturated Fat: 14g
- Unsaturated Fat: 9g
- Trans Fat: 0g
- Carbohydrates: 22g
- Fiber: 1g
- Protein: 5g
- Cholesterol: 75mg