Planning a gathering? Check out these 37+ cold appetizers that can be made ahead of time to keep stress at bay. Whether it’s a casual get-together or a fancy party, these tasty bites will impress your guests and let you enjoy the fun too.
Smoked Salmon and Cream Cheese Bites

Smoked salmon and cream cheese bites are a delightful addition to any party spread. They are simple yet elegant, making them perfect for impressing your guests without a lot of fuss. The combination of rich cream cheese and smoky salmon creates a flavor that’s hard to resist.
These bites are typically served on a base, like crackers or small toasts, topped with a generous dollop of cream cheese and a slice of smoked salmon. A sprinkle of fresh dill adds a pop of color and a hint of freshness. They look stunning on a platter, making them a visual treat as well.
Not only are they tasty, but they can also be made ahead of time. Just assemble them a few hours before your guests arrive, and you’ll have one less thing to worry about. Serve them chilled for the best experience!
Ingredients
- 8 ounces cream cheese, softened
- 8 ounces smoked salmon, sliced
- 1 tablespoon fresh dill, chopped
- 1 tablespoon lemon juice
- 1 package of mini crackers or toasted bread rounds
- Capers for garnish (optional)
Instructions
- In a bowl, mix the softened cream cheese, chopped dill, and lemon juice until smooth.
- Spread a layer of the cream cheese mixture onto each cracker or toast.
- Top with a slice of smoked salmon, folding it for a nice presentation.
- Garnish with a caper or a sprig of dill if desired.
- Chill in the refrigerator until ready to serve.
Chilled Shrimp Cocktail with Zesty Sauce
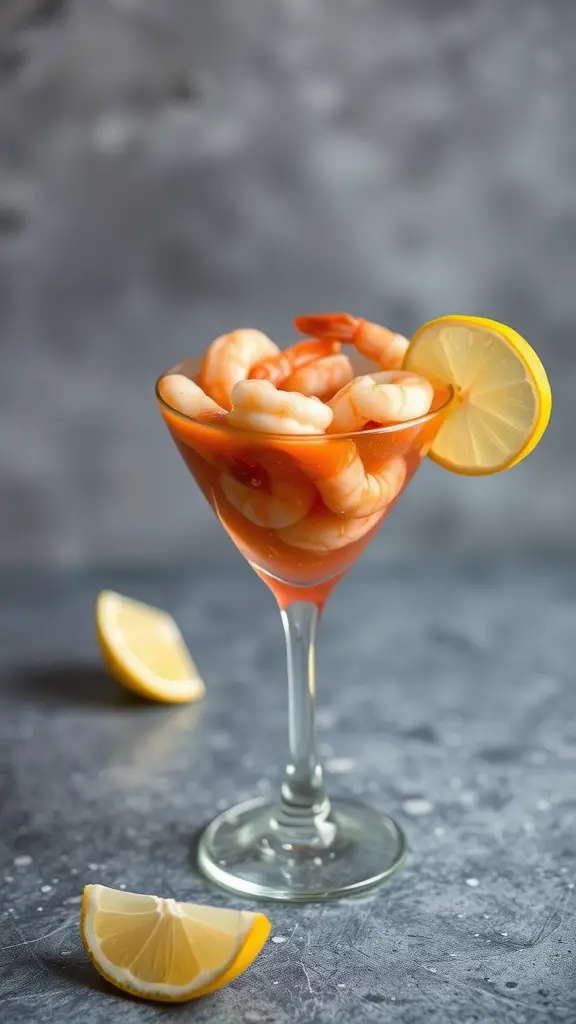
Chilled shrimp cocktail is a classic party appetizer that never fails to impress. The vibrant colors and fresh ingredients make it a standout dish. Picture a glass filled with succulent shrimp, garnished with a slice of lemon and a sprig of mint. The zesty sauce adds a delightful kick, making each bite refreshing and exciting.
This dish is perfect for gatherings, as it can be made ahead of time. Simply chill the shrimp and sauce, and serve them together for a stunning presentation. Pair it with a tangy cocktail sauce for dipping, and you have a crowd-pleaser on your hands.
Let’s get into the details of making this delicious chilled shrimp cocktail!
Ingredients
- 1 pound large shrimp, peeled and deveined
- 1 cup cocktail sauce
- 1 tablespoon lemon juice
- 1 teaspoon Worcestershire sauce
- 1 teaspoon hot sauce (optional)
- Lemon wedges for garnish
- Fresh mint leaves for garnish
Instructions
- Prepare the Shrimp: In a large pot, bring water to a boil. Add the shrimp and cook for about 2-3 minutes until they turn pink. Drain and immediately place them in an ice bath to stop the cooking process.
- Make the Zesty Sauce: In a bowl, mix the cocktail sauce, lemon juice, Worcestershire sauce, and hot sauce if using. Stir until well combined.
- Chill: Once the shrimp are cooled, drain them and pat dry. Place them in the refrigerator for at least 30 minutes to chill.
- Serve: Arrange the chilled shrimp in a glass or on a platter. Serve with the zesty sauce on the side, garnished with lemon wedges and mint leaves.
Crispy Vegetable Spring Rolls

Crispy vegetable spring rolls are a fantastic choice for any party. They are light, crunchy, and packed with fresh veggies. These rolls are not just tasty; they also look great on a platter, making them a hit with guests. The vibrant colors of the vegetables peek through the delicate wrappers, inviting everyone to take a bite.
Serving these rolls with a sweet and spicy dipping sauce adds an extra layer of flavor. The combination of textures and tastes makes them a delightful appetizer. Plus, they can be made ahead of time, so you can enjoy the party without spending all your time in the kitchen.
Ingredients
- 1 cup shredded carrots
- 1 cup shredded cabbage
- 1/2 cup bell peppers, thinly sliced
- 1/2 cup bean sprouts
- 1/4 cup green onions, chopped
- 1 tablespoon soy sauce
- 1 tablespoon sesame oil
- 1 package spring roll wrappers
- Oil for frying
- Sweet chili sauce for dipping
Instructions
- Prepare the Filling: In a large bowl, mix the carrots, cabbage, bell peppers, bean sprouts, green onions, soy sauce, and sesame oil. Toss until well combined.
- Wrap the Rolls: Take a spring roll wrapper and place a spoonful of the vegetable mixture near one edge. Fold the sides over the filling and roll tightly. Seal the edge with a little water.
- Fry the Rolls: Heat oil in a deep pan over medium heat. Fry the spring rolls in batches until golden brown and crispy, about 3-4 minutes per side. Drain on paper towels.
- Serve: Arrange the spring rolls on a platter with a bowl of sweet chili sauce for dipping. Enjoy!
Bruschetta with Tomato and Basil
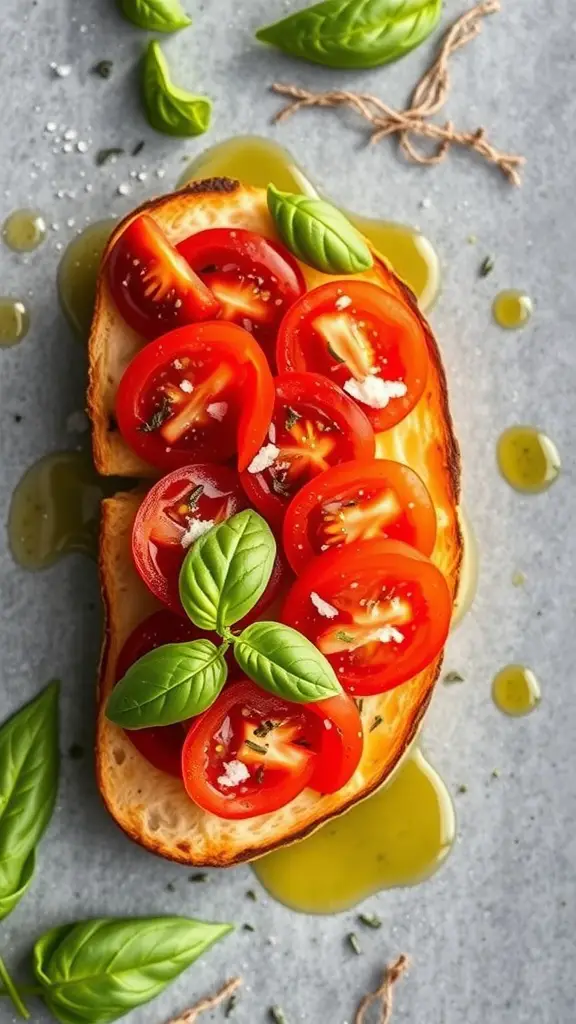
Bruschetta with tomato and basil is a classic appetizer that’s perfect for any gathering. The image showcases a beautifully toasted slice of bread topped with fresh, vibrant tomatoes and fragrant basil leaves. The bright colors of the tomatoes and the green basil create an inviting look that’s hard to resist.
This dish is not only visually appealing but also incredibly simple to prepare. The combination of crunchy bread, juicy tomatoes, and aromatic basil is a crowd-pleaser. It’s a great make-ahead option, allowing you to spend more time enjoying the party and less time in the kitchen.
To make this delicious bruschetta, you’ll need fresh ingredients that highlight the flavors of summer. It’s a fantastic way to use ripe tomatoes and fresh basil from your garden or local market.
Ingredients
- 1 baguette or crusty bread
- 4 ripe tomatoes, diced
- 1/4 cup fresh basil, chopped
- 2 cloves garlic, minced
- 2 tablespoons olive oil
- Salt and pepper to taste
- Balsamic glaze (optional, for drizzling)
Instructions
- Prepare the Bread: Preheat your oven to 400°F (200°C). Slice the baguette into 1/2-inch thick slices. Arrange them on a baking sheet and brush with olive oil. Toast in the oven for about 5-7 minutes until golden.
- Make the Topping: In a bowl, combine the diced tomatoes, chopped basil, minced garlic, olive oil, salt, and pepper. Mix well and let it sit for about 10 minutes to allow the flavors to meld.
- Assemble the Bruschetta: Once the bread is toasted, spoon the tomato mixture generously onto each slice. If desired, drizzle with balsamic glaze for an extra touch of flavor.
- Serve: Enjoy immediately or let them sit for a few minutes to allow the bread to soak up some of the juices. These bruschettas are best served fresh!
Mediterranean Hummus Platter
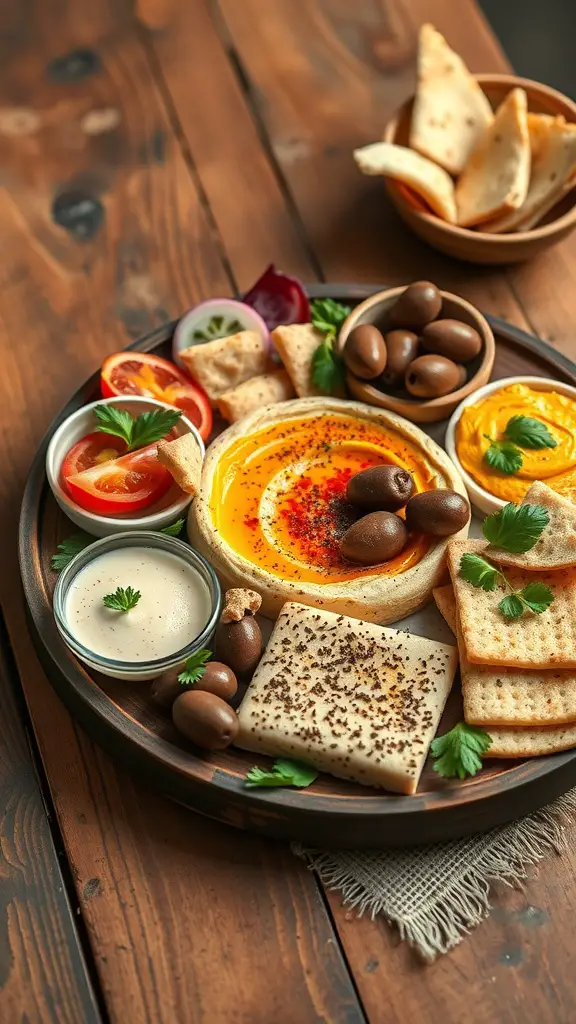
The Mediterranean Hummus Platter is a vibrant and inviting dish that brings a taste of the Mediterranean to your gathering. This platter features creamy hummus at its center, surrounded by a colorful array of fresh vegetables and crunchy pita bread. The bright colors of the carrots, cucumbers, and bell peppers create an eye-catching display that will surely entice your guests.
Hummus is not just delicious; it’s also packed with nutrients. Made from chickpeas, tahini, lemon juice, and garlic, it’s a great source of protein and fiber. Pairing it with fresh veggies and pita makes for a healthy and satisfying appetizer that everyone can enjoy.
To prepare this platter, simply arrange the hummus in the center of a large serving dish. Then, artfully place the sliced vegetables and pita chips around it. You can even add some olives or lemon wedges for extra flavor and garnish. This dish is perfect for parties since it can be made ahead of time and served cold.
Ingredients
- 1 can (15 oz) chickpeas, drained and rinsed
- 1/4 cup tahini
- 2 tablespoons olive oil
- 2 tablespoons lemon juice
- 1 garlic clove, minced
- Salt and pepper to taste
- 1/4 teaspoon cumin (optional)
- Fresh vegetables (carrots, cucumbers, bell peppers, cherry tomatoes)
- Pita bread or pita chips
- Olives and lemon wedges for garnish
Instructions
- Make the Hummus: In a food processor, combine chickpeas, tahini, olive oil, lemon juice, garlic, salt, pepper, and cumin. Blend until smooth. If the hummus is too thick, add a little water to reach your desired consistency.
- Prepare the Platter: Spread the hummus in the center of a large serving dish. Arrange the sliced vegetables and pita around the hummus in a colorful pattern.
- Garnish: Add olives and lemon wedges to the platter for extra flavor and decoration.
- Serve: Enjoy immediately or refrigerate until ready to serve. This dish can be made a day in advance for convenience.
Cheese and Charcuterie Board
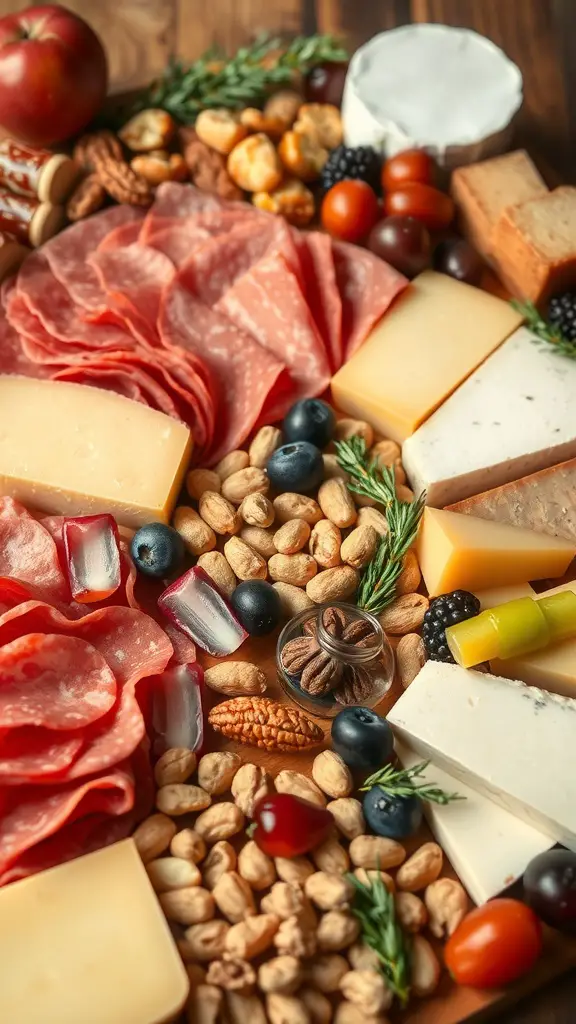
A cheese and charcuterie board is a fantastic choice for any gathering. It’s visually appealing and offers a variety of flavors and textures. You can customize it to suit your guests’ tastes, making it a versatile option for parties.
This board typically features an assortment of cheeses, cured meats, nuts, fruits, and crackers. In the image, you can see a beautiful spread that includes slices of salami, various cheeses, fresh fruits, and nuts. The colors and arrangements make it inviting and fun to explore.
To create your own cheese and charcuterie board, start with a selection of cheeses. Choose a mix of soft, hard, and blue cheeses for variety. Next, add cured meats like prosciutto or salami. Fill in the gaps with nuts, olives, and fresh fruits like grapes or berries. Finally, don’t forget some crunchy crackers or bread to complement the flavors.
Ingredients
- 1 cup assorted cheeses (cheddar, brie, gouda)
- 1 cup assorted cured meats (salami, prosciutto)
- 1/2 cup mixed nuts (almonds, walnuts)
- 1 cup fresh fruits (grapes, berries)
- 1 cup crackers or sliced bread
- Optional: honey or jam for drizzling
Instructions
- Choose a large wooden or slate board as your base.
- Arrange the cheeses in different sections, cutting some into slices and leaving others whole.
- Layer the cured meats around the cheeses, folding them for a nice presentation.
- Fill in spaces with nuts and fresh fruits, creating a colorful display.
- Add crackers or bread on the side for guests to enjoy with the cheeses and meats.
- If desired, drizzle honey or jam over the cheeses for added flavor.
Caprese Skewers with Balsamic Drizzle
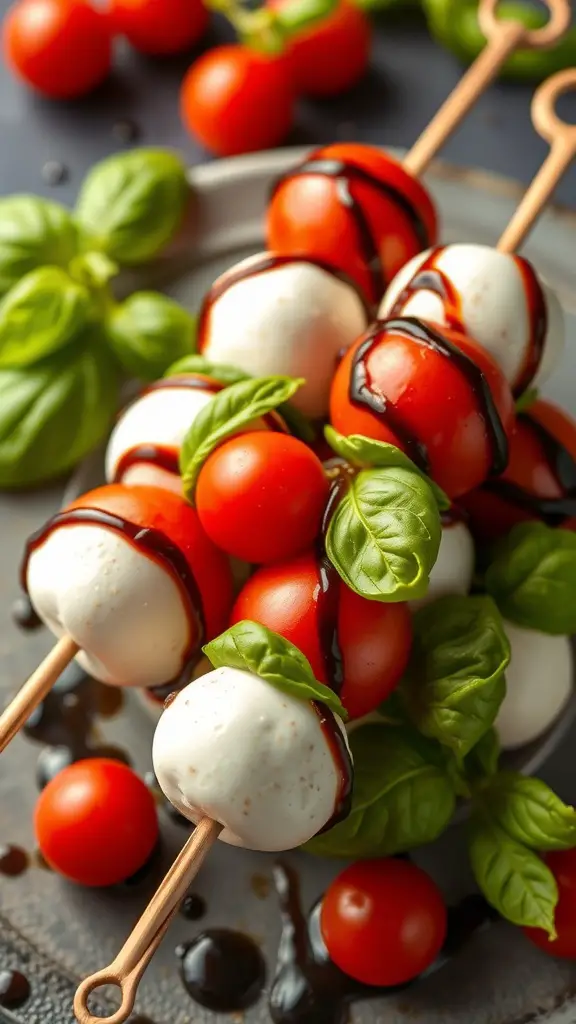
Caprese skewers are a fun and fresh way to enjoy the classic Italian salad. These bite-sized treats combine juicy cherry tomatoes, creamy mozzarella balls, and fragrant basil leaves, all drizzled with a rich balsamic reduction. They’re perfect for parties, easy to make ahead, and sure to impress your guests.
The vibrant colors of red tomatoes, white mozzarella, and green basil create a visually appealing dish that’s as delightful to look at as it is to eat. The balsamic drizzle adds a sweet and tangy finish that ties all the flavors together beautifully.
Making these skewers is simple. Just thread the ingredients onto skewers, drizzle with balsamic, and they’re ready to serve. They can be made a few hours in advance, making them a convenient option for any gathering.
Ingredients
- 1 pint cherry tomatoes
- 8 oz mozzarella balls (bocconcini)
- Fresh basil leaves
- 1/2 cup balsamic vinegar
- 1 tablespoon honey (optional)
- Salt and pepper to taste
- Skewers (toothpick size or longer)
Instructions
- Prepare the Balsamic Drizzle: In a small saucepan, combine balsamic vinegar and honey (if using). Bring to a simmer over medium heat and cook until reduced by half, about 10-15 minutes. Let it cool.
- Assemble the Skewers: On each skewer, thread a cherry tomato, a basil leaf, and a mozzarella ball. Repeat until the skewer is filled, leaving space at the ends for handling.
- Season: Once all skewers are assembled, drizzle them with the balsamic reduction. Sprinkle with salt and pepper to taste.
- Serve: Arrange the skewers on a platter and enjoy! They can be made a few hours ahead and stored in the fridge until ready to serve.
Savory Stuffed Mini Peppers
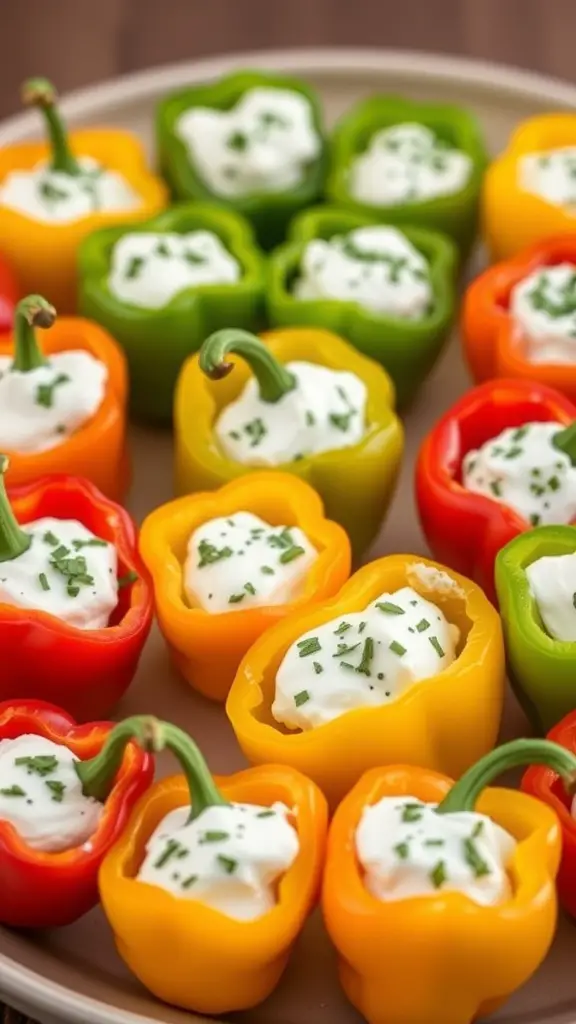
Stuffed mini peppers are a colorful and tasty addition to any party spread. These little bites are not only visually appealing but also packed with flavor. The vibrant colors of red, yellow, and green peppers make them a standout dish. They are perfect for serving as appetizers, and they can be prepared ahead of time, making them a convenient choice for busy hosts.
Each mini pepper is filled with a creamy mixture that can include cheese, herbs, and spices. This combination creates a delightful contrast with the crispness of the pepper. Guests will love popping these savory treats into their mouths, and they are sure to be a hit at your gathering.
Ingredients
- 20 mini bell peppers (mixed colors)
- 1 cup cream cheese, softened
- 1/2 cup shredded cheddar cheese
- 1/4 cup sour cream
- 2 tablespoons fresh chives, chopped
- 1 teaspoon garlic powder
- Salt and pepper to taste
Instructions
- Prepare the Peppers: Preheat your oven to 350°F (175°C). Cut the tops off the mini peppers and remove the seeds. Set aside.
- Make the Filling: In a mixing bowl, combine the cream cheese, cheddar cheese, sour cream, chives, garlic powder, salt, and pepper. Mix until smooth and well combined.
- Stuff the Peppers: Use a small spoon or piping bag to fill each mini pepper with the cheese mixture. Make sure to pack it in well.
- Bake: Place the stuffed peppers on a baking sheet and bake for about 15-20 minutes, or until the peppers are tender and the filling is slightly golden.
- Serve: Let them cool for a few minutes before serving. Enjoy these delightful bites warm or at room temperature!
Cucumber Rounds with Feta and Dill
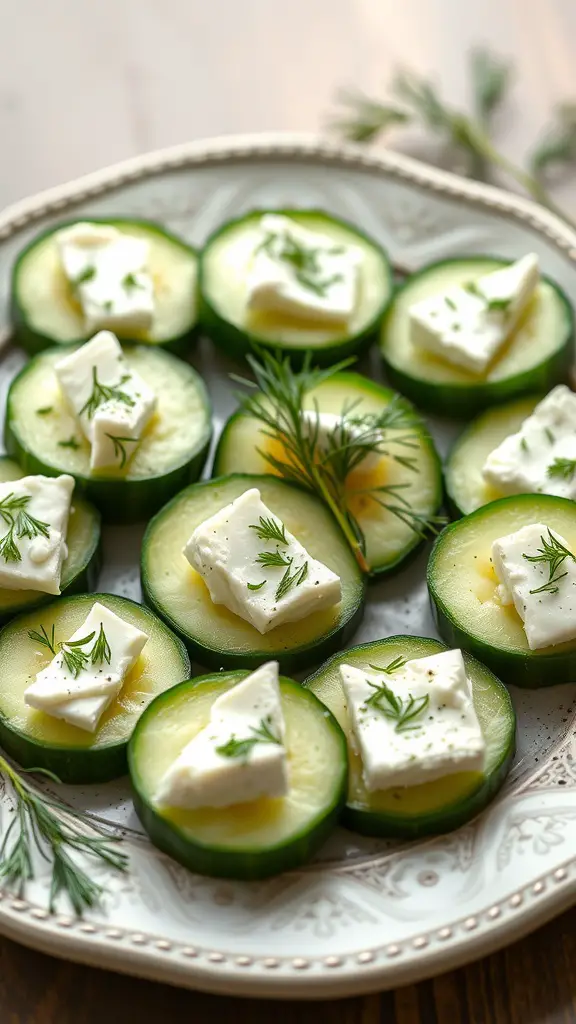
Cucumber rounds topped with feta and dill are a refreshing choice for any party. These little bites are not only easy to make but also look stunning on a platter. The crispness of the cucumber pairs perfectly with the creamy feta, while the dill adds a burst of flavor. They are light, healthy, and perfect for guests who want something tasty without feeling too heavy.
Making these cucumber rounds is a breeze. Simply slice cucumbers into thick rounds, add a piece of feta cheese on top, and sprinkle with fresh dill. You can prepare them ahead of time, making them a great option for busy hosts. Just keep them chilled until it’s time to serve!
Ingredients
- 2 large cucumbers
- 8 oz feta cheese, cut into small squares
- Fresh dill, for garnish
- Salt and pepper, to taste
Instructions
- Slice the cucumbers into 1/2-inch thick rounds.
- Place a square of feta cheese on each cucumber slice.
- Sprinkle fresh dill on top of the feta.
- Add a pinch of salt and pepper if desired.
- Arrange on a serving platter and chill until ready to serve.
Fruit and Yogurt Parfaits
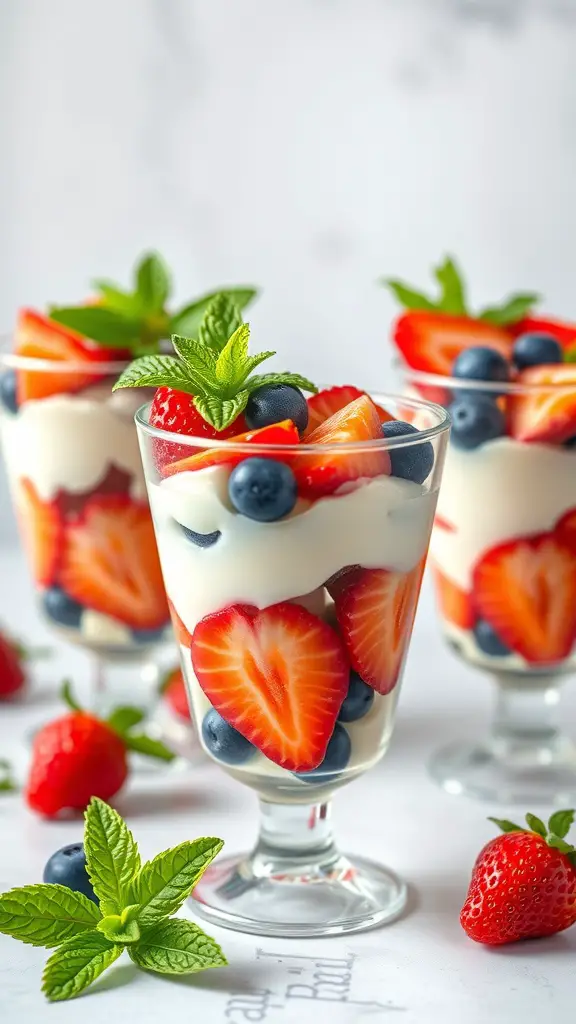
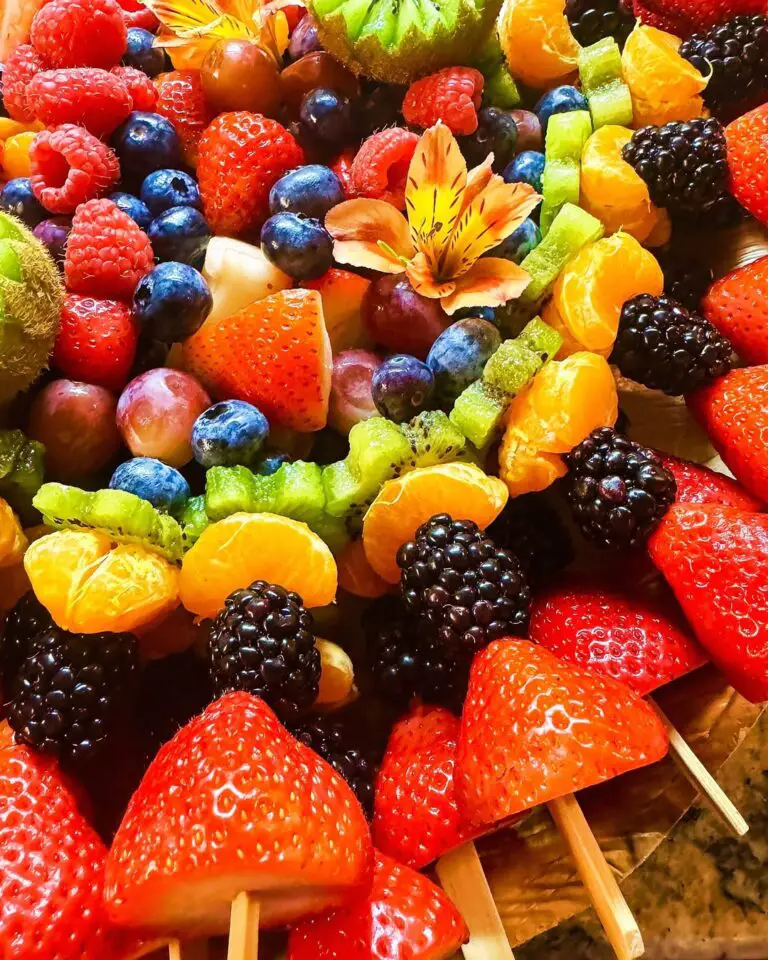
Fruit and yogurt parfaits are a delightful addition to any party spread. They are not only visually appealing but also packed with flavor and nutrition. These layered treats typically consist of creamy yogurt, fresh fruits, and a sprinkle of granola or nuts for that perfect crunch. You can customize them with your favorite fruits, making them versatile for any occasion.
To prepare these parfaits, start by selecting your fruits. Strawberries, blueberries, and bananas are popular choices. Layer them with yogurt in clear cups to showcase the beautiful colors. Top with a mint leaf for a fresh touch. These parfaits can be made ahead of time, allowing you to enjoy the party without the last-minute rush.
Ingredients
- 2 cups Greek yogurt
- 1 cup strawberries, sliced
- 1 cup blueberries
- 1 cup granola
- Fresh mint leaves for garnish
Instructions
- In a clear cup, add a layer of Greek yogurt at the bottom.
- Next, add a layer of sliced strawberries followed by a layer of blueberries.
- Sprinkle a layer of granola on top of the fruit.
- Repeat the layers until the cups are filled, finishing with yogurt on top.
- Garnish with fresh mint leaves for a pop of color.
- Chill in the refrigerator until ready to serve.
Roasted Red Pepper and Feta Dip
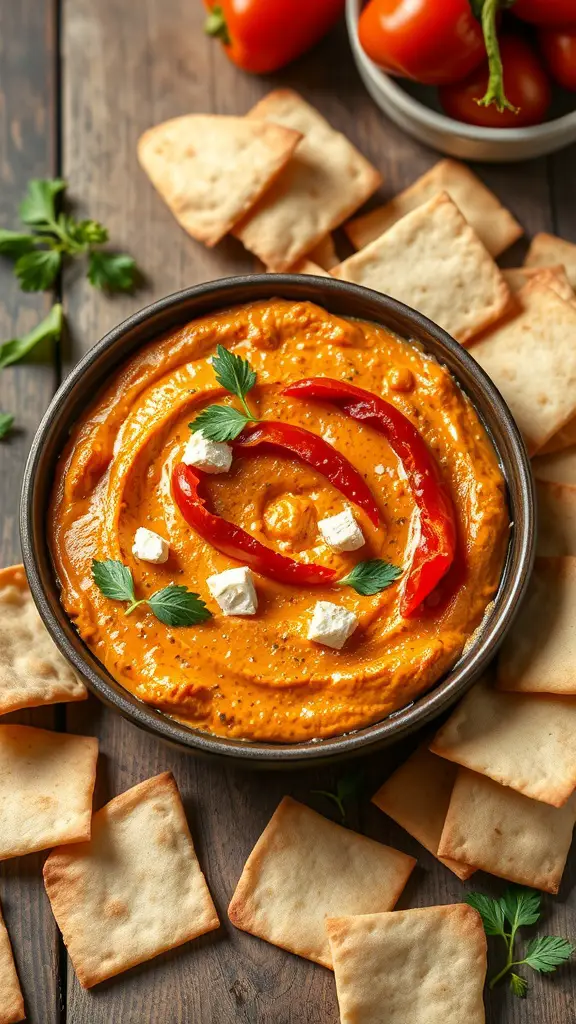
This roasted red pepper and feta dip is a fantastic choice for any gathering. It’s colorful, creamy, and packed with flavor. The vibrant orange hue of the dip, combined with the fresh herbs and red pepper slices on top, makes it visually appealing. Served with crispy crackers, it’s perfect for dipping and sharing.
The dip is easy to prepare ahead of time, allowing you to enjoy your party without stress. Just blend the ingredients, chill, and you’re good to go. Your guests will love the combination of sweet roasted peppers and tangy feta cheese.
Ingredients
- 2 cups roasted red peppers (jarred or homemade)
- 1 cup feta cheese, crumbled
- 1/2 cup cream cheese, softened
- 2 tablespoons olive oil
- 1 tablespoon lemon juice
- 1 clove garlic, minced
- Salt and pepper to taste
- Fresh parsley for garnish
- Red pepper slices for garnish
- Crackers or pita chips for serving
Instructions
- Blend Ingredients: In a food processor, combine roasted red peppers, feta cheese, cream cheese, olive oil, lemon juice, and garlic. Blend until smooth.
- Season: Taste the mixture and add salt and pepper as needed. Blend again to combine.
- Chill: Transfer the dip to a serving bowl and cover. Refrigerate for at least 1 hour to let the flavors meld.
- Garnish: Before serving, top with fresh parsley and red pepper slices for a pop of color.
- Serve: Enjoy with crackers or pita chips for dipping.
Deviled Eggs with Paprika
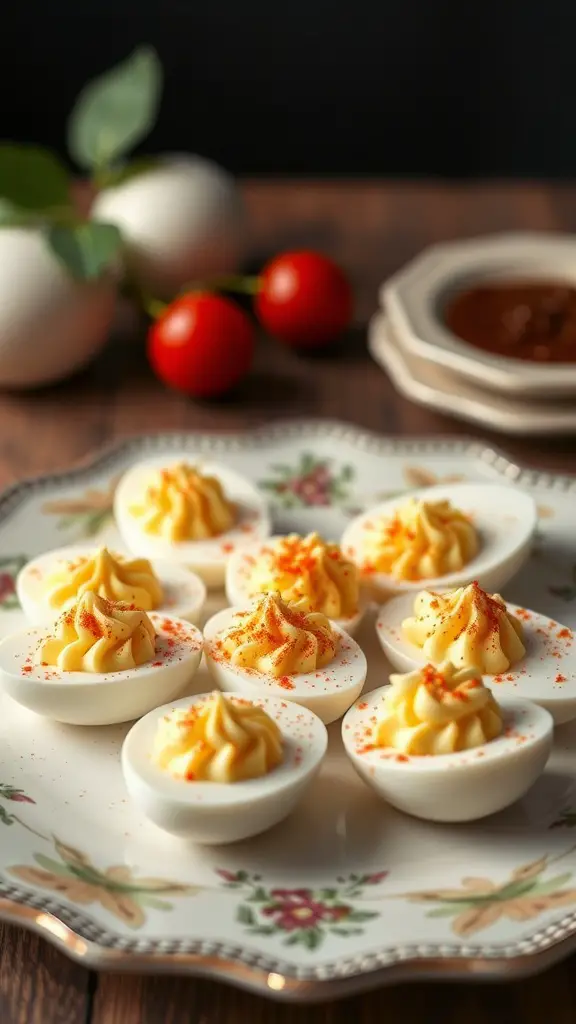
Deviled eggs are a classic cold appetizer that never fails to impress at parties. They are simple to make and can be prepared ahead of time, making them a go-to choice for gatherings. The image showcases beautifully arranged deviled eggs topped with a sprinkle of paprika, adding a pop of color and flavor.
These little bites are creamy, tangy, and just the right amount of savory. The combination of egg yolks, mayonnaise, and mustard creates a smooth filling that is piped into the egg whites. The paprika on top not only enhances the visual appeal but also adds a subtle kick.
For a successful party platter, serve these deviled eggs alongside fresh veggies or crackers. They are sure to be a hit with guests of all ages!
Ingredients
- 6 large eggs
- 1/4 cup mayonnaise
- 1 teaspoon Dijon mustard
- Salt and pepper to taste
- 1 teaspoon paprika (plus more for garnish)
- Fresh herbs for garnish (optional)
Instructions
- Boil the Eggs: Place the eggs in a pot and cover them with water. Bring to a boil, then cover and remove from heat. Let them sit for 12 minutes.
- Cool and Peel: Transfer the eggs to an ice bath for about 5 minutes. Once cool, peel the eggs and slice them in half lengthwise.
- Prepare the Filling: Remove the yolks and place them in a bowl. Mash the yolks with a fork and mix in mayonnaise, Dijon mustard, salt, pepper, and paprika until smooth.
- Fill the Egg Whites: Spoon or pipe the yolk mixture back into the egg whites.
- Garnish: Sprinkle with additional paprika and fresh herbs if desired. Chill before serving.
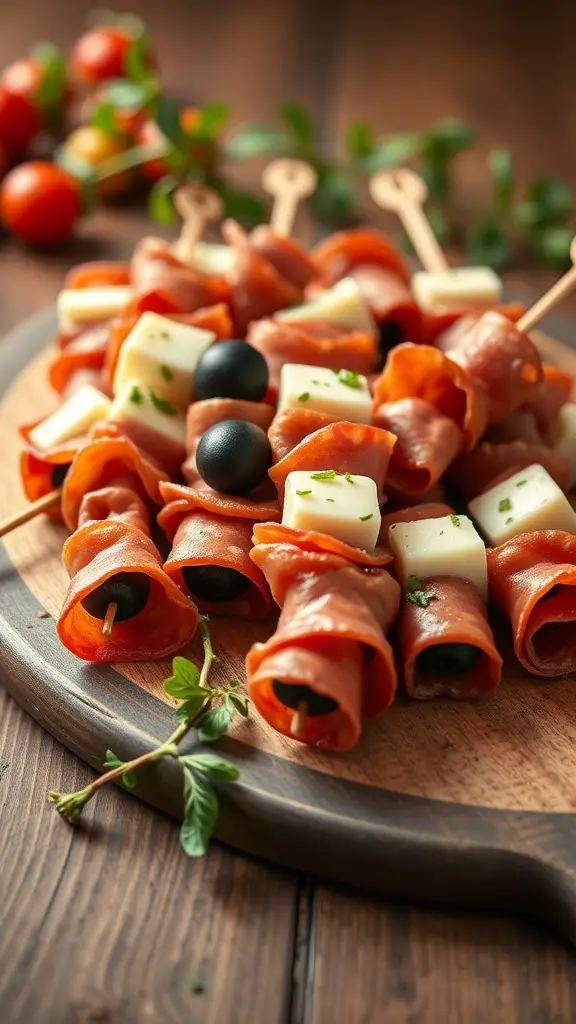
Antipasto Skewers with Salami and Olives
Antipasto skewers are a fun and easy way to serve appetizers at your next gathering. These colorful bites are packed with flavor and can be made ahead of time, making them perfect for parties. The image shows skewers loaded with salami, olives, and cheese, all beautifully arranged on a wooden platter. The vibrant colors of the ingredients make them visually appealing and inviting.
To make these skewers, you can use a variety of ingredients. Salami adds a savory touch, while olives bring a briny flavor that complements the cheese. Feel free to mix and match with other ingredients like cherry tomatoes, peppers, or even artichoke hearts for extra variety.
These skewers are not just tasty; they are also a great conversation starter. Guests will love picking their favorites off the platter. Plus, they are easy to grab and eat, making them a hassle-free option for any event.
Ingredients
- 8 ounces salami, sliced
- 8 ounces mozzarella cheese, cubed
- 1 cup black olives
- 1 cup green olives
- Fresh herbs (like oregano or basil) for garnish
- Skewers or toothpicks
Instructions
- Prepare the Skewers: Take a skewer or toothpick and start by threading a piece of salami onto it.
- Add Cheese: Follow with a cube of mozzarella cheese.
- Include Olives: Add an olive, then repeat the process until the skewer is filled, leaving some space at the end for easy handling.
- Garnish: Finish with a fresh herb for a pop of color and flavor.
- Chill: Place the skewers on a platter and refrigerate until ready to serve.
Mini Quiches with Spinach and Cheese

Mini quiches are a fantastic choice for any gathering. They are bite-sized, easy to eat, and packed with flavor. The image shows a delightful tray of mini quiches filled with fresh spinach and creamy cheese. Their golden crusts and vibrant green spinach make them visually appealing and appetizing.
These mini quiches are not just pretty; they are also versatile. You can serve them warm or at room temperature, making them perfect for parties. Plus, they can be made ahead of time, so you can enjoy the festivities without being stuck in the kitchen.
To make these tasty treats, you’ll need a few simple ingredients. Spinach adds a nutritious touch, while cheese brings richness and flavor. You can customize the filling with your favorite ingredients, like mushrooms or bell peppers, to suit your taste.
Ingredients
- 1 cup fresh spinach, chopped
- 1 cup shredded cheese (cheddar or your choice)
- 4 large eggs
- 1 cup milk
- 1/2 teaspoon salt
- 1/4 teaspoon black pepper
- 1 package of pre-made pastry shells or phyllo dough
Instructions
- Preheat your oven to 375°F (190°C).
- In a bowl, whisk together the eggs, milk, salt, and pepper until well combined.
- Place the pastry shells on a baking tray. If using phyllo dough, layer several sheets and cut them into circles to fit your muffin tin.
- Evenly distribute the chopped spinach and shredded cheese into each pastry shell.
- Pour the egg mixture over the spinach and cheese, filling each shell about 3/4 full.
- Bake for 20-25 minutes or until the egg is set and the tops are lightly golden.
- Let them cool slightly before serving. Enjoy your mini quiches!
Spicy Chickpea Salad Cups
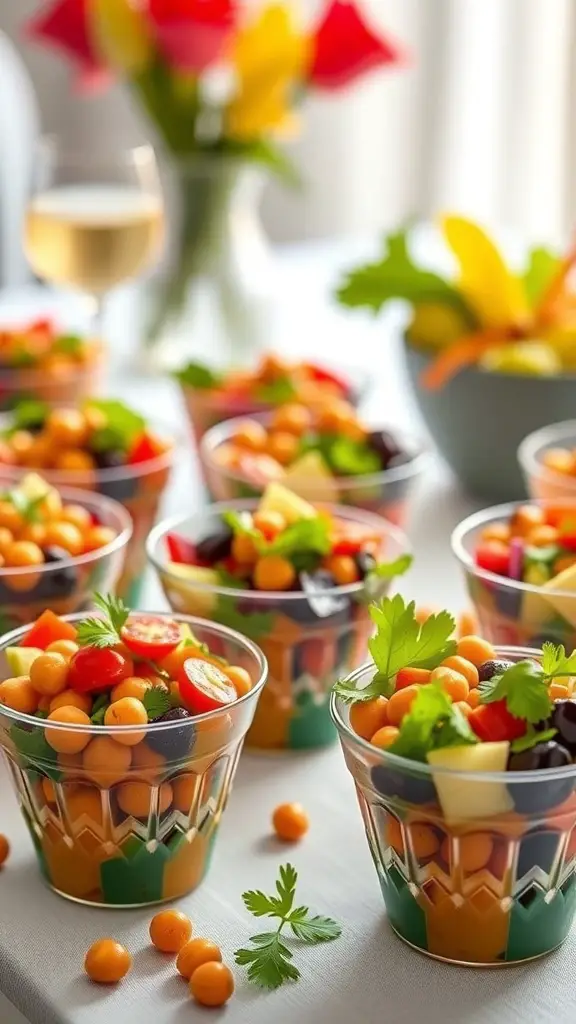
Spicy Chickpea Salad Cups are a fantastic choice for any gathering. These colorful cups are filled with a vibrant mix of chickpeas, fresh vegetables, and zesty spices. They not only look appealing but also pack a punch of flavor. Perfect for serving at parties, these cups can be made ahead of time, making your prep work a breeze.
The combination of chickpeas, diced bell peppers, cherry tomatoes, and herbs creates a refreshing bite. The cups are easy to grab and enjoy, making them a hit with guests. Plus, they cater to various dietary preferences, being both vegan and gluten-free.
To make these cups, you’ll need some basic ingredients. Start by preparing the chickpeas and mixing them with your choice of veggies and spices. Then, layer them in small cups for serving. They can be stored in the fridge until your guests arrive, allowing the flavors to meld beautifully.
Ingredients
- 1 can (15 oz) chickpeas, drained and rinsed
- 1 cup diced bell peppers (red, yellow, green)
- 1 cup cherry tomatoes, halved
- 1/4 cup red onion, finely chopped
- 1/4 cup fresh cilantro, chopped
- 2 tablespoons olive oil
- 1 tablespoon lemon juice
- 1 teaspoon cumin
- 1/2 teaspoon cayenne pepper (adjust to taste)
- Salt and pepper to taste
- Small cups for serving
Instructions
- In a large bowl, combine the chickpeas, diced bell peppers, cherry tomatoes, red onion, and cilantro.
- In a separate small bowl, whisk together the olive oil, lemon juice, cumin, cayenne pepper, salt, and pepper.
- Pour the dressing over the chickpea mixture and toss until everything is well coated.
- Using small cups, layer the chickpea salad mixture evenly.
- Cover and refrigerate for at least 30 minutes before serving to let the flavors develop.
- Serve chilled and enjoy the fresh, spicy goodness!