There’s something utterly nostalgic about ice cream sandwiches. The soft chocolate cookie layers, the creamy vanilla filling—it takes me right back to summer afternoons as a kid, sticky fingers and all. So when I wanted to make a dessert that was equal parts fun, simple, and crowd-pleasing, this Ice Cream Sandwich Cake was an easy yes.
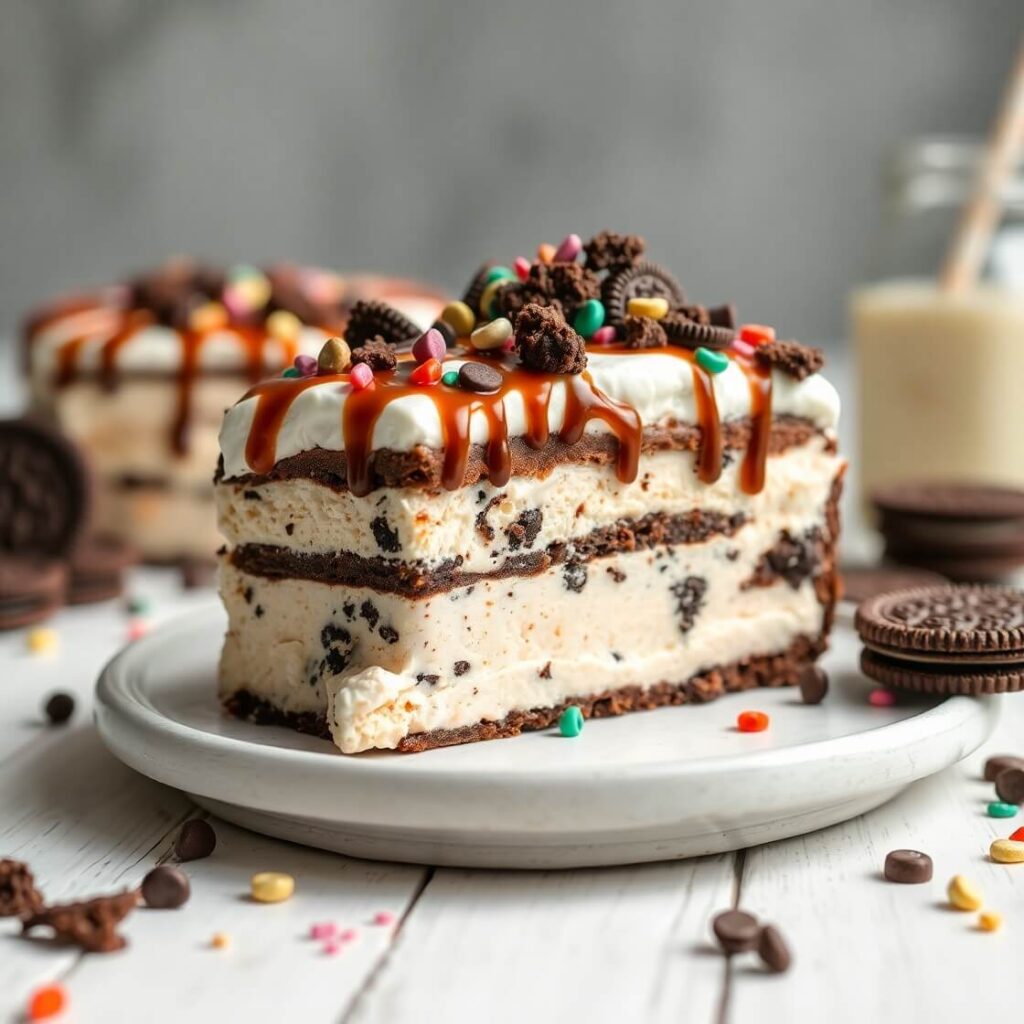
I first made this on a whim for a last-minute family barbecue. With just a handful of ingredients and barely any prep, it quickly became the most requested dessert of the summer. Everyone was shocked when I told them it was made from store-bought ice cream sandwiches—layered with whipped topping, drizzled with chocolate and caramel, and scattered with crushed cookies and candies. Pure joy, no oven required.
If you’re looking for a no-bake dessert that feels indulgent but doesn’t require hours in the kitchen, this might just be your new go-to. Let me show you how I make it (and how you can make it your own, too).
Why I Love This Recipe

Let’s be honest—most of us want to make something special, but we don’t always have the time (or energy) for complicated steps or ingredients. This Ice Cream Sandwich Cake is everything I love in a dessert:
It’s ridiculously easy to put together, it feeds a crowd, and you can customize it endlessly. That’s part of the magic—every time I make it, it feels a little different. One time it’s topped with crushed Oreos and hot fudge, another time with peanut butter cups and a drizzle of caramel.
What makes this recipe truly special, though, is its balance. The sandwiches stay soft but hold their shape. The whipped topping gives it an airy lift. The add-ins? That’s where your personality shines through. And don’t even get me started on the presentation—this cake looks like something you’d buy from a boutique bakery, but it’s made with everyday ingredients and minimal effort.
It’s the kind of dessert that works for birthdays, potlucks, Fourth of July picnics, or those “I just want something sweet” nights. I love that anyone—even someone who’s never baked—can nail this recipe on the first try.
Ingredients for Ice Cream Sandwich Cake
Now here’s the fun part—gathering your ingredients. This cake doesn’t need anything fancy, and most of it can be picked up in a single grocery store run.
Start with your base: the classic chocolate ice cream sandwich. I always go for the rectangular ones, but if you find circular or mini versions, you can absolutely play with those. Just remember to adjust your layout based on size.
You’ll also need whipped topping, like Cool Whip. It adds fluffiness and helps everything stick together. For texture and flavor, I layer in crushed cookies, chopped candies, chocolate syrup, and caramel sauce.
Here’s what I use most often:
- Ice cream sandwiches (vanilla is classic, but mix it up if you like)
- Whipped topping (Cool Whip, thawed)
- Chocolate syrup or hot fudge sauce
- Caramel sauce
- Crushed Oreos
- Mini chocolate chips
- Chopped candy bars (like Snickers, Reese’s, or Twix)
- Sprinkles (optional, but so fun)
You really can’t go wrong here. If you’re a peanut butter lover, swirl in some peanut butter between layers. Want a minty version? Use mint chocolate chip sandwiches and add crushed Andes mints. The variations are endless.
How Much Time Will You Need
This is a make-ahead dessert, but the active time is delightfully short.
Here’s how the timing usually breaks down:
- Prep time: 15 to 20 minutes
- Freezing time: Minimum 4 hours (overnight is even better)
So in under 30 minutes, you can have it layered and ready to go in the freezer—then you can sit back and relax while it chills to perfection.
How to Make This Ice Cream Sandwich Cake
Here’s the exact method I follow every single time. No oven, no baking, just a little layering and freezing.
Step – 1: Prep Your Pan
Line a 9×13-inch baking dish with parchment paper or foil. Leave some overhang on the sides—this will make it easy to lift the cake out later.
Step – 2: Unwrap Your Sandwiches
This is the part where having an extra set of hands (or a kid helper) is useful. Unwrap all your ice cream sandwiches and work quickly so they don’t melt too much. You’ll need about 12–16 sandwiches for a full-sized cake.
Step – 3: Layer the First Row
Lay a row of ice cream sandwiches side-by-side in the bottom of the pan. If your pan doesn’t fit them perfectly, you can trim a sandwich or two with a knife to make them fit.
Step – 4: Add Whipped Topping
Spread half of your thawed whipped topping evenly over the first layer. I use a spatula and go edge to edge.
Step – 5: Add Toppings
Sprinkle your crushed Oreos or candies right over the whipped topping. Then drizzle on chocolate syrup or caramel sauce. You can use one or both—I often do both because why not?
Step – 6: Repeat the Layers
Add a second layer of ice cream sandwiches on top of everything. Then spread the remaining whipped topping over the top. Smooth it out nicely for a clean finish.
Step – 7: Decorate the Top
This is your chance to make it look irresistible. Sprinkle on more crushed cookies, chopped candy bars, or chocolate chips. Drizzle extra fudge or caramel over everything. Add sprinkles if you’re feeling festive.
Step – 8: Freeze Until Firm
Cover the pan with plastic wrap or foil and freeze the cake for at least 4 hours. Overnight is best, especially if you want neat slices.
Step – 9: Slice and Serve
When you’re ready to serve, lift the cake out of the pan using the parchment or foil. Let it sit for 5 minutes to soften slightly, then slice with a sharp knife. Wipe the knife between cuts for clean edges.
Substitutions
What I love about this recipe is how easy it is to swap ingredients depending on what you have—or what you’re craving.
If you want a lower sugar version, try using sugar-free ice cream sandwiches and light whipped topping.
Craving something more decadent? Use brownie sandwiches or layer in crushed cookies between layers.
Here are some of my favorite substitutions:
- Dairy-free? Use vegan ice cream sandwiches and coconut whipped topping.
- No chocolate? Try vanilla or Neapolitan sandwiches and top with fruit syrups or jam.
- Nut-free? Stick to cookie toppings like graham crackers or sprinkles instead of nutty candy bars.
- Gluten-free? Use gluten-free sandwiches (several brands make them) and check all your toppings for gluten-free labels.
Think of this cake like a dessert board—you can design it around your dietary needs or favorite flavors without losing any of the fun.
Best Side Dish of Ice Cream Sandwich Cake
While this cake is the star, pairing it with the right side dish can make dessert time even more delightful. Here are my favorite companions:
- Fresh Mixed Berries: Their tartness balances the sweetness of the cake and adds a refreshing contrast.
- Iced Coffee or Cold Brew: A strong, unsweetened coffee is the perfect bitter-sweet match.
- Salted Pretzels or Popcorn: It may sound odd, but a salty crunch served on the side is unexpectedly satisfying with each sweet bite.
Serving and Presentation Tips
One of the best parts about this cake—aside from how delicious it is—is how pretty it can look with minimal effort. If you’re serving this at a gathering, you’ll want to show it off a little, and the good news is, it’s incredibly photogenic even before trying too hard.
To make it visually pop, I like to sprinkle a mix of mini chocolate chips and crushed cookies on top right after spreading the final whipped topping layer. Then I finish with a zig-zag drizzle of chocolate syrup and caramel sauce. If it’s for a kid’s party or something festive, I’ll toss on some colorful sprinkles, crushed M&M’s, or even a few maraschino cherries.
When slicing, run your knife under hot water and wipe it clean between each cut. It makes the slices come out smoother and neater. I love serving this cake on a chilled white platter to help keep it cold a little longer, especially on hot days. You can even pre-slice it and return the pieces to the freezer on a tray so people can grab and go.
If you’re hosting, stack the slices with wax paper between them and arrange them like building blocks—it’s playful, eye-catching, and just a little different.
Tips and Tricks to Make This Recipe Even Better

There are a few key things I’ve learned after making this cake many times. These little tricks can make a huge difference in flavor, structure, and ease.
Work fast but smart: Ice cream melts quickly, so unwrap everything before you start layering. If you’re making a double batch or planning to decorate later, keep half the sandwiches in the freezer while you work.
Use a metal pan: Metal pans conduct the cold better than glass or ceramic, so your cake freezes faster and more evenly.
Let it freeze overnight: Yes, it can technically be ready in 4 hours, but overnight freezing makes the layers firmer and easier to slice.
Layer in textures: Add some crunch between layers—crushed cookies, chopped nuts, or a few crumbled waffle cones go a long way.
Thaw whipped topping fully before spreading: If it’s partially frozen, it won’t spread evenly and can tug at the ice cream layer.
Common Mistakes to Avoid
This recipe is almost foolproof, but a few small missteps can make things a bit messy. Here’s what to watch out for:
Don’t use warm ingredients. Everything—especially the whipped topping—needs to be cold. If it’s too warm, your cake will get soupy fast.
Skipping the parchment or foil lining. This makes removing the cake from the pan so much easier. Without it, you’ll be wrestling frozen cake out of the pan, and nobody wants that.
Overloading with wet toppings. A little drizzle goes a long way. If you pour on too much chocolate or caramel, it’ll ooze out and make cutting the cake messy.
Not freezing long enough. If the cake hasn’t had time to set properly, the layers will slide apart or collapse. Four hours is the minimum, but overnight is best.
Using old ice cream sandwiches. Trust me, freezer burn is real. Always check the expiration dates and make sure the sandwiches are fresh.
How to Store It
This cake stores beautifully—and if you’re anything like me, you’ll love having a slice stashed away for a midnight treat.
Once the cake is frozen solid, I like to slice it and store the pieces in an airtight container with parchment or wax paper between each one. This keeps them from sticking together and makes them easy to grab one at a time.
If you’re keeping the whole cake intact, wrap it tightly in plastic wrap, then again in foil to prevent freezer burn. It’ll stay fresh for up to 7 days in the freezer. After that, it’s still safe to eat but may start losing its texture and flavor.
When you’re ready to serve again, let it sit for just 5–7 minutes at room temperature before slicing. It softens just enough to make clean cuts without melting too quickly.
FAQ
Can I make this cake ahead of time?
Yes! In fact, it’s best when made a day ahead. The longer freezing time helps it set beautifully and makes slicing easier.
Can I use different flavored ice cream sandwiches?
Absolutely. Try Neapolitan, mint chip, or even cookies and cream. You can mix and match flavors, too.
What if I don’t have Cool Whip?
You can use homemade whipped cream, but be sure it’s stabilized with a little cornstarch or gelatin so it holds its shape when frozen.
Can I make this gluten-free?
Yes! Just use gluten-free ice cream sandwiches and check all your toppings for gluten-containing ingredients.
How long will this cake last in the freezer?
About 5 to 7 days for best texture and flavor. Keep it well-wrapped to prevent freezer burn.

Ice Cream Sandwich Cake
- Total Time: 4 hours 20 minutes (including freeze time)
- Yield: 12 1x
- Diet: Vegetarian
Description
This Ice Cream Sandwich Cake is the ultimate no-bake dessert for busy days, summer parties, or just because. Made with layers of soft ice cream sandwiches, fluffy whipped topping, chocolate and caramel drizzles, and crushed cookies or candies, it’s a make-ahead crowd-pleaser that’s endlessly customizable. Whether you’re feeding a crowd or just want a slice of something sweet and nostalgic, this freezer-friendly treat comes together in minutes and disappears even faster. It’s creamy, crunchy, cold, and utterly irresistible—no oven, no stress, and no leftovers.
Ingredients
- 12 to 16 chocolate ice cream sandwiches
- 1 tub (8 oz) whipped topping (Cool Whip), thawed
- ¼ cup chocolate syrup
- ¼ cup caramel sauce
- ½ cup crushed Oreos
- ¼ cup mini chocolate chips
- Optional: sprinkles, chopped candy bars, nuts
Instructions
- Line a 9×13-inch baking pan with parchment paper, leaving some overhang.
- Lay down the first layer of ice cream sandwiches, trimming to fit if needed.
- Spread half the whipped topping over the sandwiches.
- Sprinkle with crushed cookies and drizzle chocolate and caramel sauces.
- Repeat with another layer of ice cream sandwiches and the remaining topping.
- Decorate the top with your favorite mix of toppings.
- Freeze for at least 4 hours, preferably overnight.
- Let sit at room temperature for 5 minutes before slicing.
Notes
- Use a warm knife for clean slices.
- Customize with any flavor combo—mint, peanut butter, cookies and cream.
- If you use homemade whipped cream, stabilize it with cornstarch or gelatin.
- Prep Time: 20 minutes
- Cook Time: 0 minutes
- Category: Dessert
- Method: No-bake
- Cuisine: American
Nutrition
- Serving Size: 12
- Calories: 310
- Sugar: 24g
- Sodium: 190mg
- Fat: 14g
- Saturated Fat: 7g
- Unsaturated Fat: 6g
- Trans Fat: 0g
- Carbohydrates: 42g
- Fiber: 1g
- Protein: 3g
- Cholesterol: 25mg