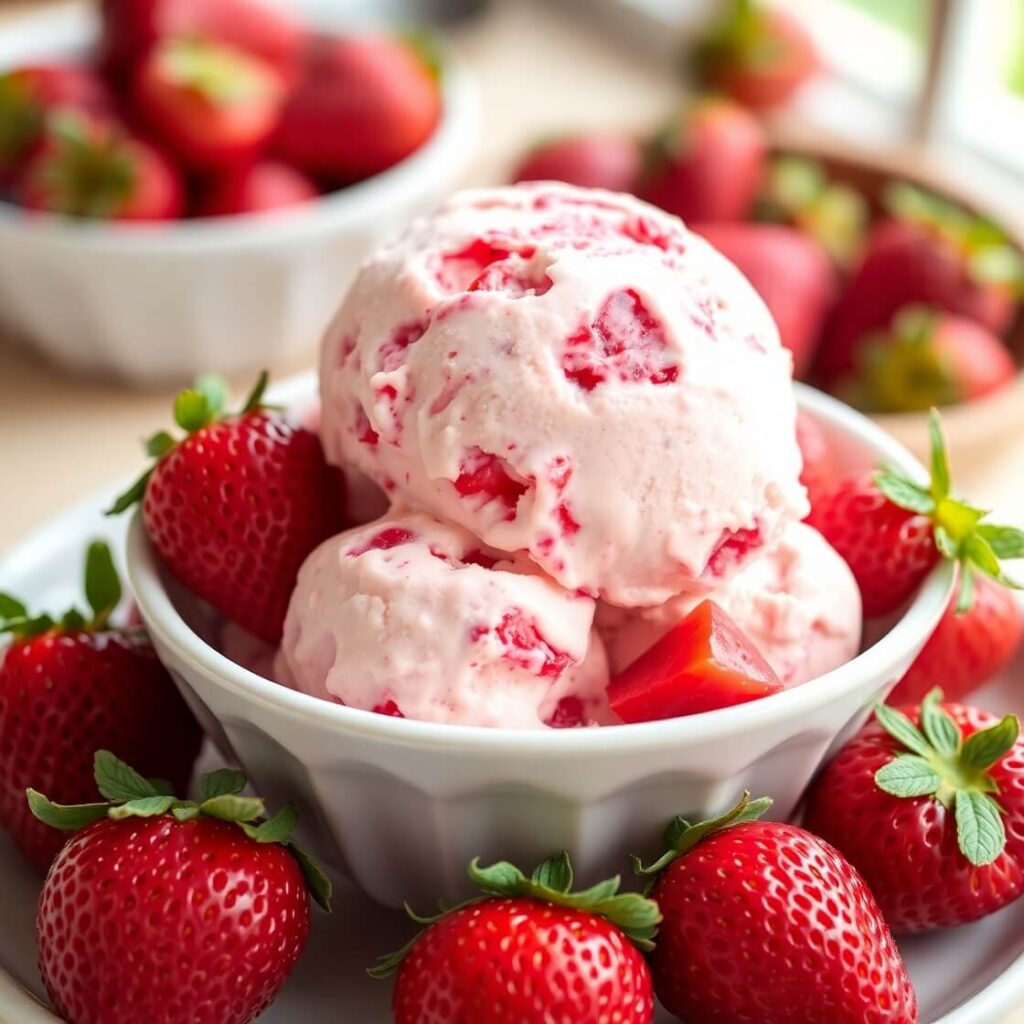
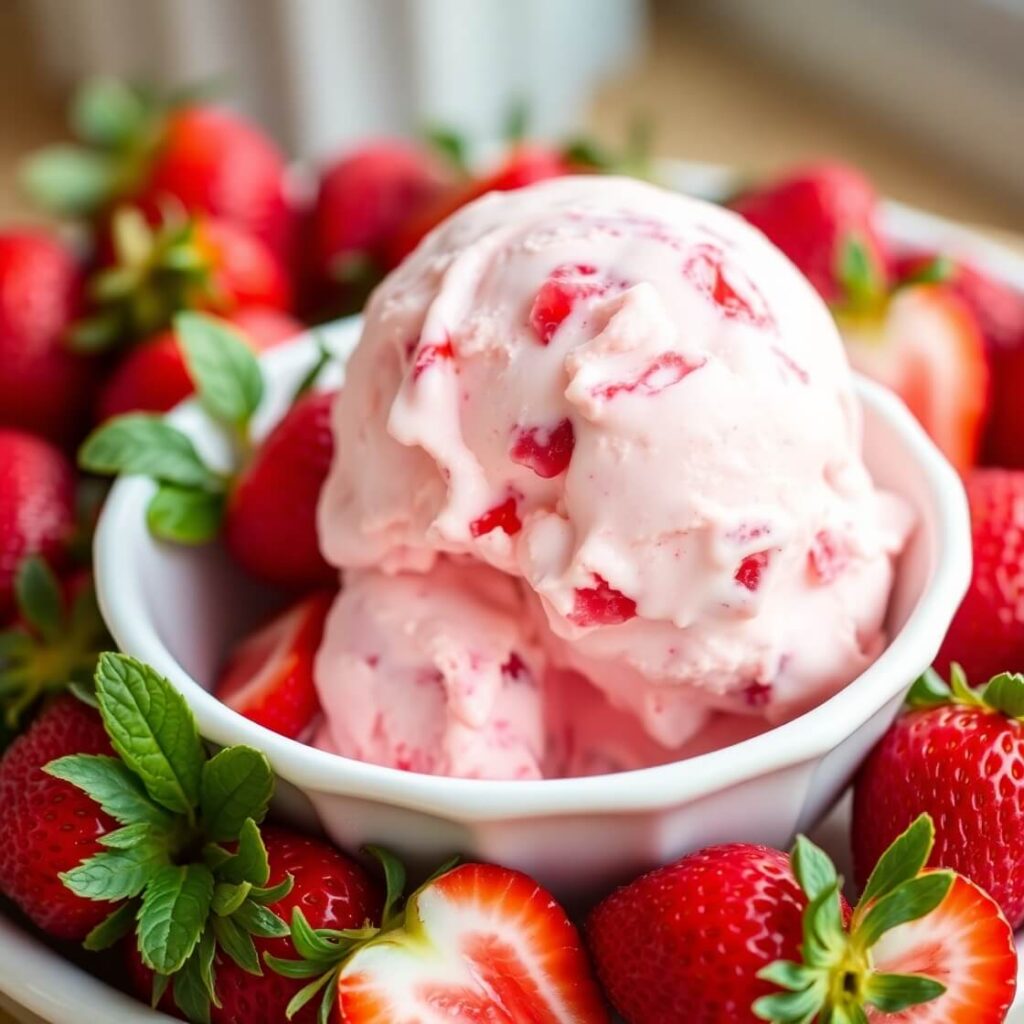
There’s something magical about homemade ice cream that store-bought just can’t match. Fresh, creamy, and bursting with real fruit flavor, this homemade strawberry ice cream is a delightful treat that instantly takes me back to warm summer afternoons and joyful family gatherings. I created this recipe because I wanted a luscious, natural strawberry ice cream free from artificial flavors or preservatives — just pure, fresh ingredients and simple love.
If you’ve ever wished for an ice cream that tastes like freshly picked strawberries on a sunny day, this recipe is for you. It’s straightforward, rewarding, and the kind of dessert that leaves you savoring every bite. Ready to dive into this creamy, fruity indulgence? Let’s get started.
Why I Love This Recipe

Homemade strawberry ice cream holds a special place in my heart — and I believe it will in yours, too.
The magic lies in the simplicity and freshness of the ingredients. Unlike many commercial ice creams, this recipe uses real strawberries that are gently cooked to enhance their sweetness, and then blended into a rich, velvety custard base. The result is an ice cream that balances the bright, natural tartness of strawberries with the creamy sweetness of the custard.
This ice cream is also incredibly versatile. It’s a perfect summer treat, a lovely ending to a family dinner, or a fun project to share with kids. Plus, making it at home means you control what goes in, avoiding artificial colors, flavors, and excessive sugars.
I love that this recipe is approachable — it doesn’t require fancy equipment or hard-to-find ingredients — yet the outcome tastes like it came from a gourmet ice cream shop. Every scoop feels like a little celebration of fresh, ripe strawberries and creamy goodness.
If you’re a fan of classic strawberry ice cream but want to take it up a notch, this recipe is your new go-to. It’s a fresh, flavorful, and comforting dessert that will bring smiles all around.
Ingredients for Homemade Strawberry Ice Cream
To make the best homemade strawberry ice cream, you’ll need fresh, high-quality ingredients. This isn’t the time for canned or overly ripe berries; the fresher, the better.
Here’s a breakdown of what you need:
- Fresh Strawberries: About 2 cups of hulled, quartered fresh strawberries. These provide the natural fruit flavor and beautiful color. You’ll gently cook them down into a strawberry purée to deepen the flavor.
- Granulated Sugar: This sweetens the berries and the custard base. We use sugar to balance the natural tartness of the strawberries and create the perfect creamy texture.
- Whole Milk and Heavy Cream: The backbone of the ice cream’s creamy texture. The milk adds smoothness, while the heavy cream brings richness.
- Egg Yolks: These create a silky custard base that’s thick and creamy. They also help stabilize the ice cream, giving it that luscious mouthfeel.
- Vanilla Extract: A splash of vanilla rounds out the flavor and complements the strawberries beautifully.
- A pinch of salt: Just a touch to enhance all the flavors.
All of these ingredients come together to create a creamy, dreamy ice cream with the perfect balance of sweetness and fresh strawberry flavor.
How Much Time Will You Need
While ice cream may seem complicated, this recipe is quite manageable with a bit of patience.
- Preparation and cooking: About 30-40 minutes. This includes cooking down the strawberries, making the custard, and chilling the mixture.
- Chilling time: At least 4 hours or overnight in the fridge. This step is crucial for the ice cream to churn properly and develop its creamy texture.
- Churning time: Around 20-30 minutes, depending on your ice cream maker.
- Freezing time: Once churned, freezing for an additional 2-3 hours will help firm it up for perfect scoopability.
Overall, expect about 7-8 hours from start to finish, mostly hands-off time during chilling and freezing. It’s a perfect recipe to prepare in advance, so the waiting just builds anticipation.
How to Make This Homemade Strawberry Ice Cream
Step-by-step, here’s how you create this luscious strawberry ice cream from scratch:
Step 1: Prepare the strawberries
Start by rinsing about 2 cups of fresh strawberries, hull and quarter them.
In a medium saucepan, combine the strawberries with 1/2 cup of granulated sugar and a tablespoon of water.
Cook over medium heat for about 10 minutes, stirring occasionally, until the strawberries soften and release their juices, forming a thick syrup.
Remove from heat and let it cool slightly. Then, use an immersion blender or regular blender to puree the mixture until smooth but still a bit textured. Set aside.
Step 2: Make the custard base
In a separate saucepan, combine 1 cup of whole milk and 1 cup of heavy cream.
Heat gently over medium heat until it just starts to steam — don’t let it boil.
In a bowl, whisk 5 large egg yolks with 1/2 cup sugar until the mixture becomes pale and slightly thickened.
Slowly pour the warm milk and cream into the egg yolks in a thin stream, whisking constantly to temper the eggs and avoid scrambling.
Return the mixture to the saucepan and cook over low heat, stirring constantly with a wooden spoon or spatula.
Cook until the custard thickens enough to coat the back of the spoon (about 170°F/77°C), but don’t let it boil.
Step 3: Combine custard with strawberry purée
Remove the custard from heat.
Stir in the strawberry purée and a teaspoon of vanilla extract, along with a pinch of salt.
Mix well until fully incorporated.
Step 4: Chill the mixture
Pour the mixture through a fine mesh sieve into a clean bowl to remove any lumps or cooked egg bits.
Cover with plastic wrap, pressing it directly onto the surface to prevent a skin from forming.
Chill the mixture in the refrigerator for at least 4 hours or overnight. This step is crucial for texture and flavor.
Step 5: Churn the ice cream
Once chilled, pour the custard into your ice cream maker.
Churn according to the manufacturer’s instructions, typically 20-30 minutes, until it reaches soft-serve consistency.
Step 6: Freeze for firmness
Transfer the churned ice cream into an airtight container.
Freeze for at least 2-3 hours to firm up before serving.
Enjoy your homemade strawberry ice cream once it’s firm enough to scoop!
Substitutions
If you want to tweak the recipe or adapt it to your preferences, here are some substitutions that can work beautifully:
- Milk and Cream: For a lighter version, you can substitute half-and-half for the cream or use 2% milk, though the texture will be less rich. For a dairy-free alternative, try coconut milk or cashew cream, but be aware it will change the flavor profile.
- Sugar: You can replace granulated sugar with honey or maple syrup for a natural sweetener twist. If using a sugar substitute, adjust the amount according to sweetness levels.
- Egg Yolks: If you prefer an eggless ice cream, you can skip the yolks and make a no-cook base using sweetened condensed milk and cream, but the texture will be slightly different and less custardy.
- Strawberries: If fresh strawberries aren’t in season, frozen strawberries can be used — just thaw and drain excess liquid before cooking.
- Flavoring: Feel free to add a splash of lemon juice to brighten the strawberry flavor, or a teaspoon of fresh mint for a twist.
Each substitution offers a way to personalize the ice cream while maintaining its delicious essence.
Best Side Dish for Homemade Strawberry Ice Cream
To elevate your strawberry ice cream experience, here are three wonderful side dishes to pair with it:
- Warm Brownies: The fudgy richness of brownies contrasts beautifully with the cold, fruity ice cream.
- Shortcakes: Light and fluffy, shortcakes make the perfect vessel for combining with your strawberry ice cream for a classic strawberry shortcake dessert.
- Fresh Fruit Salad: A mix of berries, kiwi, and citrus adds extra freshness and complements the ice cream’s flavors.
These pairings turn your simple treat into a memorable dessert feast.
Serving and Presentation Tips
Serving homemade strawberry ice cream is almost as delightful as making it. Presentation can elevate the experience, turning a simple scoop into a feast for the eyes as well as the palate.
To start, consider serving the ice cream in chilled bowls or glasses. This helps keep it firm longer and adds a touch of elegance. A scoop or two placed neatly with a fresh strawberry on top creates an inviting look. You can drizzle a little homemade strawberry sauce or balsamic reduction for a gourmet touch.
For gatherings, try layering the ice cream with fresh berries and crushed shortcake or cookie crumbs in clear parfait glasses. This not only looks beautiful but adds texture and flavor layers that guests will love.
If you want to get creative, serve scoops alongside a sprig of fresh mint or edible flowers. A dusting of powdered sugar over the strawberries or a sprinkle of toasted nuts adds contrast and crunch.
Lastly, don’t forget the waffle cones or bowls. Homemade or store-bought, these add a fun and nostalgic element to your ice cream presentation, making it perfect for kids and adults alike.
Tips and Tricks to Make This Recipe Even Better
If you want to take your homemade strawberry ice cream to the next level, here are some handy tips I’ve learned along the way:
- Use ripe, but firm strawberries: Overripe berries may turn mushy and watery, which affects texture and flavor. Aim for bright red, fragrant berries.
- Cook the strawberry purée slowly: This helps concentrate the sweetness and flavor without losing that fresh fruit brightness.
- Don’t skip chilling the custard: Allowing it to rest overnight really enhances the texture and lets the flavors meld beautifully.
- Temper your eggs carefully: Pouring hot milk slowly into the egg yolks while whisking prevents scrambling, ensuring a smooth custard.
- Avoid over-churning: Stop the ice cream maker when the mixture is creamy and soft-serve like; over-churning can cause icy texture.
- Add a splash of lemon juice: A tiny bit of acid brightens the strawberry flavor without making it tart.
- Use a fine mesh sieve: Straining the custard before chilling ensures no lumps or cooked bits spoil the smoothness.
Following these tips helps you create ice cream that’s smooth, creamy, and bursting with vibrant strawberry flavor every time.
Common Mistakes to Avoid
Making homemade ice cream is rewarding, but a few common pitfalls can impact your results. Here’s what to watch out for:
- Skipping the chilling time: Pouring warm custard into the ice cream maker will prevent proper churning and ruin texture.
- Using underripe or frozen strawberries without draining: Excess moisture can cause icy or watery ice cream.
- Overheating the custard: Boiling the custard will scramble the eggs, resulting in a grainy texture.
- Not tempering eggs properly: Adding hot milk too quickly can cause lumps and ruined custard.
- Overfilling the ice cream maker: This limits the mixture’s ability to churn and incorporate air, leading to dense ice cream.
- Ignoring ice cream maker instructions: Each machine is different, so follow the manual for best results.
Avoiding these mistakes ensures your homemade strawberry ice cream turns out smooth, creamy, and delicious every time.
How to Store It
Proper storage is key to keeping your homemade strawberry ice cream fresh and scoopable.
Use an airtight container to prevent ice crystals from forming and absorbing fridge odors.
Place a piece of parchment or wax paper directly on the surface of the ice cream before sealing the container to reduce freezer burn.
Store in the coldest part of the freezer, not the door, to maintain consistent temperature.
Homemade ice cream is best enjoyed within 1-2 weeks for optimal flavor and texture.
When serving after freezing, let it sit at room temperature for about 5-10 minutes to soften slightly for easier scooping.
Frequently Asked Questions (FAQ)
Can I make this ice cream without an ice cream maker?
Yes! You can use a no-churn method by whipping heavy cream and folding in sweetened strawberry purée, then freezing in a container. The texture will be slightly different but still delicious.
Can I use frozen strawberries?
Absolutely. Just thaw and drain any excess liquid before cooking down the berries to avoid watery ice cream.
Is it possible to make this recipe dairy-free?
Yes, substitute coconut cream or cashew cream for the dairy. The custard base will be different without eggs, so try a no-cook base using sweetened condensed coconut milk.
How do I prevent ice crystals in my ice cream?
Chilling the custard thoroughly before churning and storing the finished ice cream in an airtight container with a parchment cover helps minimize ice crystals.
Can I add mix-ins like chocolate chips or nuts?
Yes, add them during the last few minutes of churning to evenly distribute without sinking.

Homemade Strawberry Ice Cream
- Total Time: 4 hours (or overnight)
- Yield: 1 1x
- Diet: Vegetarian
Description
This homemade strawberry ice cream is a fresh, creamy delight bursting with the natural flavor of ripe strawberries. Made with a luscious custard base infused with pureed strawberries, this recipe delivers smooth texture and vibrant taste without any artificial additives. It’s the perfect summer treat to enjoy on its own or paired with brownies, shortcakes, or fresh fruit salad. Easy to prepare and made from simple ingredients, it’s an ice cream recipe you’ll return to time and again.
Ingredients
- 2 cups fresh strawberries, hulled and quartered
- 1/2 cup granulated sugar (for strawberries)
- 1 tbsp water
- 1 cup whole milk
- 1 cup heavy cream
- 5 large egg yolks
- 1/2 cup granulated sugar (for custard)
- 1 tsp vanilla extract
- Pinch of salt
Instructions
- Combine strawberries, sugar, and water in a saucepan; cook until softened and syrupy. Puree and set aside.
- Heat milk and cream until steaming but not boiling.
- Whisk egg yolks with sugar until pale. Temper eggs by slowly adding warm milk mixture.
- Return to heat; cook gently until custard thickens enough to coat the back of a spoon.
- Remove from heat; stir in strawberry purée, vanilla, and salt.
- Strain mixture, cover, and chill for at least 4 hours.
- Churn in ice cream maker until soft-serve consistency.
- Freeze for 2-3 hours before serving.
Notes
- Use ripe but firm strawberries for best flavor.
- Don’t rush chilling — it improves texture.
- Avoid overheating custard to prevent curdling.
- Store in an airtight container to avoid ice crystals.
- Prep Time: 30 minutes
- Cook Time: 15 minutes
- Category: Dessert
- Method: Stove + Ice cream maker
- Cuisine: American
Nutrition
- Serving Size: 1
- Calories: 250
- Sugar: 22g
- Sodium: 35mg
- Fat: 18g
- Saturated Fat: 11g
- Unsaturated Fat: 5g
- Carbohydrates: 22g
- Fiber: 1g
- Protein: 4g
- Cholesterol: 125mg