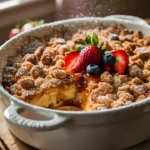
I still remember the first time I made a homemade ice cream cake—it was the peak of summer, the sun blazing down, and the kids were asking for both cake and ice cream after dinner. So, I thought, why not bring the best of both worlds together into one delightful dessert? And let me tell you, it was an instant hit.
This ice cream cake became our go-to for birthdays, BBQs, and lazy Sunday treats. What makes it so special is not just how fun it is to eat, but how incredibly easy and customizable it is to make. You don’t need an ice cream machine or fancy cake decorating skills—just a little patience, some simple layering, and your favorite flavors. It’s the kind of dessert that gets people talking and leaves them asking for seconds.
Whether you’re trying to beat the heat or celebrate something sweet, this ice cream cake has you covered. Keep reading—I’ll walk you through every creamy, dreamy step.
Why I Love This Recipe

The best part about this ice cream cake? It feels like pure joy in every bite. It’s cold, creamy, sweet, and indulgent, yet light enough that you don’t feel weighed down after a slice. There’s something nostalgic about ice cream cakes too—it takes you back to childhood parties and happy moments, but now you get to elevate it with your own favorite flavors and toppings.
What makes this cake really shine is how customizable it is. You can switch the ice cream flavors based on the occasion or your cravings—cookies and cream, mint chip, peanut butter swirl, you name it. The crust can be made from crushed Oreos, graham crackers, or even brownies. It’s a build-your-own-adventure dessert that still looks impressive and tastes divine.
And let’s not forget the satisfaction of making something from scratch that looks like it came from a fancy bakery. No preservatives, no mystery ingredients—just real, honest, delicious ice cream cake that you made yourself.
Ingredients for Homemade Ice Cream Cake
If you’re ready to dive in, here’s everything you need to gather first. This is a no-bake dessert that starts in the freezer and finishes with a whole lot of love. I usually make it in a springform pan because it makes layering easier and releasing the cake a breeze.
You’ll need:
- Ice Cream – Two different flavors work best for contrast. I typically use vanilla and chocolate, but you can mix it up with strawberry, cookies & cream, or any combination you love.
- Crust Base – Crushed chocolate sandwich cookies (like Oreos) are classic, but graham crackers or even brownie crumbles can be delicious too. Mix the crumbs with a little melted butter to form the crust.
- Whipped Topping or Frosting Layer – For that smooth bakery look. I use stabilized whipped cream, but you could also use Cool Whip for convenience.
- Filling Layers (optional) – This could be hot fudge sauce, caramel, cookie chunks, or crushed candy bars layered in between the ice cream for extra indulgence.
- Decorations – Sprinkles, shaved chocolate, crushed cookies, fresh fruit, or piped whipped cream for the final touch.
Pro tip: Let your ice cream sit out for 10-15 minutes before spreading—it makes layering much easier and cleaner.
How Much Time Will You Need
This isn’t a quick whip-up dessert, but it’s mostly hands-off while freezing. Here’s a rough breakdown:
- Prep time: 30 minutes
- Freeze time between layers: 1–2 hours (depending on your freezer strength)
- Final freeze before serving: At least 4 hours, preferably overnight
- Total time: 6–8 hours (mostly freezer time)
So yes, you’ll need to plan ahead—but trust me, the end result is more than worth the wait.
How to Make This Homemade Ice Cream Cake
Here’s how to layer, freeze, and decorate your way to dessert bliss. Take your time and don’t rush the freezing process—that’s the key to perfect layers.
Step – 1: Prepare the Crust
Start by crushing about 24 chocolate sandwich cookies in a food processor until fine. Mix with 5 tablespoons of melted butter until the mixture holds together when pressed.
Press this crust mixture into the bottom of a 9-inch springform pan. Use the back of a spoon or flat-bottomed glass to smooth it out evenly. Freeze for 15 minutes to set.
Step – 2: Layer the First Ice Cream
Take your first ice cream flavor (let’s say chocolate) and allow it to soften on the counter for 10–15 minutes. Once soft, scoop it over the crust and gently spread it into an even layer.
Smooth the top with an offset spatula. Freeze this layer for about 1 hour, or until it’s firm.
Step – 3: Add a Filling Layer (Optional)
Want to take things to the next level? Drizzle a layer of fudge sauce, caramel, or sprinkle crushed cookies or candy bars over the first ice cream layer. Lightly press it in so it sticks when frozen. Freeze for another 15 minutes.
Step – 4: Layer the Second Ice Cream
Now take your second ice cream flavor (let’s say vanilla) and repeat the softening and spreading process over the chilled base layers. Smooth it out evenly and return the cake to the freezer for 1–2 hours.
Step – 5: Frost the Cake
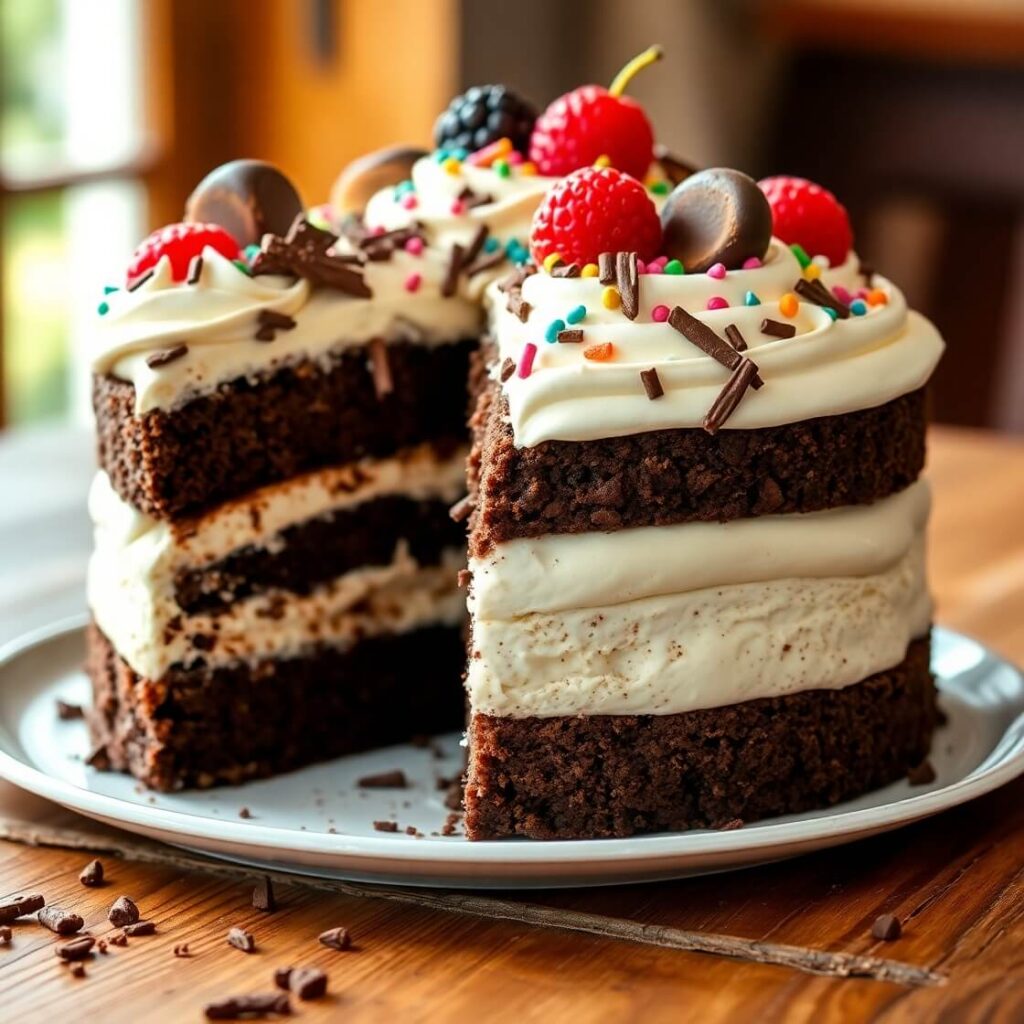
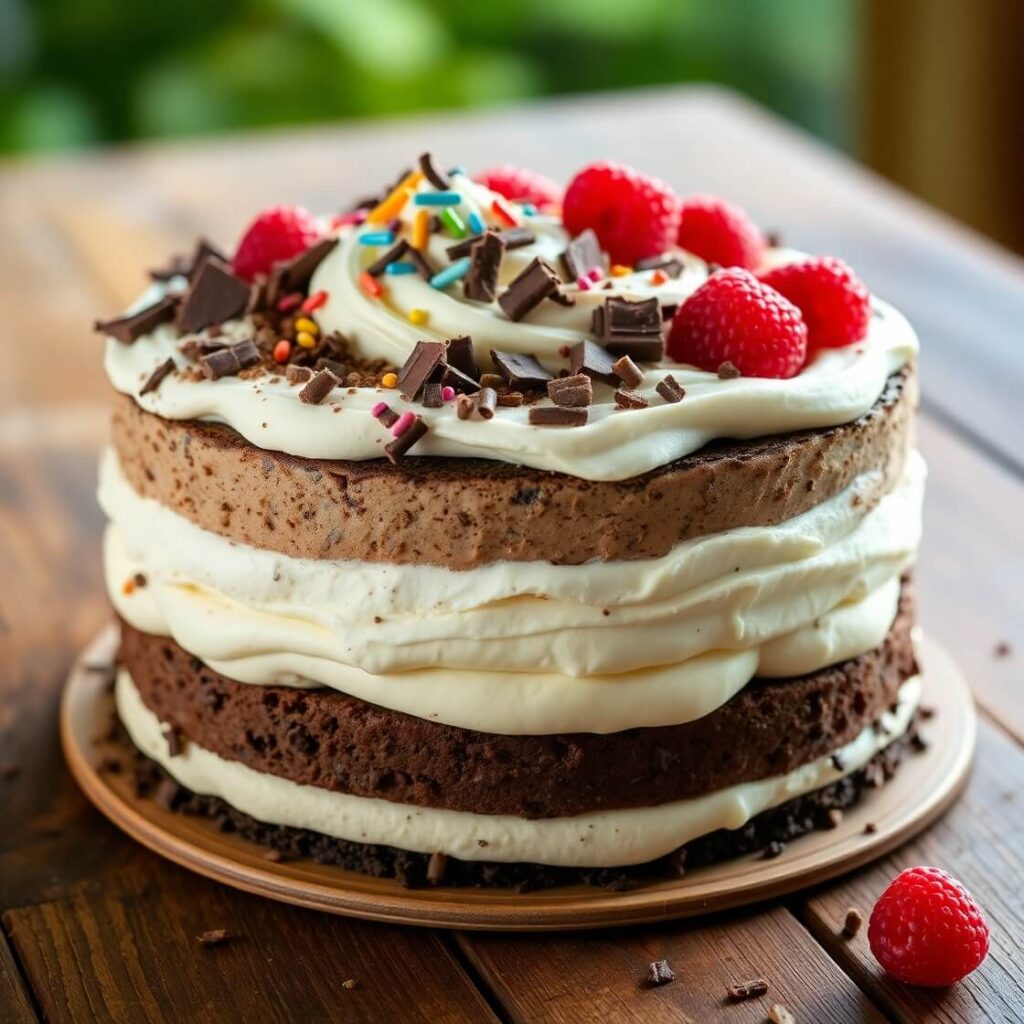
Once your layers are solid, remove the springform ring carefully. Frost the cake with stabilized whipped cream or your preferred topping. You can pipe around the edges for a decorative look or just go with a rustic spread—it’ll taste amazing either way.
Step – 6: Add the Final Touches
Time to get creative! Top your cake with sprinkles, shaved chocolate, fresh berries, or even mini cookies for a fun finish.
Step – 7: Final Freeze
Return the fully assembled cake to the freezer and let it set for at least 4 hours or overnight. When you’re ready to serve, let it sit for 10 minutes at room temperature before slicing with a sharp knife dipped in warm water.
Substitutions
There are so many ways to make this cake your own, depending on dietary needs or preferences.
Don’t like chocolate cookies? Use graham crackers or digestive biscuits for a golden crust.
Dairy-free? Use your favorite dairy-free ice cream and whipped coconut cream for the topping.
No whipped topping on hand? Try frosting with a homemade ganache or even marshmallow fluff for something different.
Gluten-free? Use gluten-free cookies or brownies for the base and ensure your ice cream is certified gluten-free.
This recipe is all about flexibility—swap in what works for you and your guests, and don’t be afraid to try bold combos!
Best Side Dish of Homemade Ice Cream Cake
While this cake can absolutely shine solo, pairing it with something complementary makes dessert time extra special. Here are three side dish ideas that elevate the experience:
Fresh Berry Salad: A simple mix of strawberries, blueberries, and raspberries with a drizzle of honey and lemon juice offers a light and tangy contrast.
Espresso or Iced Coffee: The richness of the ice cream cake pairs beautifully with the boldness of coffee—it’s a match made in dessert heaven.
Salted Caramel Popcorn: Sweet, salty, and crunchy—this side adds texture and a fun twist to your dessert spread.
Serving and Presentation Tips
Serving your homemade ice cream cake is just as fun as making it. Presentation plays a big role in making the dessert feel special and inviting. I always find that even simple touches can elevate the entire experience.
To serve, slice the cake with a sharp, warm knife—run the blade under hot water and wipe it dry before each cut. This helps create smooth, clean slices without tearing the layers apart.
For presentation, consider serving the cake on a chilled plate to help it hold its shape longer. You can also garnish each slice with fresh mint leaves or a small scoop of complementary ice cream on the side.
If you want to wow your guests, plate the cake with a drizzle of chocolate or caramel sauce, or a sprinkle of crushed nuts or cookie crumbs. Little details like this make your dessert look bakery-quality and encourage everyone to dig in.
Tips and Tricks to Make This Recipe Even Better
This homemade ice cream cake is delicious as is, but a few tricks can make it taste and look even more amazing.
- Soften the ice cream properly: Don’t rush this step. Letting your ice cream sit at room temperature for about 10–15 minutes makes it easier to spread without melting and mixing the layers.
- Use a springform pan: It makes removing the cake after freezing much easier and keeps your layers intact.
- Freeze between layers: Patience is key. Freezing the cake in stages ensures that your layers don’t blend together and stay neat.
- Stabilize your whipped cream: If you’re using homemade whipped cream, add a little gelatin or cream of tartar to keep it firm longer, especially if the cake will be out for a while.
- Add texture: Mix in some cookie crumbles, chopped nuts, or fudge pieces between layers for a surprise crunch.
- Work quickly when assembling: Ice cream melts fast! Have all your tools ready, and work efficiently to keep your layers crisp.
- Store in an airtight container or wrap well: This prevents freezer burn and keeps your cake tasting fresh.
Common Mistakes to Avoid
Even the best cooks can slip up, so here are a few common mistakes to watch out for when making your ice cream cake:
- Not softening ice cream enough: Trying to spread ice cream straight from the freezer can tear your crust and create uneven layers.
- Skipping the freezing between layers: Without freezing in stages, your ice cream layers will blend together and lose their distinct textures.
- Using a regular pan instead of a springform: It makes removing the cake without breaking it much harder.
- Not sealing the cake properly in the freezer: Exposure to air causes ice crystals and freezer burn, ruining texture and flavor.
- Slicing the cake without warming the knife: Cold knives can crack the cake or create messy edges.
Avoiding these pitfalls will make your homemade ice cream cake look polished and taste fantastic.
How to Store It
Proper storage keeps your ice cream cake fresh and delicious longer.
Wrap the cake tightly in plastic wrap, pressing gently to avoid crushing the decorations. Then cover it with aluminum foil or place it in an airtight container. This double layer of protection prevents freezer burn and unwanted odors.
Store the cake in the coldest part of your freezer, ideally at 0°F (-18°C) or below. Avoid frequent thawing and refreezing, which can cause ice crystals and affect texture.
When ready to serve, remove the cake from the freezer and let it sit at room temperature for about 10 minutes to soften slightly before slicing.
FAQ
Can I use store-bought ice cream for this recipe?
Absolutely! Store-bought ice cream works perfectly. Just make sure to let it soften before layering.
Can I make this cake ahead of time?
Yes! In fact, I recommend making it a day or two ahead to allow the layers to freeze and set properly.
What if I don’t have a springform pan?
You can use a regular cake pan lined with parchment paper, but removing the cake will be trickier. Freezing the cake well before removing it helps.
Can I freeze leftovers?
Yes, just wrap them tightly in plastic wrap and foil to prevent freezer burn. Eat within one week for best taste.
How do I prevent ice crystals on the cake?
Store it in an airtight container or wrap well in plastic wrap and foil to minimize exposure to air.
Homemade Ice Cream Cake
- Total Time: Approximately 6.5 hours
- Yield: 10–12 1x
- Diet: Vegetarian
Description
ndulge in this easy-to-make, customizable homemade ice cream cake that combines your favorite ice cream flavors layered over a crunchy cookie crust and topped with luscious whipped cream. Perfect for birthdays, summer gatherings, or any celebration, this no-bake cake is both impressive and incredibly delicious. The step-by-step method ensures smooth layers and a dessert that tastes like it came from a bakery. With plenty of room for creativity in flavors and toppings, this recipe is a must-try for anyone who loves ice cream and cake—why choose when you can have both?
Ingredients
- 2 quarts of ice cream (2 flavors of choice)
- 24 chocolate sandwich cookies (or graham crackers)
- 5 tablespoons melted butter
- 1 cup stabilized whipped cream (or store-bought whipped topping)
- Optional: fudge sauce, caramel sauce, crushed candy bars, or sprinkles for layering and decoration
Instructions
- Crush cookies finely and mix with melted butter. Press into the bottom of a 9-inch springform pan and freeze 15 minutes.
- Soften first ice cream flavor and spread evenly over crust. Freeze 1 hour.
- Optional: add a drizzle or sprinkle of filling (fudge, caramel, crushed candy). Freeze 15 minutes.
- Soften second ice cream flavor and layer on top. Freeze 1–2 hours.
- Remove pan sides carefully. Frost with whipped cream and decorate as desired.
- Freeze cake for at least 4 hours before serving. Let sit 10 minutes before slicing.
Notes
- Soften ice cream to make spreading easier.
- Freeze between layers to keep them distinct.
- Use a warm knife to slice clean pieces.
- Stabilize whipped cream for longer-lasting frosting.
- Prep Time: 30 minutes
- Cook Time: 5–6 hours (including layering)
- Category: Dessert
- Method: No-bake, freezer-based
- Cuisine: American
Nutrition
- Serving Size: 10–12
- Calories: 350
- Sugar: 28g
- Sodium: 120mg
- Fat: 18g
- Saturated Fat: 11g
- Unsaturated Fat: 5g
- Trans Fat: 0g
- Carbohydrates: 40g
- Fiber: 1g
- Protein: 4g
- Cholesterol: 55mg