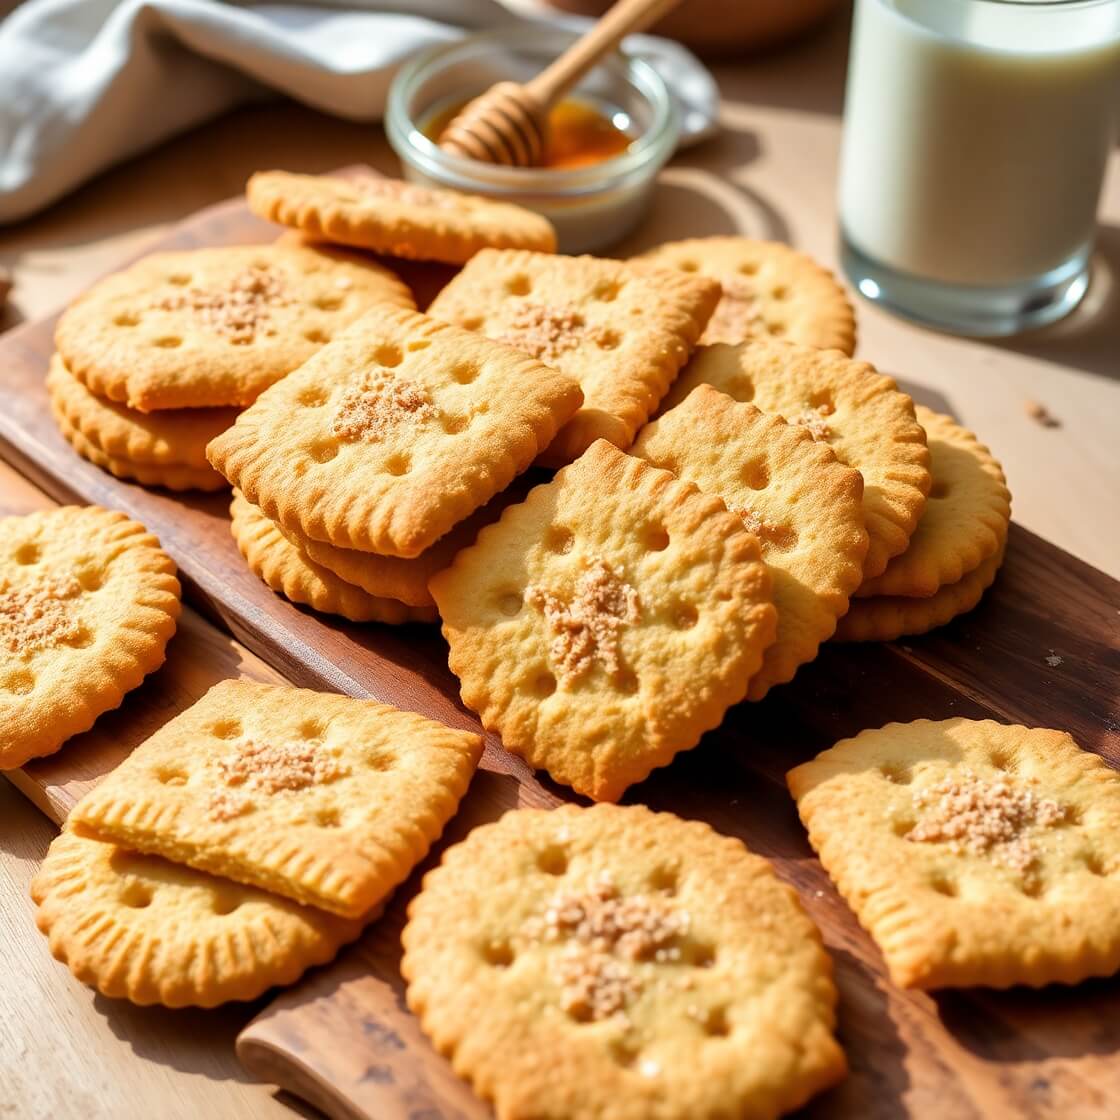
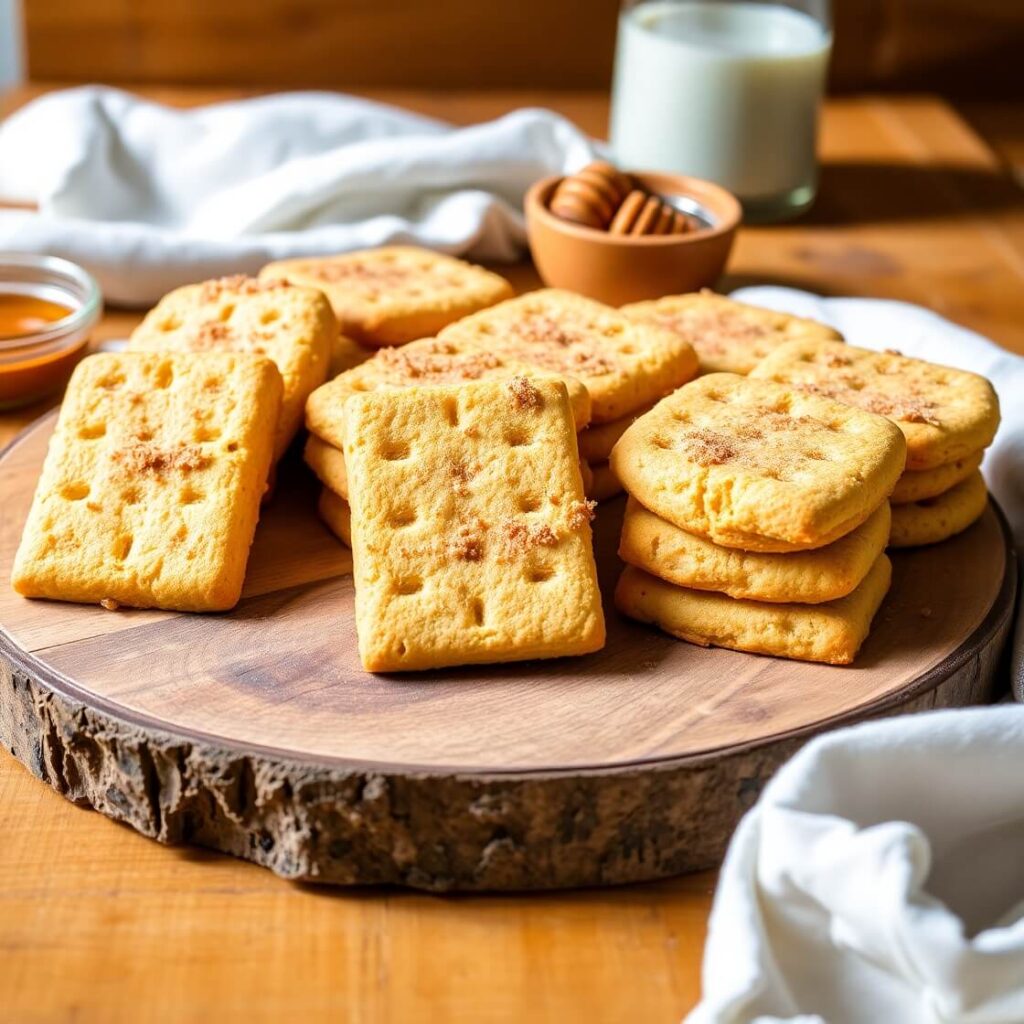
There’s something truly comforting about homemade graham crackers — the warm, sweet aroma that fills your kitchen, the satisfying crunch, and the subtly nutty, honeyed flavor that feels both nostalgic and timeless. I decided to create this recipe because while store-bought graham crackers are convenient, they often lack that fresh, wholesome taste and perfect texture you get when you make them from scratch. Plus, baking your own gives you control over ingredients and lets you customize the flavors to your liking.
Whether you’re planning to use these crackers for a classic s’mores night, a pie crust, or just as a simple snack with tea, this homemade recipe will quickly become a favorite. It’s easy enough for beginners but yields a delicious, bakery-quality result that will impress family and friends alike. Ready to bring that bakery magic right into your own kitchen? Let’s dive in.
Why I Love This Recipe

What makes homemade graham crackers so special isn’t just the taste—it’s the experience of making them from scratch. This recipe captures the perfect balance of sweet, slightly nutty flavors from whole wheat flour, a touch of honey, and warm spices like cinnamon.
Unlike the commercial versions, these crackers aren’t overly sweet or bland. The texture is just right: crisp and crunchy but not dry, with a satisfying snap when you break them. They are perfect for dunking into a hot cup of coffee or using as a base for cheesecakes and other desserts.
I also appreciate the wholesome ingredients—no unnecessary additives or preservatives. By baking your own, you get fresh, real flavor with the goodness of whole grains. And the versatility is unbeatable; you can tweak the sweetness or spice level to your preference, or add extras like vanilla or nuts for a personal touch.
This recipe is a little slice of homemade comfort and an invitation to enjoy a classic treat with your own twist.
Ingredients for Homemade Graham Crackers
To make these graham crackers, you’ll need a blend of simple, wholesome ingredients that come together beautifully:
- Whole wheat flour: The foundation of the recipe, it gives the crackers their characteristic nuttiness and slightly dense texture.
- All-purpose flour: Used in combination with whole wheat to keep the crackers crisp yet tender.
- Baking soda: Just a touch, to help the crackers rise slightly and stay light.
- Ground cinnamon: This warm spice is essential for authentic graham cracker flavor.
- Salt: Enhances all the flavors and balances the sweetness.
- Unsalted butter: Adds richness and helps create that crisp texture.
- Honey: The natural sweetener that gives these crackers their gentle, floral sweetness.
- Brown sugar: Adds depth of sweetness and helps with caramelization.
- Vanilla extract: Optional but highly recommended for a fragrant note.
- Milk: Just enough to bring the dough together.
All these ingredients are pantry staples for most home bakers, so you probably have everything on hand already. The best part is how they combine into a dough that’s easy to work with and yields a cracker that tastes like it came straight from a cozy bakery.
How Much Time Will You Need
Making homemade graham crackers is a delightful weekend project or an afternoon treat. Here’s the general timeline you can expect:
- Preparation time: About 15 to 20 minutes to gather and measure ingredients, and mix the dough.
- Chilling time: The dough needs to rest in the fridge for about 30 minutes. This helps it firm up and makes rolling easier.
- Rolling and cutting: Around 15 minutes, depending on how precise and decorative you want to be.
- Baking time: 10 to 12 minutes per batch until the crackers are golden and crisp.
- Cooling time: 15 minutes to ensure the crackers fully set and reach that perfect crunch.
All told, from start to finish, you’re looking at roughly an hour and a half. It’s well worth the time for the fresh, homemade flavor and fun experience.
How to Make Homemade Graham Crackers
Step-by-step, I’ll guide you through making these from scratch so you can follow along easily.
Step – 1: Mix the dry ingredients
In a large bowl, whisk together the whole wheat flour, all-purpose flour, baking soda, ground cinnamon, and salt. Make sure everything is evenly combined — this will help the dough develop consistent flavor and texture.
Step – 2: Cut in the butter
Add the cold, unsalted butter cut into small cubes to the flour mixture. Using a pastry cutter or your fingertips, work the butter into the flour until the mixture resembles coarse crumbs. The butter pieces should still be visible—this helps create flakiness and crispness in the crackers.
Step – 3: Combine wet ingredients
In a small bowl, whisk together the honey, brown sugar, vanilla extract (if using), and milk until smooth. The honey and sugar will add that lovely sweetness, while the milk moistens the dough.
Step – 4: Bring the dough together
Pour the wet mixture into the dry ingredients. Using a spatula or your hands, mix until the dough just comes together. Avoid overworking it; the dough should be slightly crumbly but hold together when pressed.
Step – 5: Chill the dough
Shape the dough into a flat disk, wrap it tightly in plastic wrap, and refrigerate for at least 30 minutes. This resting period firms up the butter and makes rolling the dough much easier.
Step – 6: Roll out the dough
Lightly flour your work surface and rolling pin. Roll the dough into an even rectangle, about 1/8 inch thick. Try to keep it uniform so the crackers bake evenly.
Step – 7: Cut and dock the crackers
Using a sharp knife or pizza cutter, slice the dough into squares or rectangles, about 2 to 3 inches wide. Use a fork to prick holes evenly across each cracker. This docking prevents puffing and helps the crackers stay flat and crisp.
Step – 8: Bake
Place the crackers on a parchment-lined baking sheet. Bake in a preheated oven at 350°F (175°C) for 10 to 12 minutes, or until the edges are lightly golden. Keep a close eye on them to prevent burning.
Step – 9: Cool completely
Remove the baking sheet from the oven and let the crackers cool for about 15 minutes on a wire rack. They will crisp up as they cool.
Step – 10: Store or enjoy
Once cooled, enjoy your homemade graham crackers right away, or store them in an airtight container for up to a week.
Substitutions
Want to tweak this recipe or accommodate dietary needs? Here are some easy substitutions that work well:
- Flour: You can replace all-purpose flour with whole wheat pastry flour for a lighter texture, or try spelt flour for a nuttier flavor.
- Sweeteners: If you prefer a less sweet cracker, reduce the brown sugar, or swap honey for maple syrup for a different but equally delicious sweetness.
- Milk: Use any plant-based milk such as almond, oat, or soy milk to make the recipe dairy-free.
- Butter: Substitute vegan butter or coconut oil to make it vegan-friendly. Coconut oil will add a slight coconut flavor, which can be nice.
- Spices: Feel free to experiment with ginger or nutmeg to add a warm spice twist.
These substitutions let you customize the recipe to your taste and dietary preferences without sacrificing the classic graham cracker experience.
Best Side Dishes of Homemade Graham Crackers
While these crackers are delicious on their own, pairing them with the right side dishes can elevate your snack time or dessert. Here are my top three favorites:
- Creamy vanilla or chocolate pudding — The smoothness contrasts perfectly with the crunch.
- Fresh fruit slices — Strawberries, apples, or bananas add natural sweetness and freshness.
- Nut butters — Peanut or almond butter spread on top adds richness and protein, making it more filling.
These combinations make simple moments feel special and can turn your homemade graham crackers into an elegant treat.
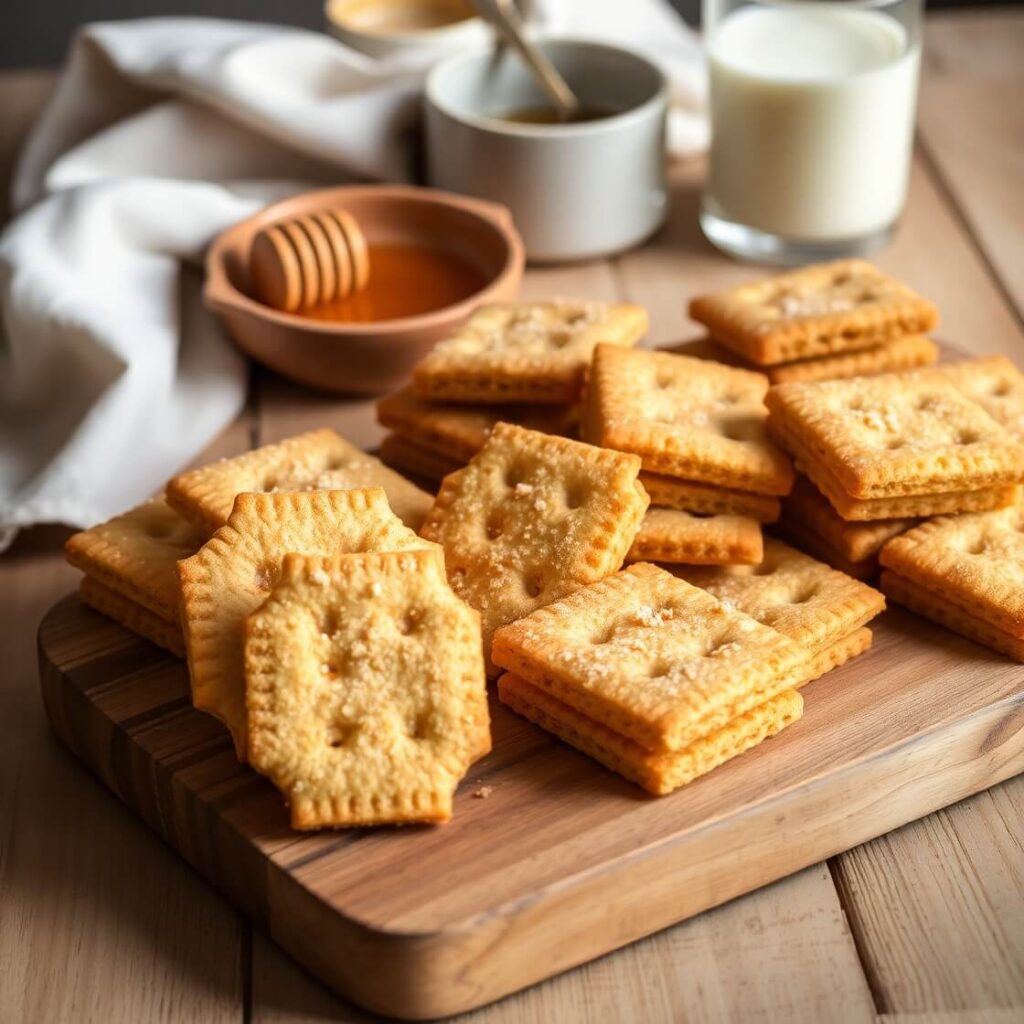
Serving and Presentation Tips
Serving your homemade graham crackers in an appealing way can truly enhance the enjoyment and make your baking efforts shine.
One delightful idea is to arrange the crackers on a rustic wooden board or a pretty platter, stacking them neatly or fanning them out for a casual, inviting look. Adding small bowls of accompaniments like fresh fruit slices, nut butters, or a drizzle of honey nearby encourages everyone to customize their bites.
For a fun dessert twist, try layering the graham crackers with whipped cream and berries in clear glasses to create quick parfaits. Or serve alongside a warm cup of spiced tea or rich hot chocolate for cozy moments.
Sprinkling a little powdered sugar or cinnamon on top just before serving adds a charming finishing touch that makes these simple crackers feel special.
Tips and Tricks to Make This Recipe Even Better
There are a few handy tricks I’ve learned over time to take homemade graham crackers from great to exceptional.
First, chilling the dough thoroughly is essential—not only does it make rolling easier, but it also prevents the crackers from spreading too much in the oven, keeping their shape crisp and defined.
When rolling, try to keep the dough thickness consistent—about 1/8 inch works best for that perfect snap without being too brittle.
Docking the dough (pricking it with a fork) isn’t just for looks; it stops air bubbles from forming and ensures even baking.
If you want extra flavor, lightly brush the tops with melted butter and sprinkle a tiny bit of coarse sugar before baking. This adds a subtle sparkle and an extra layer of sweetness and texture.
Lastly, cool the crackers completely on a wire rack—this helps them crisp up fully instead of becoming soggy from residual heat.
Common Mistakes to Avoid
While this recipe is forgiving, there are a few pitfalls to watch out for.
Avoid overmixing the dough after adding the wet ingredients—too much handling can develop gluten and result in tougher crackers instead of crisp, tender ones.
Don’t skip chilling the dough; warm dough will be sticky and harder to roll, and your crackers might lose their shape during baking.
Be careful not to roll the dough too thin, or the crackers will bake too quickly and may burn. On the other hand, rolling too thick can cause them to be chewy rather than crisp.
Watch your oven closely during baking—oven temperatures vary, and graham crackers can go from golden to burnt in minutes.
Finally, resist the temptation to eat the crackers right out of the oven. Letting them cool completely is crucial to develop that signature crunch.
How to Store It
To keep your homemade graham crackers fresh and crunchy, proper storage is key.
Once fully cooled, store the crackers in an airtight container at room temperature. Avoid storing them in humid places as moisture will make them soft and lose their crunch.
If you want to keep them longer, you can store them in a sealed zip-top bag with a piece of parchment paper in the fridge for up to two weeks.
For extended storage, freeze the crackers in an airtight container or freezer bag for up to three months. When ready to enjoy, let them come to room temperature or warm them slightly in the oven for that fresh-baked feel.
FAQ
Can I make this recipe gluten-free?
Yes! Substitute the flours with a gluten-free all-purpose baking blend that contains xanthan gum. The texture may vary slightly but will still taste delicious.
How can I make my graham crackers crispier?
Rolling the dough thinner and ensuring it cools completely on a wire rack helps. Also, avoid covering the crackers tightly while still warm to prevent moisture buildup.
Can I add chocolate chips or nuts to the dough?
Absolutely! Fold in finely chopped nuts or mini chocolate chips after mixing the wet and dry ingredients for added texture and flavor.
Are these crackers suitable for vegan diets?
With substitutions like plant-based butter and milk alternatives, you can easily make this recipe vegan-friendly.
Can I use this dough to make other baked goods?
Yes, this dough can double as a base for pie crusts or crumble toppings, adding a lovely graham cracker flavor to your desserts.
Print
Homemade Graham Crackers
- Total Time: 1 hour 5 minutes
- Yield: 24 1x
- Diet: Vegetarian
Description
Experience the warm, nutty, and lightly spiced taste of freshly baked homemade graham crackers with this easy-to-follow recipe. Made from wholesome whole wheat flour, honey, and fragrant cinnamon, these crackers offer a satisfying crunch and natural sweetness without any artificial additives. Perfect for snacking, making s’mores, or using as a base for pies, they bring a cozy bakery feel right to your kitchen. Whether you’re baking for family or friends, this recipe will quickly become a go-to classic.
Ingredients
- 1 cup whole wheat flour
- 1/2 cup all-purpose flour
- 1/2 teaspoon baking soda
- 1 teaspoon ground cinnamon
- 1/4 teaspoon salt
- 1/2 cup unsalted butter, cold and cubed
- 1/4 cup honey
- 1/4 cup brown sugar, packed
- 1 teaspoon vanilla extract (optional)
- 2 to 3 tablespoons milk
Instructions
- Whisk together flours, baking soda, cinnamon, and salt.
- Cut cold butter into flour mixture until crumbly.
- In a separate bowl, mix honey, brown sugar, vanilla, and milk.
- Combine wet and dry ingredients until dough holds together.
- Chill dough wrapped for 30 minutes.
- Roll dough out to 1/8 inch thickness on a floured surface.
- Cut into rectangles, prick with fork holes to dock.
- Bake at 350°F (175°C) for 10-12 minutes until golden.
- Cool completely on a wire rack before storing or serving.
Notes
- Chilling the dough is crucial for easy rolling and crisp crackers.
- Docking prevents puffing and ensures even baking.
- Customize with nuts or spices for unique flavors.
- Store in airtight containers to maintain freshness.
- Prep Time: 20 minutes
- Cook Time: 12 minutes
- Category: Snack / Dessert
- Method: Baking
- Cuisine: American
Nutrition
- Serving Size: 24
- Calories: 120
- Sugar: 6g
- Sodium: 80mg
- Fat: 5g
- Saturated Fat: 3g
- Unsaturated Fat: 2g
- Trans Fat: 0g
- Carbohydrates: 17g
- Fiber: 2g
- Protein: 2g
- Cholesterol: 15mg