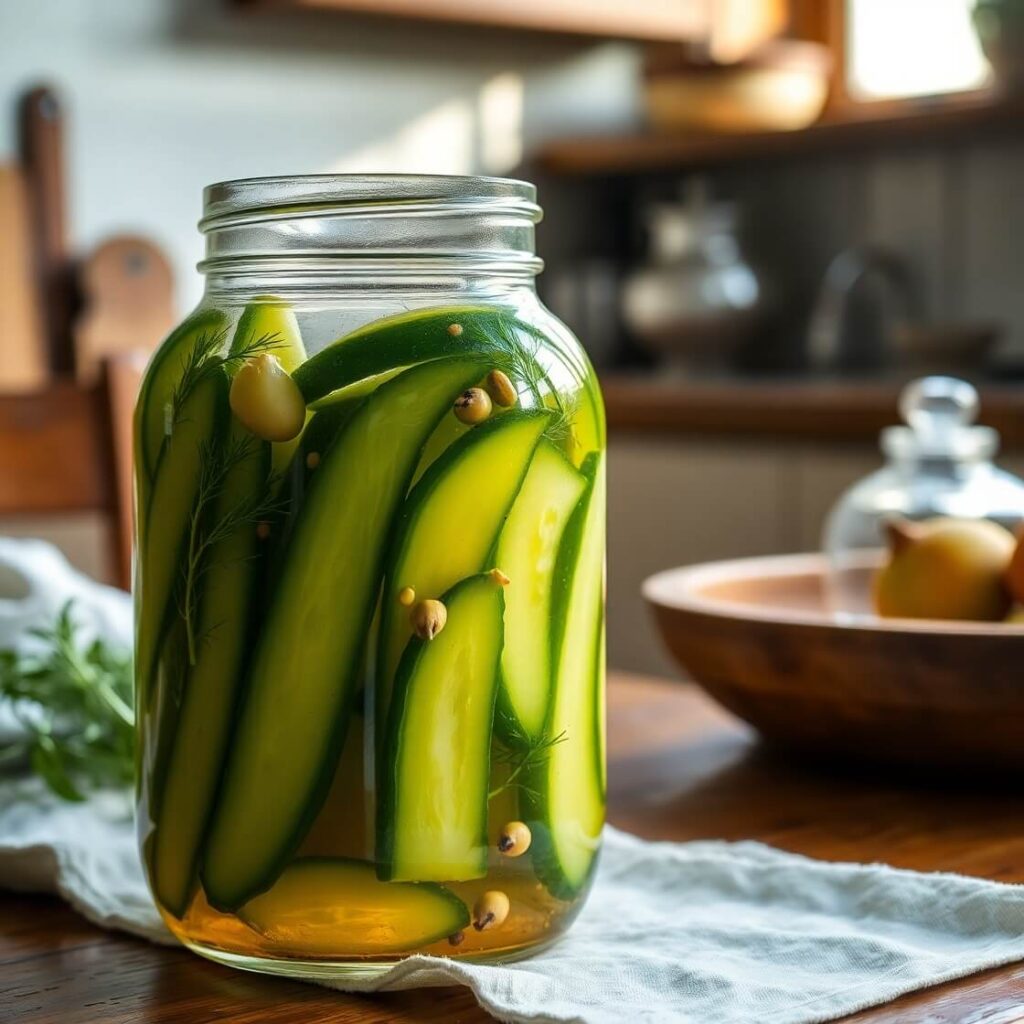
I still remember the first time I bit into a crunchy, cold dill pickle straight from my grandma’s cellar. It was tart, garlicky, fresh, and packed with flavor in a way no store-bought version ever matched. That unforgettable crunch and burst of briny goodness stayed with me—and that’s exactly what inspired me to start making my own homemade dill pickles.
In today’s world of fast food and mass-produced everything, there’s something incredibly satisfying about making your own pickles at home. Not only is it surprisingly easy, but you also get to control the flavors, the crispness, and even the ingredients. Whether you’re looking to top a burger, build the ultimate charcuterie board, or snack straight from the jar (guilty!), these pickles hit all the right notes.
Stick around and I’ll walk you through everything—from choosing the right cucumbers to creating the perfect brine. If you’ve never made pickles before, this guide is designed to make it approachable, fun, and a little addicting.
Why I Love This Recipe

Here’s the thing: dill pickles are timeless. They’re more than just a side item or sandwich add-on—they’re little jars of preserved summer.
What makes this recipe special is how simple, adaptable, and flavor-packed it is. With just a few pantry staples and fresh dill, you’ll create a pickle that rivals anything you’ve had from a deli. Plus, these are refrigerator pickles, meaning no water-bath canning required. You can whip up a batch in under 30 minutes, let them sit overnight, and the next day—bam!—you’ve got crisp, tangy pickles ready to devour.
Another reason I keep coming back to this recipe? The crunch. I’ve worked on this brine for years, testing different vinegar ratios and experimenting with firming agents, and now I’ve landed on the perfect combination that keeps the pickles snappy, even days later.
If you’re someone who loves playing with spices, this recipe is a blank canvas too. Add jalapeños for heat, peppercorns for depth, or mustard seeds for a hint of bitterness. But even in its simplest form, it never disappoints.
Ingredients for Homemade Dill Pickles
Let’s talk ingredients. The magic of homemade pickles lies in how few ingredients you need to create such bold flavor. It’s honestly kind of amazing.
You’ll want to start with fresh, small cucumbers—ideally pickling cucumbers or Kirby cucumbers. These have a thicker skin and hold up better during the pickling process. Avoid those big, waxy salad cucumbers; they’ll turn soft and soggy.
Here’s what you’ll need to get started:
- Cucumbers: Pickling cucumbers (Kirby) are the best. Choose firm, unblemished ones around 4–5 inches long. About 2 lbs will fill two quart-size jars.
- Fresh Dill: Whole dill heads or sprigs. You can also use dill seeds in a pinch, but fresh dill gives unbeatable aroma.
- Garlic: Lots of it. I use 2–3 cloves per jar, smashed to release flavor.
- Vinegar: Distilled white vinegar gives that classic sharp pickle tang. Apple cider vinegar works too, but it has a sweeter edge.
- Water: Filtered water helps keep the brine clean-tasting.
- Kosher Salt: Not table salt. You want pickling salt or kosher salt without additives, so your brine stays clear.
- Optional Spices: Whole peppercorns, mustard seeds, red pepper flakes, coriander seeds—all up to you!
There’s no need for anything artificial—no food coloring, preservatives, or “natural flavors.” Just real, whole ingredients.
Once you’ve got your lineup, it’s just a matter of prepping the brine and assembling your jars.
How Much Time Will You Need
This is a quick pickle recipe, so you won’t need to block out your whole afternoon.
Here’s the breakdown:
- Prep Time: 20 minutes
- Cook Time (for brine): 5 minutes
- Resting Time (in fridge): Minimum 24 hours for flavor development (but they get even better after 2-3 days)
So in just 25 minutes of active time, you’ll have delicious homemade pickles ready to chill and infuse overnight.
If you’re like me and can’t resist trying them early, they’re still tasty after a few hours—but give them time, and you’ll be rewarded with maximum crunch and flavor.
How to Make This Homemade Dill Pickles
Making homemade dill pickles is more straightforward than you’d think. It’s really just a matter of prepping your cucumbers, making a hot brine, and letting everything steep in the fridge.
Here’s my step-by-step method:
Step 1: Wash and prep the cucumbers
Give the cucumbers a good scrub to remove dirt or wax. Trim both ends, especially the blossom end—it contains enzymes that can make your pickles mushy. Leave them whole, halve them, or slice into spears or chips, depending on how you want to use them.
Step 2: Sterilize your jars
While you don’t need to do full canning sterilization, I still recommend washing the jars in hot soapy water or running them through a hot dishwasher cycle. Make sure they’re dry before packing.
Step 3: Make the brine
In a saucepan, combine 1 cup vinegar, 1 cup water, and 1 tablespoon kosher salt per jar. If making two jars, double it. Bring the mixture to a boil, then reduce heat and simmer for 1–2 minutes to fully dissolve the salt.
Step 4: Pack the jars
To each jar, add a few sprigs of fresh dill, 2–3 smashed garlic cloves, and any optional spices like mustard seeds, red pepper flakes, or black peppercorns. Then, tightly pack the cucumbers into the jars, leaving a little headspace at the top.
Step 5: Pour in the brine
Carefully pour the hot brine over the cucumbers until they’re completely submerged. Tap the jars gently or use a clean knife to release air bubbles. Top off with more brine if needed.
Step 6: Seal and chill
Screw the lids on tightly and let the jars cool to room temperature. Then pop them into the fridge. The flavors will start developing right away, but for best results, wait 24–48 hours.
And just like that, you’ve got your own batch of crisp, garlicky dill pickles.
Substitutions
One of the best parts about this recipe is how flexible it is. If you’re out of an ingredient or want to switch things up, you absolutely can.
Here are a few of my favorite swaps:
- Vinegar: If you prefer a slightly sweeter, more mellow flavor, try apple cider vinegar instead of white vinegar. Rice vinegar works too, though it’s milder.
- Dill: No fresh dill? You can use 1 teaspoon dried dill weed or dill seeds per jar. It’s not quite the same, but still delicious.
- Salt: If you don’t have kosher salt, you can use sea salt, but avoid table salt—it contains anti-caking agents that can cloud the brine.
- Spices: Customize your blend! Try coriander seeds for citrus notes, or cloves for a deeper, old-fashioned flavor. A dash of sugar can soften the tang if you like sweeter pickles.
Want to make them spicy? Add a few slices of jalapeño or a pinch of crushed red pepper flakes to each jar. It’s a game changer!
Best Side Dish of Homemade Dill Pickles
Dill pickles are incredibly versatile and go with just about everything. But here are three pairings that make them really shine:
- Pulled Pork Sandwiches – The salty crunch of a pickle cuts through the rich, saucy meat beautifully.
- Deviled Eggs – Add chopped dill pickles into the yolk filling or serve them alongside for a briny bite.
- Grilled Cheese – A classic pairing. The tangy snap of a cold pickle next to melty cheddar is comfort food magic.
Serving and Presentation Tips
There’s something oddly joyful about serving homemade pickles—especially when they’re beautifully presented. Whether you’re hosting a barbecue, building a charcuterie board, or just packing a lunch, pickles deserve their moment to shine.
For a casual, rustic presentation, serve them right from the jar with a set of wooden tongs or a small fork for easy grabbing. If you’re doing a party spread, arrange spears or chips on a wooden board with folded deli meats, cheeses, crackers, and olives. Garnish with a few fresh dill sprigs and slices of garlic for that fresh-from-the-garden look.
Want something a little more polished? Transfer the pickles to a small glass bowl or vintage ramekin. A drizzle of olive oil and pinch of chili flakes can elevate the flavor even more. I also love pairing these pickles with sliders or mini sandwiches—they act as a palate cleanser and a flavor booster all at once.
Tips and Tricks to Make This Recipe Even Better
If you’re making homemade dill pickles for the first time, here are some of my best tips to ensure you get the crunchiest, most flavorful results every single time.
- Use the freshest cucumbers possible. The fresher the cucumbers, the better the crunch. Avoid soft or overripe cucumbers—they won’t hold up well.
- Trim the blossom end. It’s not just a tradition—it’s science. The blossom end contains enzymes that can cause softening. Always cut off both ends, especially the one with a dried, flower-like shape.
- Don’t skip the cooling step. Letting your jars cool before refrigeration helps prevent condensation and ensures even flavor distribution.
- Use whole garlic cloves. Sliced garlic can turn blue in vinegar (totally safe, but weird-looking). Keeping them whole avoids this and gives a slow, mellow infusion.
- Label your jars. It’s easy to forget when you made them. Use masking tape or a chalk marker to write the date.
- Let them sit for at least 48 hours. The pickles will taste good after a day, but two or three days brings out a deeper, more balanced flavor.
Common Mistakes to Avoid
Making pickles is simple, but a few missteps can affect the final texture and flavor. Here’s what to steer clear of:
- Using table salt. It often contains anti-caking agents that can cloud your brine and mess with the flavor. Stick to kosher or pickling salt.
- Overcrowding the jars. Cramming too many cucumbers in can cause uneven pickling. Leave space for the brine to circulate.
- Not boiling the brine. If the salt doesn’t dissolve properly, your flavor will suffer. Always bring the brine to a boil before pouring.
- Using waxed cucumbers. These are often coated in a wax that prevents brine from penetrating. Always choose unwaxed, fresh varieties.
- Reusing brine. It might be tempting, but leftover brine loses its potency. Always make fresh brine for each new batch.
How to Store It
Refrigerator dill pickles are super easy to store—and they actually improve the longer they sit.
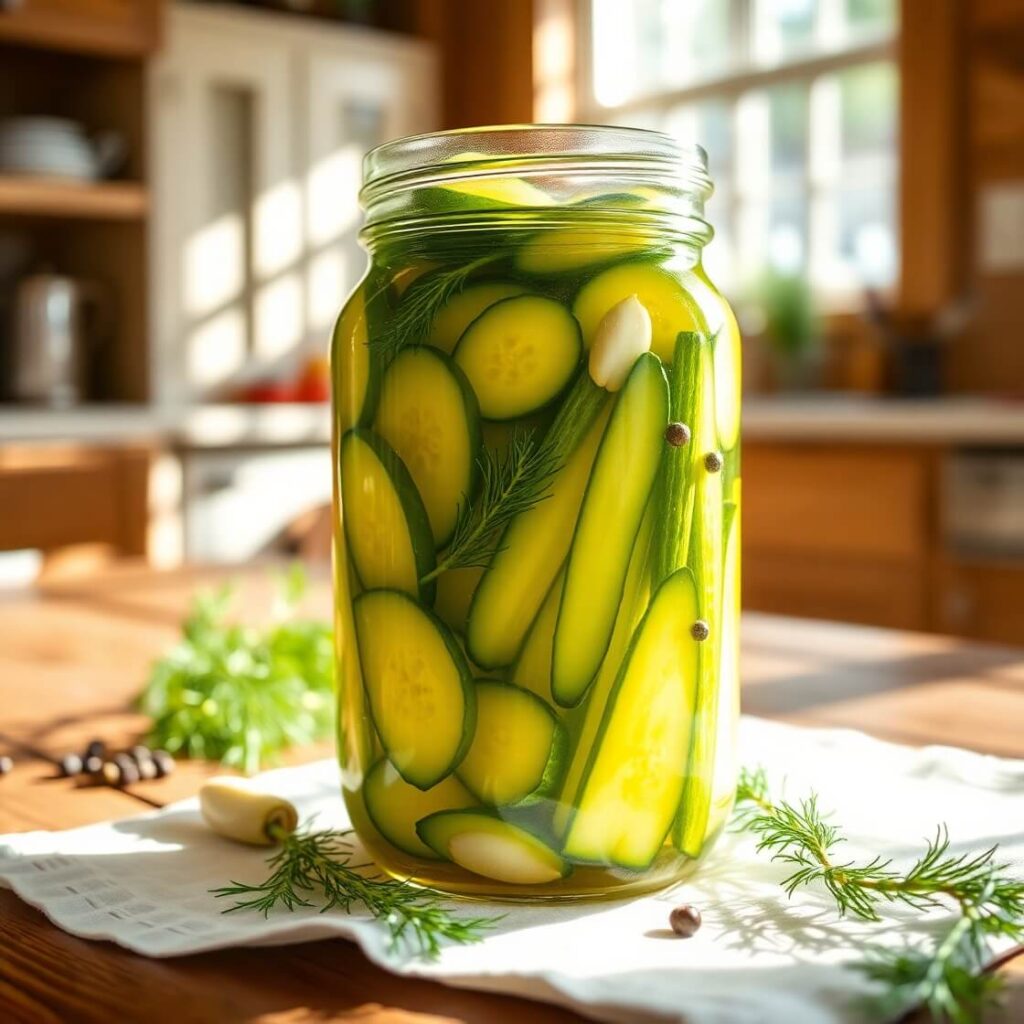
Keep your pickles in airtight glass jars in the refrigerator. Mason jars work best, but any clean jar with a tight lid will do.
Once opened, they’ll stay fresh for up to 2 months—though they rarely last that long in my house!
Always use a clean utensil to remove pickles from the jar. Avoid fingers or dirty forks, which can introduce bacteria and spoil the brine faster.
If you ever notice cloudiness, that’s usually from spices or garlic—not a bad sign. But if you see mold, throw the whole jar out.
FAQ
Can I use apple cider vinegar instead of white vinegar?
Yes! Apple cider vinegar adds a slightly sweet, tangy twist. Just make sure it’s at least 5% acidity.
Do I need to peel the cucumbers?
Nope—leave the skins on for the best crunch. Just give them a good scrub before pickling.
Can I use dried dill instead of fresh?
Absolutely. Use about 1 tsp of dried dill weed or ½ tsp dill seeds per jar if you can’t find fresh.
How long do homemade pickles last in the fridge?
They’re good for about 1–2 months, as long as you keep the jars sealed and refrigerated.
Can I make these pickles spicy?
Definitely! Add a few slices of jalapeño or ¼ tsp of red pepper flakes to each jar for a kick.
Homemade Dill Pickles
- Total Time: 25 minutes (+24 hours resting)
- Yield: 2 1x
- Diet: Vegetarian
Description
Make your own crunchy, zesty dill pickles right at home—no canning required! These quick refrigerator pickles are the perfect balance of tangy, salty, garlicky, and herbaceous. They’re ideal for snacking, burgers, charcuterie boards, or anytime you want a fresh, homemade treat. This is one of those simple recipes you’ll come back to again and again—and the best part? It only takes 25 minutes of hands-on time.
Ingredients
- 2 lbs pickling cucumbers
- 4 cups water
- 4 cups white vinegar
- 2 tbsp kosher salt
- 6 cloves garlic, smashed
- 4–6 sprigs fresh dill (or 2 tsp dill seeds)
- Optional: 1 tsp black peppercorns, 1 tsp mustard seeds, ½ tsp red pepper flakes
Instructions
- Wash and scrub cucumbers well; slice into desired shapes (spears or chips).
- Trim off both ends of each cucumber.
- Boil water, vinegar, and salt in a saucepan until salt dissolves; remove from heat.
- Sterilize jars by washing in hot soapy water or running through dishwasher.
- Add dill, garlic, and spices to each jar.
- Pack cucumbers tightly into the jars.
- Pour hot brine over cucumbers until fully submerged.
- Let jars cool, then refrigerate for at least 24 hours before eating.
Notes
- For spicy pickles, add jalapeño slices or red pepper flakes.
- Let pickles sit for 2–3 days for best flavor.
- Always use clean utensils to remove pickles from jar.
- Prep Time: 20 minutes
- Cook Time: 5 minutes
- Category: Snack / Side
- Method: No-cook (refrigerator pickling)
- Cuisine: American
Nutrition
- Serving Size: 2
- Calories: 9
- Sugar: 0g
- Sodium: 320mg
- Fat: 0g
- Saturated Fat: 0g
- Unsaturated Fat: 0g
- Trans Fat: 0g
- Carbohydrates: 2g
- Fiber: 1g
- Protein: 0g
- Cholesterol: 0mg