Chocolate syrup is one of those timeless classics that instantly brings a smile to anyone’s face. I decided to create this homemade chocolate syrup recipe because, honestly, store-bought versions often feel too sweet or artificial to me. I wanted a rich, luscious syrup that tastes deeply chocolatey, is simple to make, and has that perfect balance of sweetness and thickness. Plus, making it at home means I control every ingredient — no preservatives, just pure goodness. Whether you’re drizzling it over ice cream, stirring it into milk, or using it in baking, this syrup is a versatile treat you’ll want to keep on hand.
If you’ve ever wished for a chocolate syrup that tastes homemade, fresh, and decadently smooth, keep reading. I promise it’s easier than you think, and the results are so rewarding.
Why I Love This Recipe

Chocolate syrup might seem like a simple thing, but the difference between a homemade batch and a store-bought bottle is night and day. What makes this recipe special is the balance of intense cocoa flavor without being overpoweringly bitter or sickly sweet. It’s silky, glossy, and just the right thickness to coat your favorite desserts or drinks without feeling heavy or sticky.
I love making this syrup because it’s pure, customizable, and incredibly fresh. It’s made with basic pantry ingredients — cocoa powder, sugar, water, and a touch of vanilla — but the way they come together here creates a deep, rich flavor that feels indulgent yet natural.
Another reason I adore this recipe is the control it gives me over sweetness and texture. I can make it thicker or thinner depending on the use — for drizzling, dipping, or mixing — and adjust the sugar to suit my mood or occasion. Plus, it’s a fantastic base for experimenting: a pinch of cinnamon or espresso powder can turn it into a gourmet delight.
Making your own chocolate syrup also means no artificial additives or preservatives, which gives peace of mind, especially when serving it to kids or health-conscious guests. Homemade always feels a little more special.
Ingredients for Homemade Chocolate Syrup
The beauty of this recipe is that it uses just a handful of everyday ingredients, all of which you probably already have in your kitchen. Here’s what you need to create this luscious syrup:
- Cocoa powder: Unsweetened cocoa powder is the heart of the recipe. It provides that intense chocolate flavor and beautiful dark color. I recommend using a good-quality natural or Dutch-processed cocoa for the best taste.
- Granulated sugar: This balances the bitterness of cocoa and gives the syrup its sweetness. You can adjust the amount based on your preference.
- Water: It acts as the base liquid that dissolves the cocoa and sugar to form a smooth syrup.
- Salt: Just a tiny pinch helps to enhance the chocolate flavor and bring everything together.
- Vanilla extract: This adds warmth and depth, rounding out the flavor beautifully.
Each ingredient plays an important role in making the syrup taste rich and well-balanced. No fancy or hard-to-find ingredients here, just simple things working in perfect harmony.
How Much Time Will You Need
One of the best parts about this recipe is how quick it is. From start to finish, you’ll need about 10 to 15 minutes to make this chocolate syrup.
- Prep time: 5 minutes — mostly gathering ingredients and measuring.
- Cooking time: 5 to 10 minutes — simmering the mixture until it thickens just right.
Overall, it’s a fast and easy way to elevate any dessert or drink with homemade charm, and the results are totally worth the few minutes you invest.
How to Make This Homemade Chocolate Syrup
Here’s the detailed step-by-step process to make this rich, glossy chocolate syrup. I’ll guide you carefully so you get the perfect texture and flavor every time.
Step – 1: In a medium saucepan, whisk together the cocoa powder, granulated sugar, and salt until well combined and there are no lumps.
Step – 2: Slowly add water to the dry mixture, whisking continuously to create a smooth, liquid batter without any clumps.
Step – 3: Place the saucepan over medium heat. Stir constantly as the mixture warms up and begins to simmer. This prevents burning or sticking.
Step – 4: Once the syrup starts to simmer, reduce the heat to low and let it cook gently. Continue stirring frequently to keep the syrup smooth and prevent it from scorching.
Step – 5: After about 5 to 7 minutes, the syrup will thicken slightly. To test the consistency, dip a spoon in the syrup and let it cool for a moment — it should coat the back of the spoon nicely without running off too quickly.
Step – 6: Remove the saucepan from heat and stir in the vanilla extract. This step adds a lovely depth of flavor to your syrup.
Step – 7: Let the syrup cool to room temperature. It will thicken more as it cools.
Step – 8: Transfer the syrup to a clean jar or bottle for storage. It’s ready to use immediately or can be refrigerated to keep for up to two weeks.
Following these steps carefully ensures you get a smooth, glossy, and richly flavored syrup every time, without any graininess or bitterness.
Substitutions
While this recipe works wonderfully as is, there are a few substitutions you can consider to customize or adapt it to your needs.
If you don’t have granulated sugar, you can use light brown sugar for a slightly richer, molasses note, which pairs beautifully with cocoa.
For a more intense, deeper chocolate flavor, try swapping natural cocoa powder with Dutch-processed cocoa. Dutch-processed has a milder acidity and a darker color, resulting in a smoother, less bitter syrup.
If you prefer a less sweet syrup or want to reduce refined sugar, you can experiment with natural sweeteners like maple syrup or honey. Just note that these will alter the flavor and sweetness level, and the syrup may be a bit thinner.
For a dairy-free or vegan version, this recipe is already suitable as it contains no dairy.
Finally, you can add a pinch of instant espresso powder or cinnamon during the cooking process to elevate the chocolate flavor with subtle complexity.
Best Side Dish of Homemade Chocolate Syrup
Chocolate syrup is a delightful addition to many dishes. Here are three of my favorite ways to serve it to make your eating experience even more enjoyable:
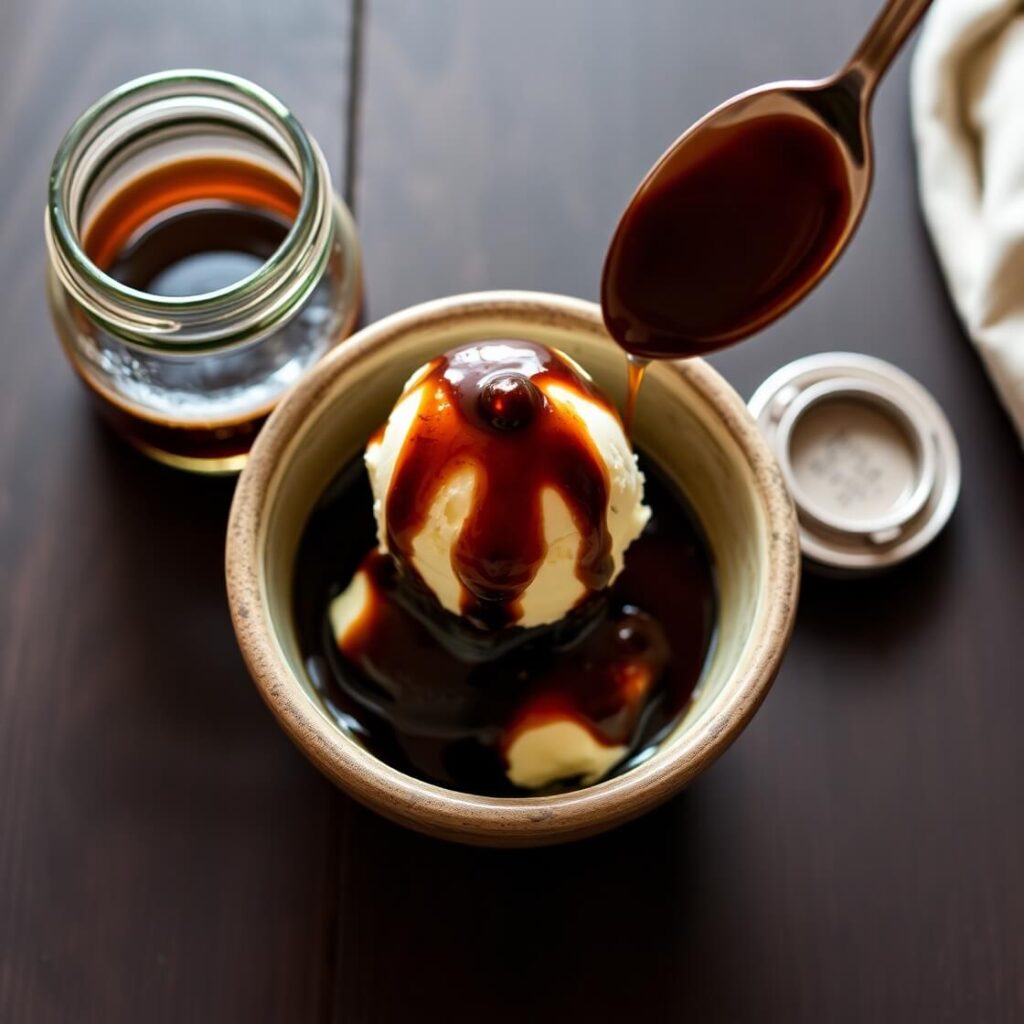
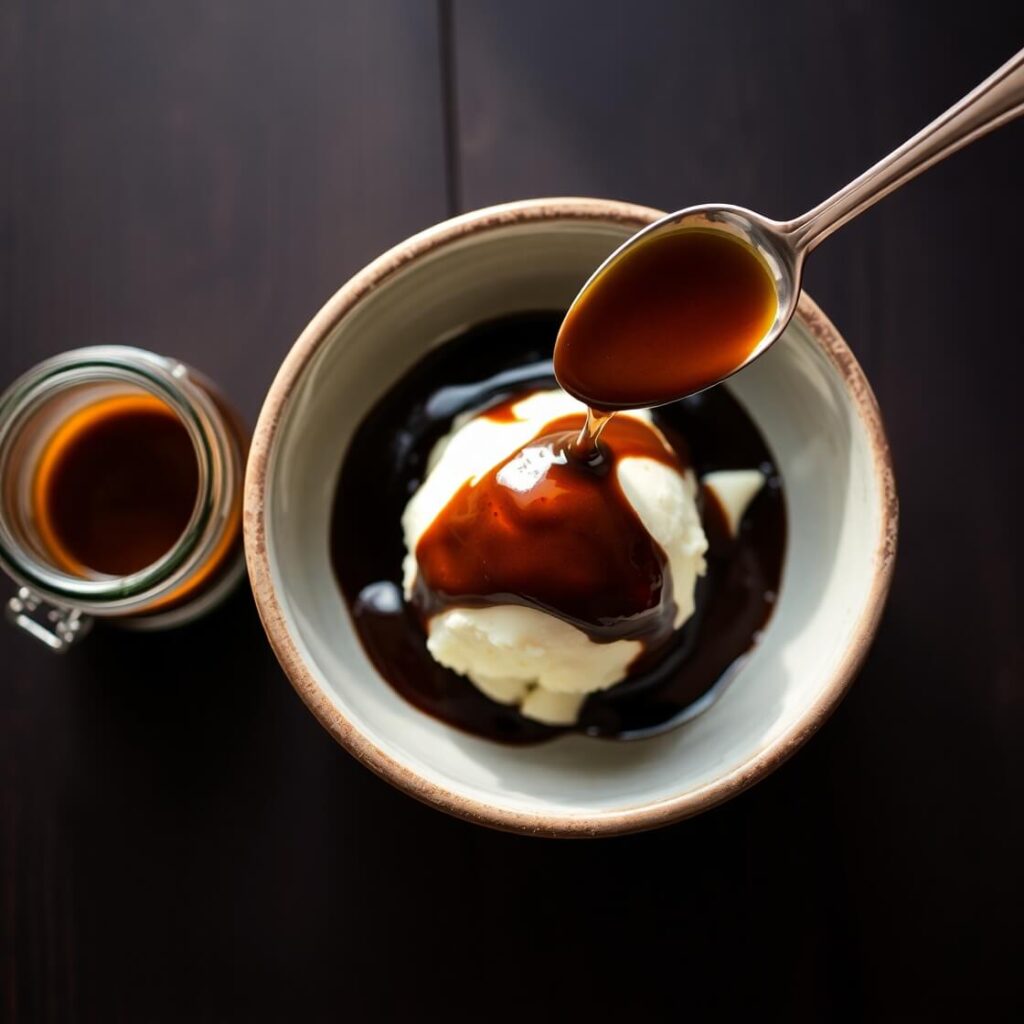
- Vanilla ice cream: Drizzle the syrup over a scoop of creamy vanilla ice cream for a classic sundae that never fails to please.
- Pancakes or waffles: Pour chocolate syrup over warm, fluffy pancakes or waffles as an indulgent breakfast or dessert treat.
- Fresh fruit: Use the syrup as a dip or drizzle for strawberries, bananas, or sliced apples for a simple yet decadent snack.
These pairings bring out the best in the syrup and offer a variety of delicious options for any time of day.
Serving and Presentation Tips
Serving homemade chocolate syrup is all about highlighting its rich, glossy texture and deep chocolate aroma to make every bite or sip feel special. One simple way to present it beautifully is to drizzle it artistically over your dessert or beverage, creating elegant swirls or zigzags that invite you to dig in. Use a small spoon or a squeeze bottle for precision — this little touch transforms a simple dish into something visually enticing.
For drinks like milkshakes or hot chocolate, consider adding a swirl of whipped cream topped with a light drizzle of the syrup to create layers of flavor and texture. You can also rim your glass with cocoa powder or crushed chocolate chips to add an extra element of indulgence.
If you’re serving it with fruit or ice cream, place the syrup in a small decorative bowl alongside your plate, allowing guests to customize the amount. Presentation is as much about ease and enjoyment as it is about looks, so keep it simple yet inviting.
Tips and Tricks to Make This Recipe Even Better
To take your homemade chocolate syrup to the next level, here are some tips I’ve learned from experience:
- Use high-quality cocoa powder. The flavor and color of your syrup depend heavily on the cocoa, so don’t skimp here.
- Whisk thoroughly when combining dry and wet ingredients to avoid lumps. A smooth mixture leads to a glossy syrup.
- Don’t rush the simmering process. Slow cooking allows the syrup to thicken evenly and develop a richer flavor without burning.
- Adjust sweetness gradually. Taste as you go and add more sugar or vanilla if needed to match your preference.
- For a thicker syrup, simmer a little longer but watch closely to avoid scorching.
- Adding a tiny pinch of salt really enhances the chocolate flavor by balancing bitterness.
- Store the syrup in a sterilized, airtight container to keep it fresh longer.
- If you want to add a hint of sophistication, sprinkle in a little cinnamon, chili powder, or espresso powder during cooking.
These simple tricks can turn your syrup from good to extraordinary.
Common Mistakes to Avoid
Making chocolate syrup is straightforward, but there are a few common pitfalls to watch out for:
- Not whisking enough at the start: This can leave lumps of dry cocoa powder that never fully dissolve, resulting in a gritty syrup.
- Using too high heat: Boiling the syrup too aggressively can cause it to scorch on the bottom or become too thick and sticky.
- Skipping the salt: Even a small pinch of salt is essential to brighten the chocolate flavor.
- Over-thickening: Cooking too long can lead to a syrup that hardens when cooled, making it difficult to pour or drizzle.
- Adding vanilla too early: Adding vanilla while cooking can diminish its delicate flavor. Always stir it in after removing from heat.
Avoiding these mistakes ensures your syrup will have the perfect taste and texture.
How to Store It
Proper storage will keep your homemade chocolate syrup fresh and ready to use for weeks.
Store the syrup in a clean, airtight jar or bottle, preferably glass. Refrigerate it to extend shelf life — it should last up to two weeks when kept cold.
Before each use, give the syrup a good stir or gentle shake, as it may thicken or separate slightly in the fridge. If it becomes too thick, you can warm it gently in the microwave or on the stove with a splash of water to loosen it.
Always use a clean spoon or pour directly from the bottle to avoid introducing contaminants that can spoil the syrup.
Frequently Asked Questions
Can I make chocolate syrup without cocoa powder?
Cocoa powder is the base of this recipe, so it’s difficult to substitute. However, melted chocolate chips or baking chocolate can be used but will change the texture and sweetness.
Is this chocolate syrup vegan?
Yes! This recipe contains no animal products, so it’s naturally vegan and dairy-free.
Can I use this syrup in baking?
Absolutely! It’s great as a drizzle over cakes or mixed into batters for extra chocolate flavor.
How long does homemade chocolate syrup last?
Stored in the refrigerator in an airtight container, it lasts about two weeks.
Can I freeze homemade chocolate syrup?
It’s not recommended, as freezing can change the texture and make it grainy upon thawing.

Homemade Chocolate Syrup
- Total Time: 12 minutes
- Yield: 1 ½ 1x
- Diet: Vegan
Description
Indulge your sweet tooth with this rich and silky homemade chocolate syrup made from simple pantry ingredients. It’s the perfect topping for ice cream, pancakes, or drinks and beats store-bought versions with its fresh, natural flavor and customizable sweetness. Made with cocoa powder, sugar, water, and a hint of vanilla, this syrup comes together quickly and keeps well refrigerated. Whether you want to drizzle, dip, or stir, this recipe will become your go-to for chocolatey goodness.
Ingredients
- 1 cup granulated sugar
- 1 cup unsweetened cocoa powder
- 1 cup water
- Pinch of salt
- 1 teaspoon vanilla extract
Instructions
- In a medium saucepan, whisk together cocoa powder, sugar, and salt until smooth.
- Gradually add water, whisking until fully combined with no lumps.
- Place over medium heat and stir constantly until the mixture starts to simmer.
- Reduce heat and simmer gently for 5-7 minutes, stirring frequently until slightly thickened.
- Remove from heat and stir in vanilla extract.
- Let cool, then store in an airtight container in the refrigerator.
Notes
- Adjust sweetness by adding more or less sugar to taste.
- For a thicker syrup, simmer longer but watch carefully to avoid burning.
- Use high-quality cocoa powder for the best flavor and color.
- Prep Time: 5 minutes
- Cook Time: 7 minutes
- Category: Sauce / Topping
- Method: Stove-top simmering
- Cuisine: American
Nutrition
- Serving Size: 1 ½
- Calories: 90
- Sugar: 21g
- Sodium: 10mg
- Fat: 0g
- Saturated Fat: 0g
- Unsaturated Fat: 0g
- Trans Fat: 0g
- Carbohydrates: 24g
- Fiber: 1g
- Protein: 1g
- Cholesterol: 0mg