There’s something undeniably nostalgic about biting into a hot, juicy ear of grilled corn on the cob. It instantly brings me back to warm summer evenings, backyard barbecues, and the irresistible smoky smell of food cooking on an open flame.
This grilled corn on the cob recipe is more than just a side dish — it’s a crowd-pleasing classic that bridges simplicity and flavor. Whether it’s slathered with butter and salt or dressed up with a zesty lime crema, there’s a version of grilled corn for everyone.
I made this recipe because I wanted to capture that rustic charm — the joy of cooking with fire, of food kissed by smoke, and of a dish that requires very little but delivers so much. Whether you’re hosting a cookout, enjoying a family dinner on the patio, or meal-prepping for the week, this grilled corn recipe is one you’ll turn to over and over again.
So, let’s dive into it — because nothing says summer quite like grilled corn on the cob.
Why I Love This Recipe

Let’s be honest — there are dozens of ways to cook corn. But grilling it? That’s where the magic happens. I love this recipe because it’s the perfect combination of texture, flavor, and ease.
Grilling brings out the natural sweetness of the corn while adding a little char and smokiness that’s impossible to replicate with boiling or steaming. You don’t need fancy ingredients — just a few ears of fresh corn, a bit of butter or oil, and the heat of the grill.
What makes this grilled corn recipe so special is its versatility. You can leave it simple, dressed with nothing but salt and melted butter, or go bold with toppings like chili lime mayo, parmesan cheese, or even crumbled cotija. It’s the kind of recipe that adapts to your mood, your guests, or whatever’s in your pantry.
And perhaps my favorite part? It’s the kind of dish that brings people together. Whether you’re standing around the grill with a drink in hand or passing plates across a picnic table, grilled corn is the glue of a good gathering.
Ingredients for Grilled Corn on the Cob
Before we get into grilling, let’s talk about what you’ll need — because part of what makes this recipe so lovable is how little it requires.
Fresh Corn on the Cob:
This is the heart of the dish, so it’s worth getting the best you can find. Look for ears with bright green husks that feel slightly damp and plump. The silk should be light-colored and a bit sticky. That’s how you know your corn is sweet, fresh, and perfect for grilling.
Butter or Olive Oil:
Either will work depending on your flavor preferences. I personally love brushing my grilled corn with a mix of melted butter and a little olive oil for richness and depth.
Salt and Pepper:
Classic and necessary. Sea salt gives a bit more texture and flavor than table salt, but any kind will work. You can also sprinkle on some freshly cracked black pepper for a little extra bite.
Optional Garnishes and Toppings:
Here’s where you can get creative:
- Chili powder or smoked paprika for a little heat
- Crumbled cotija or parmesan cheese
- Fresh lime juice or lime zest
- Garlic butter or herb compound butters
- Fresh chopped cilantro or parsley
- A drizzle of hot honey
You can keep it as simple or as extravagant as you like. The corn is your canvas.
How Much Time Will You Need
One of the many beauties of grilled corn on the cob is how fast it comes together. You don’t need to plan hours in advance — just a bit of prep and you’re good to go.
Prep time: 10 minutes
Cook time: 10–15 minutes
Total time: 20–25 minutes
That’s it! You can have this ready before your guests even settle in. It’s quick, satisfying, and ideal for those summer nights when you don’t want to be stuck in the kitchen.
How to Make This Grilled Corn on the Cob

Grilling corn is as much about the method as it is about the ingredients. Here’s my tried-and-true step-by-step guide to getting that perfect charred, juicy bite every time.
Step – 1: Prep Your Corn
Start by removing the outer husks. You can grill corn with or without the husks — I prefer doing it without for maximum caramelization and flavor.
Once the husks are removed, pull off as much silk as you can. It doesn’t have to be perfect, but less silk means a cleaner bite.
If you’d like, you can soak the corn in water for about 10 minutes beforehand to prevent burning and help keep it juicy — but this is optional if you’re grilling over medium heat.
Step – 2: Preheat Your Grill
Heat your grill to medium-high. You want it hot enough to get a good sear, but not so hot that the corn burns too quickly.
If you’re using a charcoal grill, let the coals get nice and gray. For gas grills, preheat for about 10 minutes with the lid closed.
Step – 3: Oil or Butter the Corn
Brush each ear lightly with olive oil or melted butter. This not only helps with browning, but also enhances flavor and keeps the kernels from drying out.
Sprinkle with a little salt and pepper before placing on the grill.
Step – 4: Grill the Corn
Place the ears directly on the grates. Turn them every 2-3 minutes, allowing each side to get some nice char marks. You’re not looking to blacken the whole ear — just those golden, slightly crisped bits.
Grill for about 10–15 minutes total. The corn should be tender and juicy, with visible grill marks and slight blistering.
Step – 5: Serve It Up
Once it’s grilled, remove the corn from the grill and place on a platter. Serve it as is with extra butter on the side — or dress it up with any toppings your heart desires.
Grilled corn is best eaten hot, so gather everyone around and dig in right away.
Substitutions
Not everyone has the same preferences, and that’s the beauty of this dish — it’s incredibly flexible.
Don’t have fresh corn?
You can use frozen corn on the cob in a pinch. Just thaw completely before grilling and follow the same steps. While fresh corn is superior, frozen works well in a bind.
No grill?
Use a stovetop grill pan or even your oven broiler. You won’t get quite the same smoky flavor, but you’ll still achieve that crisp char and juicy bite. Cast iron pans work particularly well for stovetop grilling.
Vegan alternative to butter?
Try coconut oil or a plant-based butter substitute. These both add richness without using dairy.
Spice preference?
Skip the pepper or chili powder and try smoked paprika, garlic powder, or a citrus-infused salt. You can even add a touch of brown sugar to your butter for a sweet-and-savory twist.
Best Side Dishes for Grilled Corn on the Cob
Grilled corn is a versatile side that pairs beautifully with a wide range of dishes. Here are three that make the whole meal sing:
1. Grilled Chicken Thighs:
Juicy, smoky chicken and sweet, charred corn are a match made in heaven. The savory protein balances out the sweetness of the corn beautifully.
2. Classic Potato Salad:
Creamy, cool, and comforting — potato salad adds a lovely contrast to the hot and smoky corn. A great way to round out a backyard barbecue spread.
3. Tomato and Avocado Salad:
Fresh, juicy tomatoes and creamy avocados pair wonderfully with the crunch and smokiness of grilled corn. Add a little lime vinaigrette for a refreshing bite.
Serving and Presentation Tips
The moment your grilled corn hits the plate, you want it to feel just as special as it tastes — and presentation plays a huge role in that.
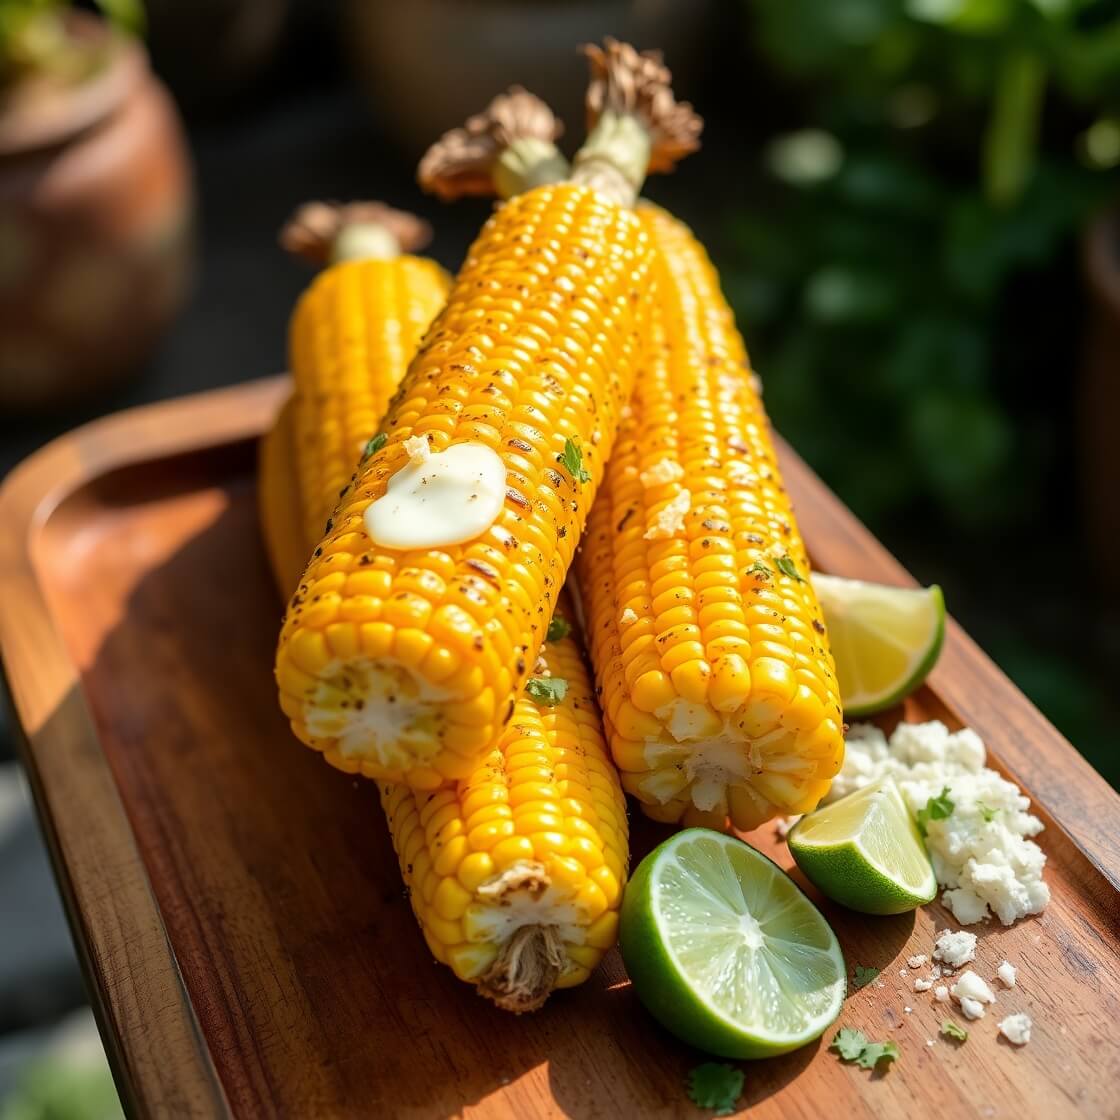
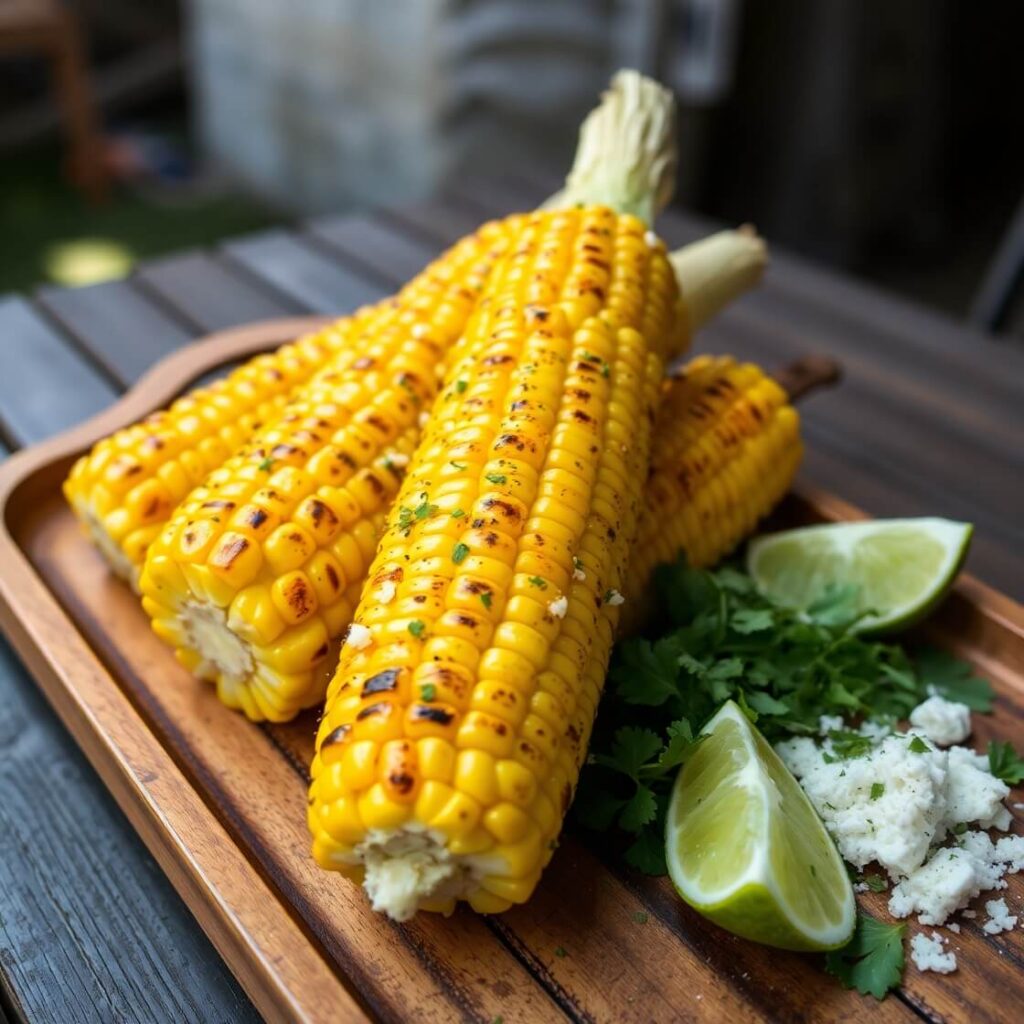
One of my favorite ways to serve grilled corn on the cob is on a large wooden cutting board or rustic serving tray. Stack the ears slightly on top of each other, then scatter a few lime wedges, a sprinkle of chopped cilantro or parsley, and a small bowl of melted butter or flavored mayo nearby.
If you’re adding cheese or spice blends, go ahead and dust it over the top while the corn is still warm. The heat will help everything melt just slightly, creating an irresistible look and smell.
For individual servings, skewer each ear with wooden or stainless steel corn holders or cut the cobs in half for easier eating — especially helpful for kids or party guests. If you’re going for a fancier presentation, serve in paper corn sleeves or wrap the base with a bit of parchment tied with twine.
Don’t forget the napkins — grilled corn is delightfully messy!
Tips and Tricks to Make This Recipe Even Better
When it comes to grilling corn, a few smart tips can make all the difference between “pretty good” and “out-of-this-world” delicious.
Start with quality corn. The sweeter and fresher it is, the better the final result. I always look for corn that was picked the same day, especially during summer months when it’s in season.
Butter after grilling. Applying butter before grilling can sometimes cause flare-ups. I like to brush a bit of oil on beforehand, then go in with all the buttery goodness as soon as it comes off the grill. The heat helps it melt beautifully into every kernel.
Don’t overcook. Over-grilling can dry out the corn. You want it tender with some brown, charred spots — not shriveled or burnt.
Rotate frequently. Turning the ears every few minutes allows for even cooking and prevents burning.
Mix up your flavor. Try compound butters like garlic-parsley, chipotle-lime, or honey-chili for a gourmet twist. You can also serve a “corn bar” with different seasoning options and sauces so guests can customize their own.
Common Mistakes to Avoid
Grilled corn is simple, but a few missteps can lead to disappointing results. Here’s what to avoid:
Using old corn. If the corn is dry or starchy, no amount of grilling will bring it back. Freshness is key.
Skipping the oil. Without a little fat (like oil or butter), the corn can stick to the grill or become dry and chewy.
Too much heat. High flames will burn the outer kernels before the inside is even warm. Stick to medium or medium-high heat for a controlled char.
Neglecting seasoning. Salt enhances sweetness and helps balance flavors. Don’t forget to season before and/or after grilling.
Leaving on the husks without soaking. If you’re grilling in the husks, soaking is a must to prevent them from catching fire.
How to Store It
Grilled corn stores surprisingly well, and you can even repurpose leftovers in creative ways.
To refrigerate:
Let the corn cool completely, then wrap each ear tightly in aluminum foil or place in an airtight container. It’ll stay fresh for up to 4 days.
To reheat:
You can reheat on the grill or in a 350°F oven wrapped in foil for about 10 minutes. A quick zap in the microwave works too — just cover with a damp paper towel to retain moisture.
To freeze:
Remove kernels from the cob using a sharp knife and freeze them in a zip-top bag or freezer-safe container. They’re perfect for salads, salsas, or soups later on.
FAQ
Can I grill corn with the husk on?
Yes! Grilling corn in the husk helps steam the kernels and keeps them super moist. Just soak the corn in water for 15–30 minutes beforehand to prevent burning, then grill for about 15–20 minutes, turning occasionally.
What’s the best way to remove silk from corn?
After removing the husks, use a damp paper towel or vegetable brush to gently rub away any remaining silk strands. A silicone brush also works great.
Can I make grilled corn ahead of time?
Absolutely. Grill the corn, then wrap it in foil and keep warm in a low oven (around 200°F) until serving. You can also reheat on the grill just before serving.
What toppings go best with grilled corn?
The possibilities are endless — garlic butter, chili-lime mayo, cotija cheese, parmesan, smoked paprika, sriracha, or even bacon bits. Fresh herbs like cilantro, parsley, or basil also work beautifully.
Can I make this indoors without a grill?
Yes! Use a stovetop grill pan, broil in the oven, or even use a cast iron skillet to char the corn. While you won’t get the same smoky flavor as outdoor grilling, the caramelized kernels still taste fantastic.

Grilled Corn on the Cob
- Total Time: 25 minutes
- Yield: 4 1x
- Diet: Vegetarian
Description
Grilled corn on the cob is a summer staple that’s simple to make, incredibly flavorful, and endlessly customizable. Whether you prefer it brushed with classic butter and salt or jazzed up with cheese, spices, or herbs, this recipe brings out the natural sweetness of fresh corn while adding a satisfying smoky char. It’s a go-to for barbecues, weeknight dinners, and summer potlucks — and best of all, it comes together in under 30 minutes with minimal ingredients. This is the kind of no-fuss, all-flavor dish that makes everyone smile at the table.
Ingredients
- 4 ears fresh corn on the cob, husked and cleaned
- 2 tablespoons olive oil or melted butter
- Salt, to taste
- Black pepper, to taste
- Optional toppings: lime wedges, chili powder, cotija or parmesan cheese, fresh herbs, garlic butter
Instructions
- Preheat your grill to medium-high heat.
- Remove husks and silk from the corn. Rinse and pat dry.
- Brush each ear with olive oil or melted butter. Season with salt and pepper.
- Place corn directly on the grill grates.
- Grill for 10–15 minutes, turning every 2–3 minutes to achieve even char marks.
- Remove from grill, apply additional butter or desired toppings, and serve hot.
Notes
- For an extra burst of flavor, try flavored butters or spice rubs.
- If grilling with husks, soak the ears in water for 15–30 minutes first.
- Leftovers can be cut off the cob and added to salads, tacos, or pasta dishes.
- Prep Time: 10 minutes
- Cook Time: 15 minutes
- Category: Side Dish
- Method: Grilling
- Cuisine: American
Nutrition
- Serving Size: 4
- Calories: 165
- Sugar: 5g
- Sodium: 180mg
- Fat: 8g
- Saturated Fat: 2g
- Unsaturated Fat: 5g
- Trans Fat: 0g
- Carbohydrates: 22g
- Fiber: 3g
- Protein: 4g
- Cholesterol: 5mg