Some days just call for something indulgent—something sweet, creamy, and nostalgic. That’s how I landed on this incredibly simple yet wildly satisfying recipe for easy Oreo desserts. I wanted something that didn’t require hours in the kitchen or fancy equipment but still delivered that wow factor. This dessert combines everyone’s favorite cookie—Oreos—with rich layers of cream, creating a no-fuss dish that feels downright luxurious.
I first made this dessert for a girls’ night in. I needed a quick treat that would impress without the pressure. And let me tell you, it was a hit. The best part? You can whip it up with minimal ingredients, and no baking required. Whether you’re planning a cozy movie night or bringing dessert to a potluck, this easy Oreo treat is going to be your new go-to.
Keep reading—I promise, you’ll want to make this tonight.
Why I Love This Recipe
Here’s the thing about Oreo desserts: they’re almost impossible to mess up. And that’s precisely what makes them so special.
This particular recipe is creamy, crunchy, and just the right amount of sweet. It’s one of those “dump and chill” kinds of desserts that deliver maximum flavor with minimal effort. I love that it brings together just a handful of pantry staples—Oreos, whipped topping, cream cheese, and a touch of vanilla—to create something people won’t stop talking about.
Plus, it’s incredibly versatile. You can serve it in a trifle dish, mason jars, a casserole pan—whatever suits your vibe. And because there’s no baking involved, it’s practically foolproof, making it perfect for beginner home cooks or anyone short on time.
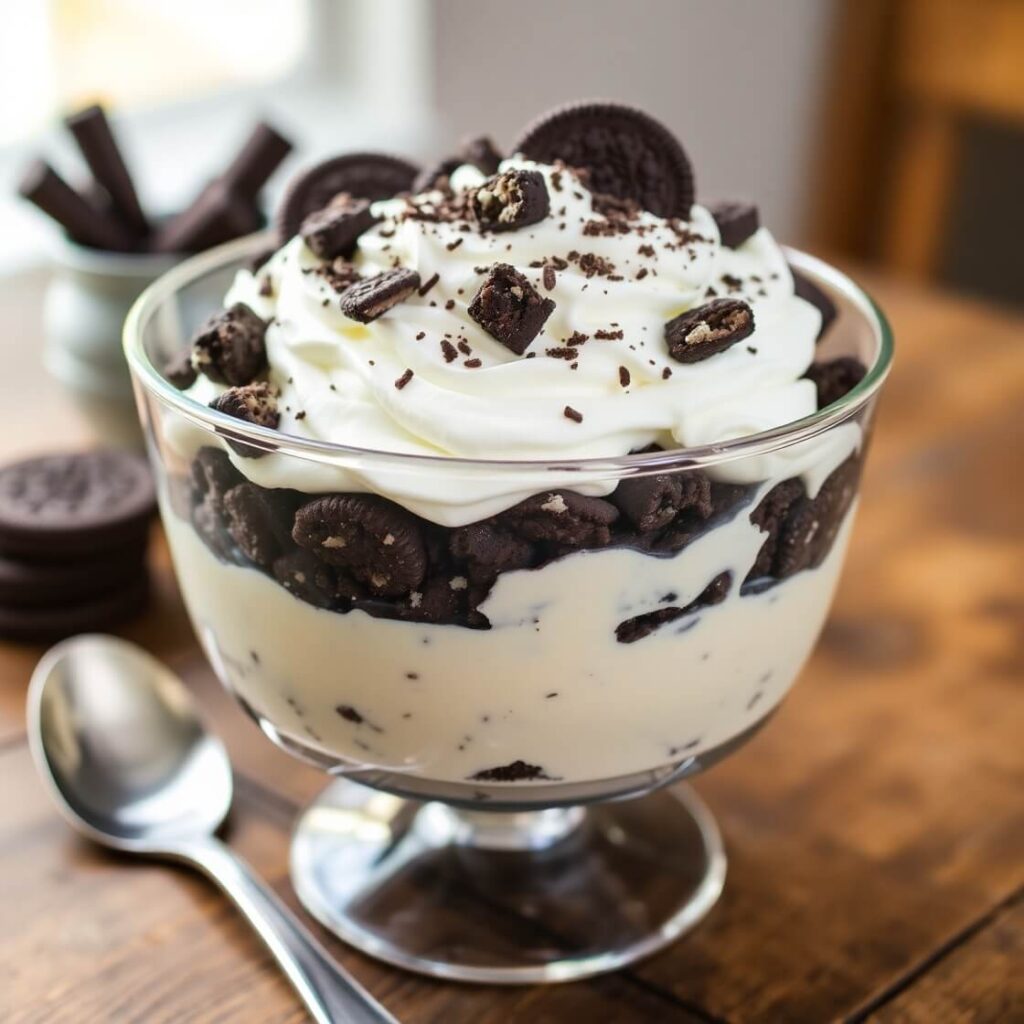
The texture is what makes this recipe stand out. The crushed Oreos soften just enough to mimic cake layers, while the filling remains light and mousse-like. It’s creamy, dreamy, and melts in your mouth in the best way possible.
So, if you’re craving something that feels indulgent but doesn’t take a culinary degree to pull off, this dessert is for you.
Ingredients for Easy Oreo Desserts
This recipe is built around simplicity, but don’t let that fool you—the flavor is anything but basic.
Here’s what you’ll need to bring this easy Oreo dessert to life:
- Oreo cookies – You’ll want the classic variety, though you can switch things up with flavored ones if you’re feeling adventurous. These form both the crust and part of the creamy layers.
- Cream cheese – Full-fat works best for that ultra-smooth, rich filling. Let it soften at room temp for easier blending.
- Powdered sugar – This sweetens the cream cheese mixture without leaving a grainy texture.
- Whipped topping (like Cool Whip) – Adds that fluffy, light texture that makes the dessert feel airy. You can use homemade whipped cream, but I love the convenience here.
- Vanilla extract – A little vanilla enhances all the other flavors and gives the dessert a homemade feel.
- Milk (optional) – Just a splash to help soften the Oreos if you like a more cake-like bite.
You don’t need to turn on the oven or buy anything fancy. It’s simple, approachable, and everything can be found at your local grocery store.
How Much Time Will You Need
This dessert comes together in a flash—and that’s part of its charm.
Here’s what you’re looking at time-wise:
- Prep time: 20 minutes
- Chill time: 2 to 4 hours (or overnight if you can wait)
- Total time: Under 30 minutes active, with some hands-off chilling.
If you’re in a pinch, 2 hours in the fridge will do the trick. But for best results? Letting it sit overnight allows the layers to meld beautifully.
How to Make This Easy Oreo Dessert
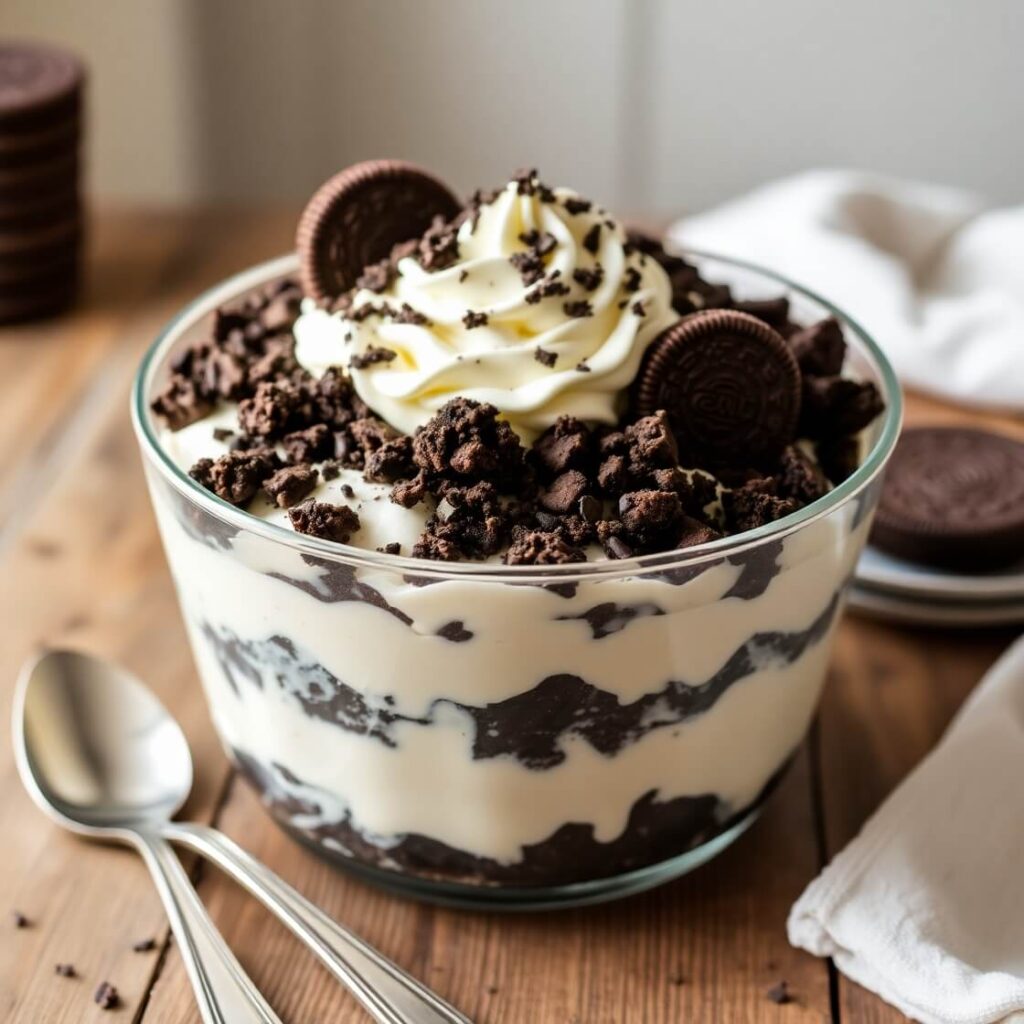
The beauty of this recipe is in its simplicity. It’s all about layering flavors and textures—and letting the fridge do the rest of the work.
Step – 1: Crush the Oreos
Start by crushing the Oreos. You can do this in a food processor for fine crumbs or in a zip-top bag with a rolling pin for chunkier bits. Set aside a handful to sprinkle on top at the end.
Step – 2: Make the creamy filling
In a large bowl, beat the softened cream cheese until smooth. Add in powdered sugar and vanilla extract. Mix until fully combined and fluffy. Then fold in the whipped topping gently so the mixture stays airy and light.
Step – 3: Build the base layer
In a 9×13 inch dish (or any dish you love), spread a layer of crushed Oreos across the bottom. You can press them lightly to form a loose crust, or leave them fluffy for a more deconstructed feel.
Step – 4: Add the creamy layer
Spread half of the cream cheese mixture over the Oreo base. Use a spatula to even it out—it doesn’t have to be perfect, just evenly distributed.
Step – 5: Repeat and layer
Add another layer of crushed Oreos over the cream mixture. Then spread the remaining half of the cream filling over the top.
Step – 6: Top and chill
Sprinkle your reserved Oreo crumbs on top for texture and garnish. Cover the dish with plastic wrap and refrigerate for at least 2 hours (but overnight is ideal).
Step – 7: Serve and enjoy
Scoop and serve chilled. Every bite should have a little bit of crunch, creaminess, and that signature Oreo flavor.
Substitutions
One of my favorite things about this dessert is how customizable it is. Depending on dietary needs or what you have on hand, you can easily make swaps without sacrificing flavor.
Here are some creative alternatives:
- Dairy-free: Use dairy-free cream cheese and coconut whipped topping. There are some amazing options out there now that taste just as rich.
- Gluten-free: Swap classic Oreos for gluten-free versions (yes, they exist and taste almost identical).
- Whipped cream: Prefer homemade whipped cream? Go for it. Just beat 2 cups of heavy cream with 2 tbsp powdered sugar until stiff peaks form.
- Different cookie base: Try using graham crackers, chocolate chip cookies, or even peanut butter sandwich cookies for a fun twist.
Want a fruity edge? Layer in sliced strawberries or bananas between the cream layers. Craving a mocha vibe? Mix a tablespoon of espresso powder into the cream filling. The sky’s the limit.
Best Side Dishes for Easy Oreo Dessert
While this dessert stands strong on its own, sometimes you want to round out your spread with a few thoughtful additions. Here are three ideas that pair beautifully:
- Vanilla Bean Ice Cream – A simple scoop cuts through the richness and adds a contrast in temperature.
- Fresh Berry Salad – Strawberries, raspberries, and blueberries tossed in a little honey and lemon juice offer a bright, tangy counterpoint.
- Espresso or Strong Coffee – Not exactly a side dish, but trust me—this dessert and a strong cup of coffee were made for each other.
Serving and Presentation Tips
There’s something magical about turning a simple dessert into something that feels like a showstopper. And with easy Oreo desserts, the right presentation can elevate it from casual treat to centerpiece.
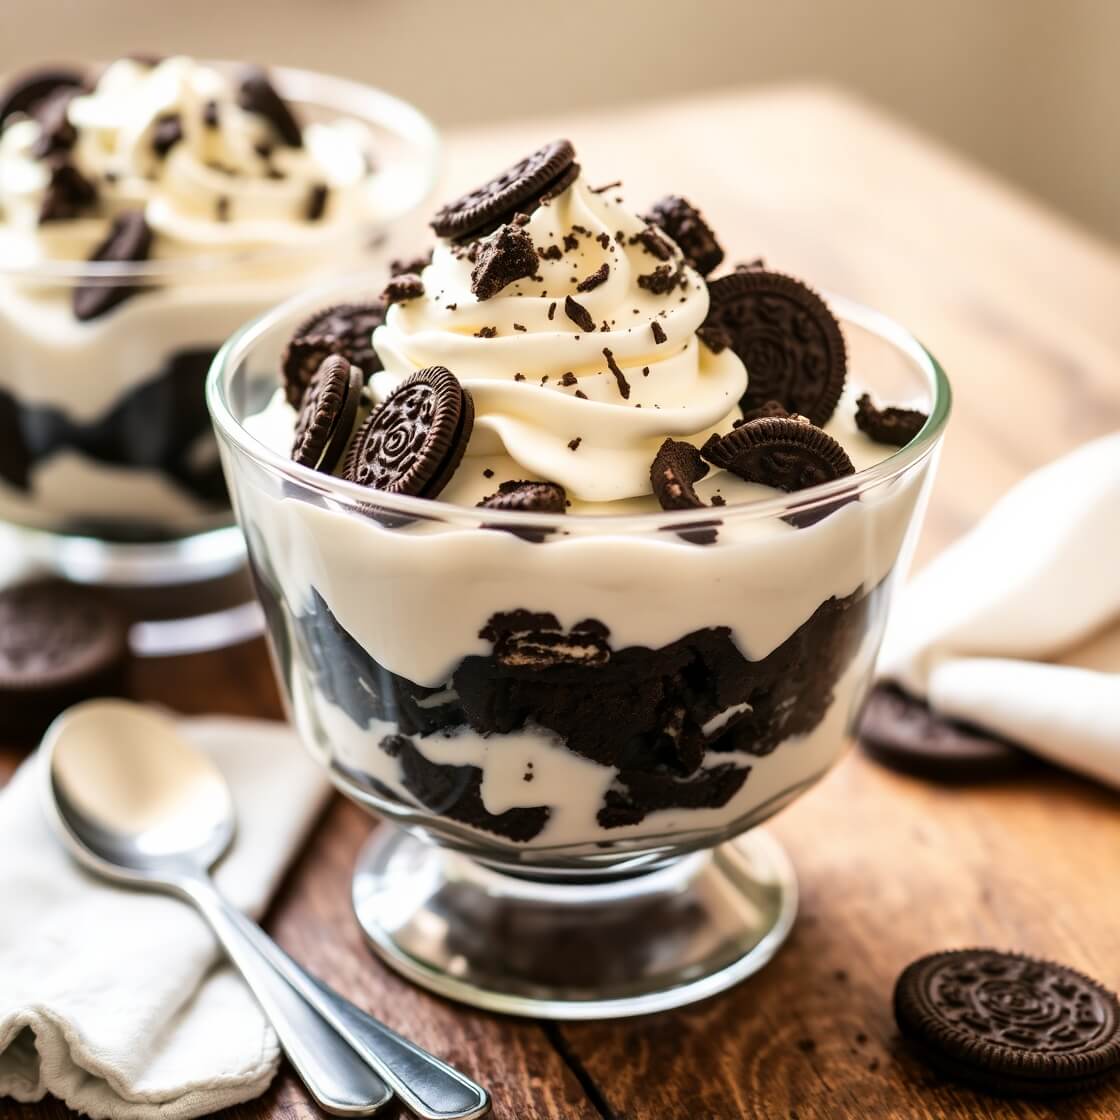
I love serving this dessert in a clear trifle dish when I want it to look impressive—it beautifully shows off the layers of cookies and cream. If you’re hosting a party or bringing it to a potluck, go for individual mason jars or stemless wine glasses. It makes the dessert feel personal and thoughtful, and honestly, people eat with their eyes first.
For a final touch, I’ll often top each serving with a mini Oreo, a dollop of whipped cream, or chocolate shavings. A drizzle of chocolate or caramel sauce right before serving adds a little extra flair—and nobody ever complains about more chocolate.
Don’t forget: this is a no-bake dessert, so make sure it stays chilled until serving to keep the layers firm and fresh.
Tips and Tricks to Make This Recipe Even Better

If you want your easy Oreo dessert to go from “yum” to “wow,” a few small tips make a huge difference.
- Chill your mixing bowl: When folding whipped topping into the cream cheese mixture, using a cold bowl helps it stay fluffy and firm.
- Let the cream cheese soften properly: Don’t rush this part. Room temperature cream cheese blends more smoothly and helps avoid lumps.
- Don’t overmix: Fold the whipped topping gently. Overmixing will knock out the air and make the filling heavy.
- Layer strategically: For a cleaner look, use a spoon to gently drop dollops of cream mixture and spread slowly over the Oreos.
- Use double-stuffed Oreos for extra richness: If you’re going all out, this is one of my favorite hacks. More cream means more indulgence.
Want to take it even further? Add a layer of chocolate ganache or drizzle melted peanut butter between the layers. Trust me—it’s a game-changer.
Common Mistakes to Avoid
This is a simple recipe, but a few common missteps can keep it from reaching its full potential.
- Not softening the cream cheese: Cold cream cheese will stay lumpy, no matter how long you beat it. Give it time to warm up before mixing.
- Using wet Oreos: If you’re dunking them in milk, go easy. A quick dip is fine, but over-soaked cookies will turn mushy and break apart.
- Skipping the chill time: This dessert needs time in the fridge to set properly. Rushing it can lead to a soupy mess when serving.
- Overmixing the whipped topping: Be gentle when folding it in—this keeps your filling light and airy.
- Using off-brand cookies: I’m all for saving money, but when it comes to flavor and texture, Oreos really do make a difference.
How to Store It
Because this dessert is cream-based, proper storage is key.
Here’s how I do it:
- Refrigerator: Cover the dish tightly with plastic wrap or transfer to an airtight container. It’ll keep well for 3–4 days.
- Freezer: Yes, you can freeze it! Freeze in an airtight container and thaw overnight in the fridge. Just know that the texture of the whipped topping might be slightly softer after freezing.
- Individual servings: Want to portion it out? Assemble in small jars or containers with lids for grab-and-go treats during the week.
Avoid letting it sit at room temperature for more than an hour, especially in warm weather. The cream layer can soften too much and lose structure.
FAQ
Can I make this recipe ahead of time?
Absolutely! In fact, I recommend it. Making it the day before gives it time to chill and the layers to blend beautifully.
Can I use homemade whipped cream instead of Cool Whip?
Yes, you can substitute with homemade whipped cream. Just make sure it’s whipped to stiff peaks and gently folded into the mixture.
Can I use flavored Oreos?
Of course! Golden Oreos, peanut butter, or even mint Oreos can bring a fun twist. Just keep in mind it will change the overall flavor profile.
Is there a way to make this dessert lighter?
You can use light cream cheese and light whipped topping to reduce fat and calories, though the texture will be a bit less rich.
Can I make this dessert in individual cups?
Definitely. In fact, it’s one of my favorite ways to serve it—perfect for parties and easy portion control.

Easy Oreo Desserts
- Total Time: 2 hours (including chill time)
- Yield: 10–12 1x
- Diet: Vegetarian
Description
This no-bake Oreo dessert is a creamy, dreamy treat layered with crushed Oreo cookies and a fluffy cream cheese filling. It’s easy to make, budget-friendly, and guaranteed to satisfy your sweet tooth. Whether you’re hosting a party, planning a family gathering, or just craving something delicious after dinner, this dessert is the perfect make-ahead option. With just a few ingredients and minimal prep, you can create a dessert that’s rich, comforting, and crowd-pleasing. The best part? It comes together in under 30 minutes—no oven required!
Ingredients
- 1 package (14.3 oz) Oreo cookies
- 8 oz cream cheese, softened
- 1 cup powdered sugar
- 1 tsp vanilla extract
- 8 oz whipped topping (like Cool Whip)
- 2–3 tbsp milk (optional)
Instructions
- Crush Oreos into fine crumbs, reserving a handful for topping.
- Beat softened cream cheese until smooth. Add powdered sugar and vanilla; beat until fluffy.
- Gently fold in whipped topping.
- In a serving dish, layer half the crushed Oreos. Spread half the cream mixture over the cookies.
- Repeat with remaining Oreos and cream layer.
- Top with reserved crushed Oreos.
- Chill for at least 2 hours before serving.
Notes
- For extra richness, use double-stuffed Oreos.
- You can swap Cool Whip with homemade whipped cream.
- Add sliced bananas or strawberries between layers for a fruity variation.
- Prep Time: 20 minutes
- Cook Time: 0 minutes
- Category: Dessert
- Method: No-bake
- Cuisine: American
Nutrition
- Serving Size: 10–12
- Calories: 320
- Sugar: 18g
- Sodium: 240mg
- Fat: 19g
- Saturated Fat: 10g
- Unsaturated Fat: 7g
- Trans Fat: 0g
- Carbohydrates: 33g
- Fiber: 1g
- Protein: 3g
- Cholesterol: 30mg

