Corn on the cob has a way of bringing summer to your plate, no matter the season. It’s a classic, comforting dish that reminds many of barbecues, family picnics, or those last-minute weekday dinners when you need something quick yet satisfying.
I created this microwave version out of pure necessity. One humid July evening, my grill ran out of gas just as I was preparing dinner. With hungry kids waiting and no time to boil water, I turned to the microwave—and discovered a game-changer. The corn came out incredibly juicy, sweet, and full of flavor. From that day on, this became my go-to method for a fast and foolproof way to enjoy fresh corn without the wait.
Whether you’re low on time or simply avoiding a steamy kitchen, this microwave corn on the cob recipe will be your new favorite shortcut.
Why I Love This Recipe

This isn’t just a “fast” version—it’s the best way to bring out the natural sweetness of corn with very little effort. That’s what makes it special. It tastes like it was just picked from the field and roasted over a fire, all without dirtying a single pot.
What I truly adore about this method is the simplicity. You don’t need fancy equipment. You don’t need to shuck it ahead of time. And yet, the microwave somehow steams the corn perfectly within its own husk, intensifying the natural sugars and yielding a tender, juicy bite every time.
It’s also incredibly practical. Whether you’re making one ear or four, the process stays almost the same—making it perfect for solo meals or impromptu dinner parties. Plus, there’s hardly any cleanup, and who doesn’t love that?
If you’ve ever been hesitant to microwave vegetables, let this recipe change your mind.
Ingredients for Corn on the Cob Microwave
Let’s talk about what you’ll need—and more importantly, why each part matters. This recipe doesn’t ask for much, but that’s the beauty of it.
The ingredients are so basic that you probably already have them in your kitchen. But with corn, it’s all about freshness and flavor.
- Fresh ears of corn – Choose corn still in its husk. The husk helps steam the corn naturally in the microwave and keeps the kernels moist and flavorful.
- Butter – Optional, but highly recommended. It melts into the corn and enhances its sweetness with a rich, savory finish.
- Salt – A small sprinkle can brighten up the corn’s natural taste.
- Optional extras – Think chili powder, parmesan cheese, lime juice, or garlic butter if you’re feeling fancy.
No boiling water. No extra pans. Just pure corn goodness with ingredients that respect the simplicity of this dish.
How Much Time Will You Need
The magic of this recipe is in its speed. You can have delicious, hot, and juicy corn ready in just about 5 minutes from start to finish.
Here’s the breakdown:
- Prep Time: 1 minute (just grab your corn and pop it in)
- Cook Time: 3–4 minutes per ear of corn
- Optional Add-ons Time: 1 minute for buttering and seasoning
So even if you’re cooking two or three ears, you’ll be done in under 10 minutes—quicker than it takes to boil water.
How to Make This Corn on the Cob Microwave

Step – 1: Choose and Prep Your Corn
Start with fresh ears of corn that still have the husk on. The husk is essential—it creates a natural steam pocket that helps cook the corn evenly.
Don’t remove the husk or silk just yet. Keep everything intact.
If your microwave is smaller, trim the long stem ends so they fit comfortably inside.
Step – 2: Microwave the Corn
Place one or two ears of corn (with husk) directly on the microwave turntable. Don’t wrap them or put them in a dish—they don’t need it.
Microwave on high power:
- 1 ear: 3 to 4 minutes
- 2 ears: 5 to 6 minutes
- 3 ears: 7 to 8 minutes
No turning is necessary if your microwave has a rotating plate.
Step – 3: Let It Rest
Once microwaved, leave the corn inside the microwave for an extra 1 minute. This resting time allows the heat to finish cooking the corn internally and makes it easier to handle.
Step – 4: Remove the Husk
Use a kitchen towel or oven mitts to carefully remove the hot corn from the microwave. Cut off the bottom (stem end) of the corn with a sharp knife, about one inch from the base.
Now grab the corn at the top, where the silk is. Squeeze and shake—the corn will slide right out, clean and silk-free. It’s oddly satisfying!
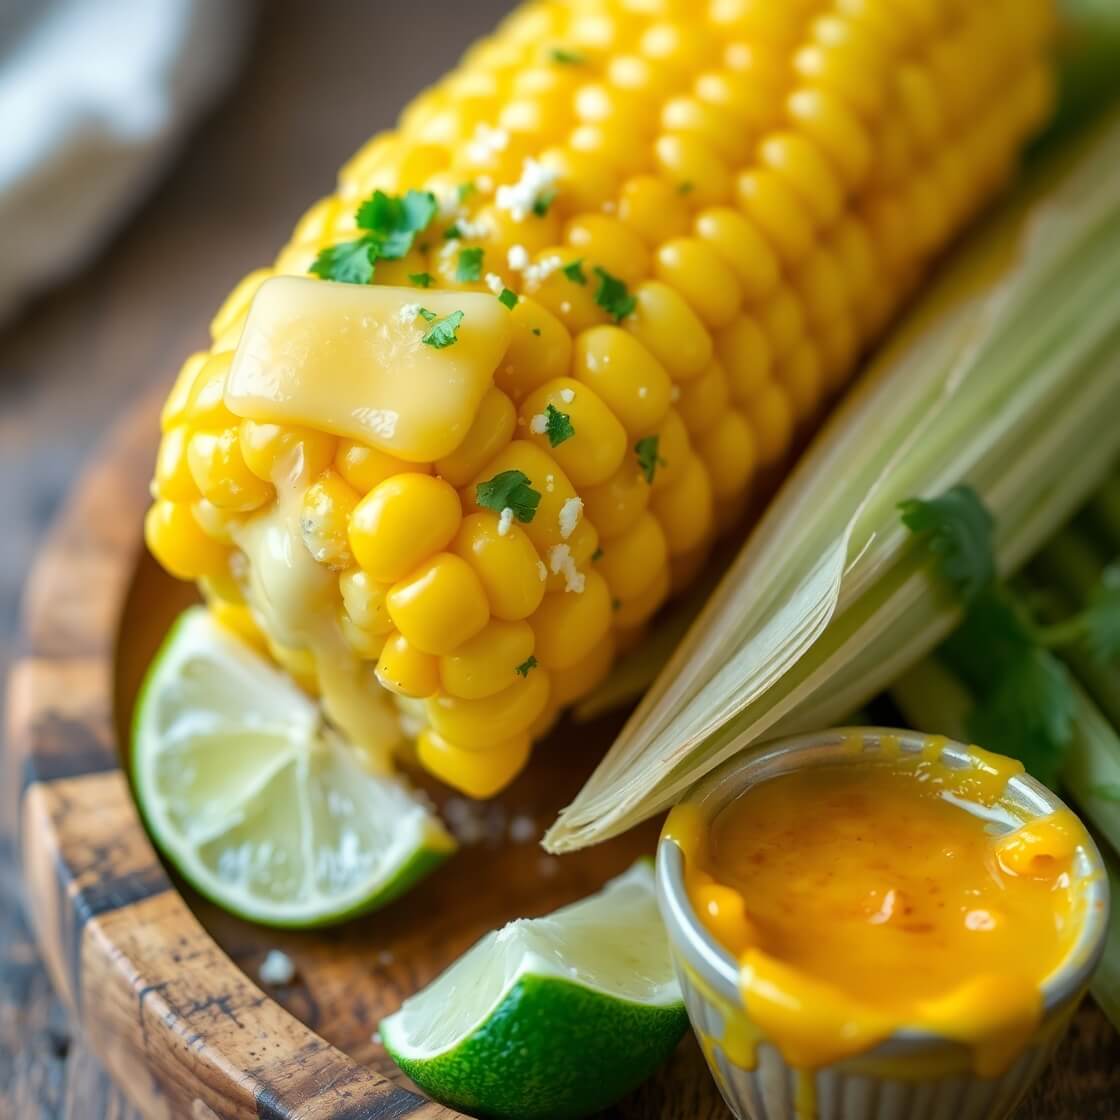
Step – 5: Butter and Season
Lay your corn on a plate and slather with butter. Sprinkle with salt—or try fun toppings like chili lime, parmesan, or garlic butter for a flavor boost.
Serve immediately while it’s hot and juicy.
Substitutions
No fresh corn with husks? No problem.
Here are some substitutes that still let you enjoy microwave corn with great results:
- Pre-shucked corn – Wrap it in a damp paper towel and microwave for 2–3 minutes per ear. It won’t be quite as steamy, but still very tasty.
- Frozen corn on the cob – Microwave according to the package directions, typically wrapped in a paper towel. Slightly less sweet than fresh, but reliable year-round.
- Vegan butter or olive oil – Great for dairy-free versions. Just brush on after cooking for a smooth, rich finish.
- Spice blends – Try smoked paprika, Cajun seasoning, or even curry powder for international twists.
Customizing this dish is easy, and you can adapt it to whatever you have in your pantry.
Best Side Dish of Corn on the Cob Microwave
To elevate your meal, pair your corn with any of these irresistible sides:
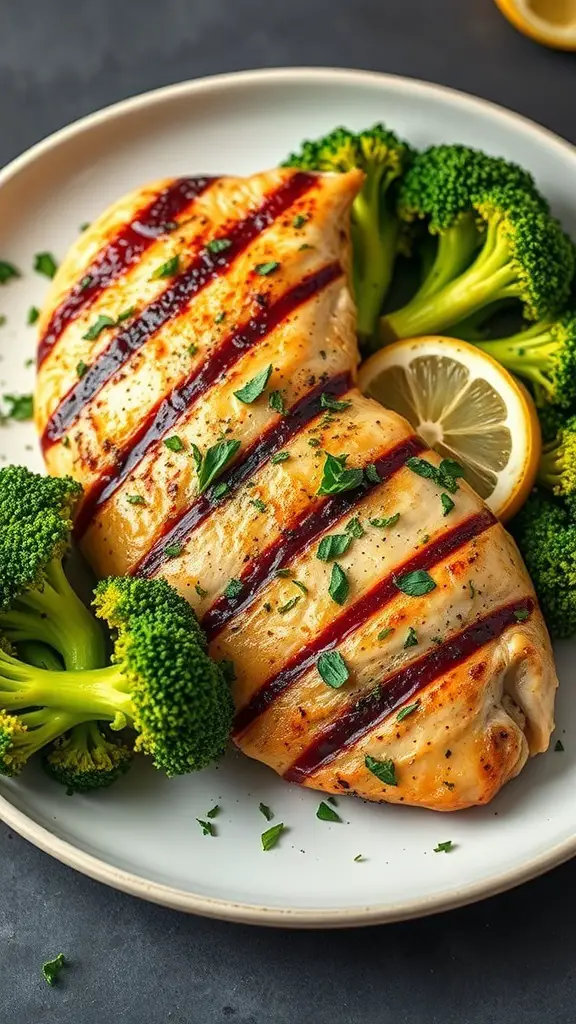
- Grilled Chicken Thighs – The smokiness of grilled meat pairs beautifully with the sweet crispness of corn.
- Fresh Tomato Salad – The acidity of tomatoes and a splash of balsamic cuts through the buttery richness of the corn.
- Garlic Herb Buttered Potatoes – These creamy, seasoned potatoes complement the natural flavor of the corn for a cozy and satisfying plate.
Whether you’re planning a summer feast or a cozy dinner for one, these sides bring balance and texture to your table.
Serving and Presentation Tips
There’s nothing boring about serving microwave corn—especially when you dress it up right.
One of my favorite ways to serve this is on a rustic wooden platter, with a brush of melted butter and a sprinkle of chopped herbs like parsley or cilantro. You can also add a small ramekin of flavored butter on the side—think garlic-lime, chili honey, or herbed compound butter—to let everyone customize their cob.
If you’re serving this at a dinner party, slice the corn into thirds and stick toothpicks or mini skewers in each piece. It turns into the perfect, grab-and-go side that feels fun and intentional.
Want to go a little extra? Use a microplane to dust a bit of hard cheese (like aged parmesan or cotija) over each cob right before serving. A final squeeze of lime adds just the right tangy finish.
Tips and Tricks to Make This Recipe Better

Want truly unforgettable corn from the microwave? Here’s how to take it from good to great:
- Always leave the husk on. It’s like nature’s steaming bag. Removing it before microwaving dries the corn out.
- Use similar-sized ears. This ensures even cooking—nothing worse than one cob undercooked and another overdone.
- Don’t over-microwave. Start with the lower cook time, then add 30 seconds if needed. Overcooked corn gets tough and loses that sweet crunch.
- Add a flavor twist. Brush your hot corn with compound butter (garlic and parsley, smoked paprika and honey, or lime zest with chili flakes). It’s a simple upgrade that goes a long way.
- Let it rest in the husk. One minute is all it takes for carry-over heat to finish the cooking, giving you juicier results.
Microwave cooking might feel basic, but when done right, it can make your corn taste straight off the grill—without the smoke and flames.
Common Mistakes to Avoid
Even simple recipes have room for missteps. Avoid these, and your microwave corn will always come out perfect:
- Peeling the husk too soon. The husk traps in moisture—skip it, and you’ll end up with dry, unevenly cooked corn.
- Not trimming the stem. A long cob might spin awkwardly or hit the microwave walls, causing uneven cooking.
- Over-microwaving. It’s tempting to “just add a minute,” but corn cooks fast. Go short, check it, and only then extend if needed.
- Forgetting to rest. That 1-minute rest post-cooking is crucial. It finishes the steaming process and makes the corn easier to handle.
- Skipping seasoning. A plain cob is good—but a buttered, salted, or spiced one is unforgettable. A little seasoning goes a long way.
Master these small details, and you’ll never settle for boiled corn again.
How to Store It
Got leftovers? No problem. Microwave corn stores beautifully when done right.
- Refrigerate cooked corn (on or off the cob) in an airtight container for up to 3 days.
- Leave it on the cob if possible—it helps retain moisture. Wrap it in foil or plastic wrap to keep it fresh.
- To reheat, wrap a cob in a damp paper towel and microwave for 30–60 seconds. It will taste almost as good as fresh.
- Freezing? Yes, you can! After cooking and cooling, remove the kernels with a sharp knife and store them in freezer-safe bags for up to 3 months. Perfect for soups, salads, or salsas later on.
Microwave corn is incredibly meal-prep friendly—especially when you’re planning for a busy week or need a quick veggie side in minutes.
FAQ
Can I microwave corn without the husk?
Yes. Wrap it in a damp paper towel and microwave for 2–3 minutes per ear. It won’t be quite as juicy but still works great.
Can I microwave frozen corn on the cob?
Absolutely. Follow package directions, typically 4–6 minutes. Wrap it in a damp paper towel for better texture.
Is it safe to microwave corn with the husk?
Yes, it’s perfectly safe. The husk acts like a steamer and actually protects the corn from drying out or overcooking.
Can I cook multiple ears at once?
Yes. Just increase the cook time. For example, 2 ears take around 5–6 minutes, and 3 ears need about 7–8 minutes.
Can I use flavored butter?
Definitely! Flavored butters like garlic-herb, spicy honey, or lemon-parmesan are easy to make and elevate the flavor of the corn.

Corn on the Cob Microwave
- Total Time: 5 minutes
- Yield: 1 1x
- Diet: Vegetarian
Description
If you’ve been boiling or grilling your corn all these years, this microwave method is about to blow your mind. In just minutes, you can achieve juicy, tender, perfectly cooked corn with zero mess. The secret? Cooking it inside its husk, right in the microwave. It’s a technique that locks in moisture and sweetness, requiring no pots or pans. Whether you’re making one ear or feeding a family, this quick recipe is reliable, delicious, and endlessly customizable. With just a few pantry ingredients, you can enjoy fresh corn all year round.
Ingredients
- 1 ear fresh corn, in husk
- 1 tbsp butter (optional)
- Salt, to taste
- Optional toppings: lime juice, chili powder, parmesan, garlic butter
Instructions
- Leave the corn in the husk. Trim stem end if needed to fit microwave.
- Microwave 1 ear on high for 3–4 minutes. Let rest 1 minute in microwave.
- Cut off the bottom (stem end) of the corn.
- Squeeze from the top—corn will slide out silk-free.
- Butter, season, and serve hot.
Notes
- For more than 1 ear, increase cooking time by 2–3 minutes per extra ear.
- Add a dash of chili powder or squeeze of lime for a fun twist.
- Use compound butters for flavor variations.
- Prep Time: 1 minute
- Cook Time: 4 minute
- Category: Side Dish
- Method: Microwave
- Cuisine: American
Nutrition
- Serving Size: 1
- Calories: 150
- Sugar: 6g
- Sodium: 120mg
- Fat: 8g
- Saturated Fat: 5g
- Unsaturated Fat: 3g
- Trans Fat: 0g
- Carbohydrates: 19g
- Fiber: 2g
- Protein: 3g
- Cholesterol: 20mg