There’s something truly magical about the moment you cut into a chocolate lava cake and warm, gooey chocolate oozes out like liquid velvet. The first time I made this dessert, I was honestly a little nervous. I had seen friends and chefs pull off these perfectly molten cakes on cooking shows, and it always looked intimidating. But once I took that first bite, the rich, decadent chocolate melting in my mouth completely won me over.
I remember making it for a quiet Sunday dinner with my family. My kids were curious about why I was handling so much chocolate and butter with such focus, and my husband teased me about whether it would actually work this time. When the cakes came out perfectly, I felt a little triumph—like I had unlocked a chocolate treasure. We all stood there, forks in hand, sharing that perfect, warm center, and it was honestly one of those small, memorable moments that make home cooking so rewarding.
Chocolate lava cake isn’t just a dessert; it’s an experience. It’s rich, indulgent, and surprisingly simple when you follow the right steps. Today, I want to share my favorite method for making this show-stopping dessert at home.
Why I Love This Recipe
What makes this chocolate lava cake stand out is that it’s deeply chocolatey, silky smooth, and incredibly forgiving once you understand the technique. Unlike some desserts that require endless precision, this recipe gives you room to breathe while still delivering that molten center we all crave.

I love it because it hits that perfect balance between being an indulgence and being approachable. It’s the kind of dessert that impresses dinner guests without making you spend hours in the kitchen. And the aroma—it fills the kitchen with rich cocoa notes that are irresistible. It’s one of those recipes I keep coming back to, whether it’s for a quiet evening at home or a special occasion.
It’s also versatile. You can experiment with bittersweet chocolate for a slightly sophisticated bitterness, or go for a sweeter chocolate if your family has a sweet tooth. Adding a hint of espresso deepens the flavor, creating a complex profile that makes each bite more than just dessert—it’s an experience. This recipe isn’t just about taste; it’s about creating a moment around the table, where everyone can savor and enjoy together.
Ingredients for Chocolate Lava Cake
Making chocolate lava cake requires simple, high-quality ingredients, but the type you choose makes a world of difference. Here’s what I use:
- Chocolate: I always go for good-quality semi-sweet or dark chocolate. It melts beautifully and creates that luscious center. I’ve experimented with milk chocolate, but it tends to be too sweet for the richness I love.
- Butter: Unsalted butter is my go-to. It helps control the flavor, and since this recipe balances sweet and slightly bitter notes, unsalted butter works best.
- Eggs: Fresh, large eggs give the cake structure while keeping it soft and tender. The yolks enrich the batter, adding to the richness of the cake.
- Sugar: Granulated sugar does the trick here, giving just the right sweetness without overpowering the chocolate.
- Flour: All-purpose flour is sufficient. You only need a small amount to give structure while keeping the interior molten.
- Optional flavor boosters: A pinch of salt enhances the chocolate flavor, and a teaspoon of espresso powder can elevate the richness without making it taste like coffee.
Each ingredient plays a role in making the lava cake unforgettable. I like to measure carefully because even small changes in the chocolate-to-butter ratio can affect how molten the center turns out.
How Much Time Will You Need
One of the best things about chocolate lava cake is that it’s surprisingly quick to make. From start to finish, it takes about 30–40 minutes:
- Prep time: 10–15 minutes
- Cook time: 12–14 minutes per batch
- Cooling & serving: 5–10 minutes
This means you can whip up an impressive dessert in under an hour, perfect for last-minute dinner plans or when you simply crave something chocolatey. The key is to stay attentive during baking because even a minute too long can firm up the molten center.
How to Make Chocolate Lava Cake
Step – 1: Preheat your oven to 425°F (220°C). Butter your ramekins thoroughly, then dust them lightly with cocoa powder. This ensures the cakes release cleanly.
Step – 2: Melt the butter and chocolate together. I like to do this gently over a double boiler, stirring frequently so it’s smooth and glossy. You can also microwave in short bursts, stirring in between to avoid burning.
Step – 3: In a separate bowl, whisk together eggs, egg yolks, and sugar until pale and slightly thickened. This creates the light structure of the cake while keeping it tender.
Step – 4: Fold the melted chocolate mixture into the eggs slowly, making sure not to deflate them. Then gently fold in the flour until just combined. The batter should be smooth and silky.
Step – 5: Pour the batter evenly into the prepared ramekins, filling about three-quarters full. Place them on a baking sheet for easy handling.
Step – 6: Bake for 12–14 minutes. The edges should be firm, but the center will still jiggle slightly when nudged. This is what ensures that molten center.
Step – 7: Let the cakes rest for about a minute or two. Then carefully invert them onto serving plates. Tap gently to release the cake.
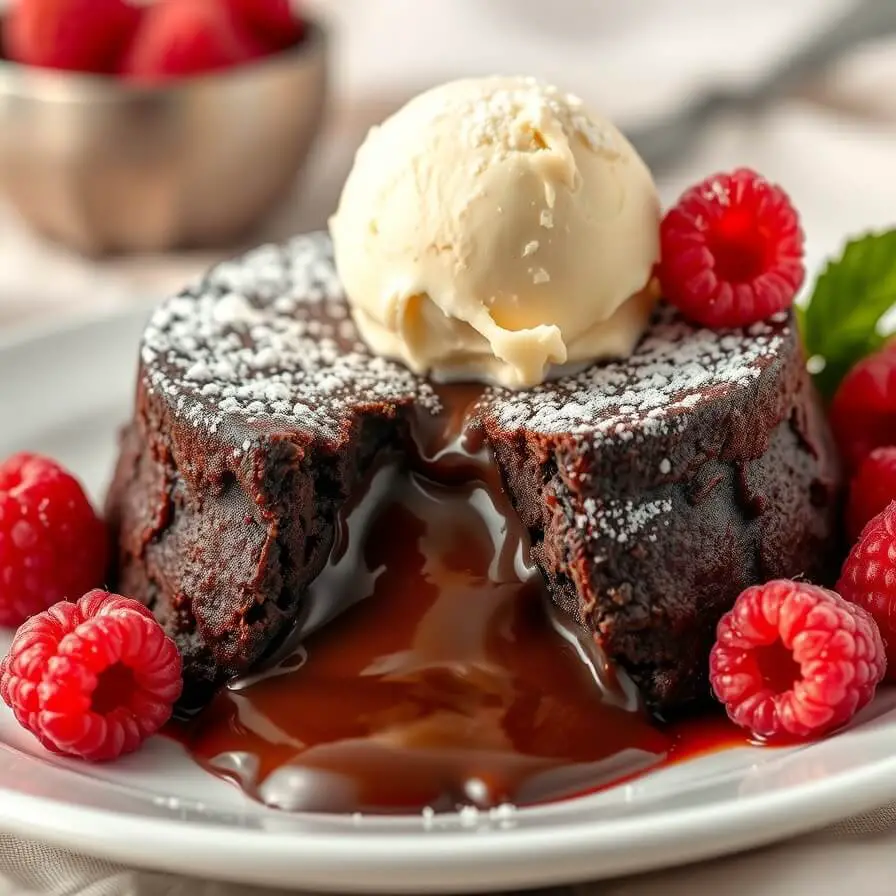
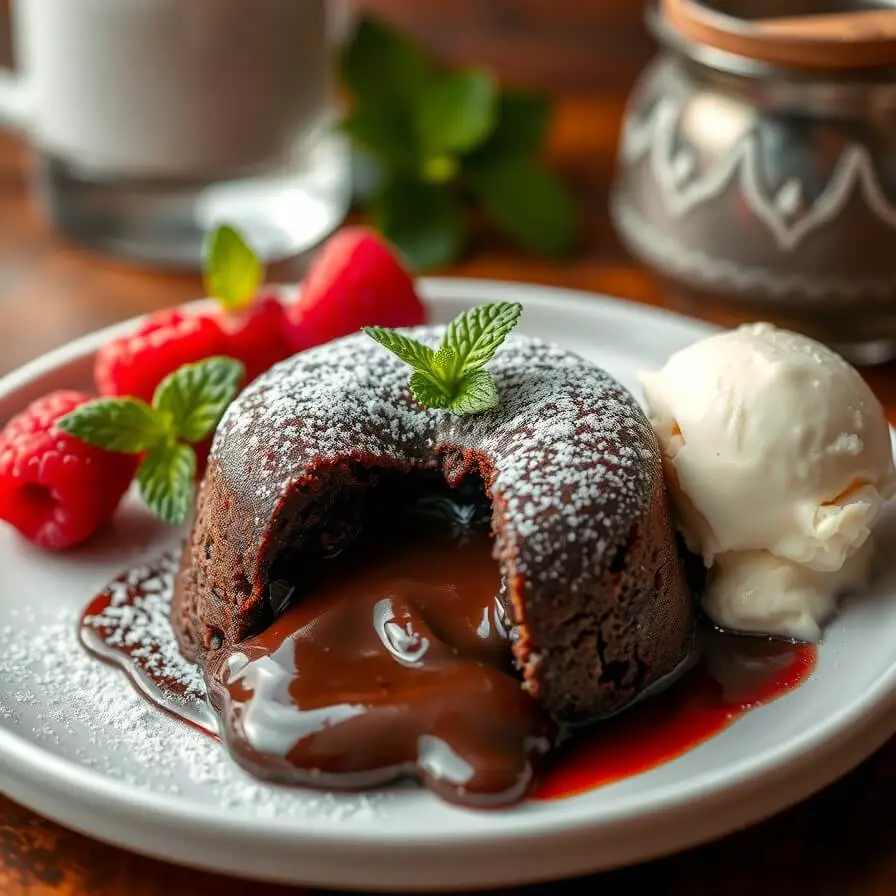
Step – 8: Serve immediately while warm. The moment you cut into it and the chocolate flows out, it’s pure bliss.
Substitutions
If you want to experiment or accommodate dietary preferences, there are a few substitutions that work beautifully:
- Chocolate: You can swap semi-sweet with milk chocolate for a sweeter flavor or use dark chocolate with 70% cocoa for a more intense taste.
- Butter: Coconut oil can be used in place of butter for a slightly tropical twist and dairy-free option.
- Flour: Almond flour works if you want a gluten-free version, though it may slightly change the texture.
- Eggs: For an egg-free alternative, you can try using flax eggs, though the center may be a little less molten.
These adjustments allow you to personalize the recipe while keeping the indulgent experience intact.
Best Side Dishes for Chocolate Lava Cake
Pairing your lava cake with the right side dish can elevate the experience:
- Vanilla ice cream: The cold creaminess balances the warm, rich cake perfectly.
- Fresh berries: Strawberries or raspberries add a touch of freshness and acidity to cut through the chocolate richness.
- Whipped cream: Lightly sweetened whipped cream adds airy texture that complements the dense, molten cake.
Each side enhances the dessert without overpowering it, creating a perfect harmony of flavors and textures.
Serving and Presentation Tips
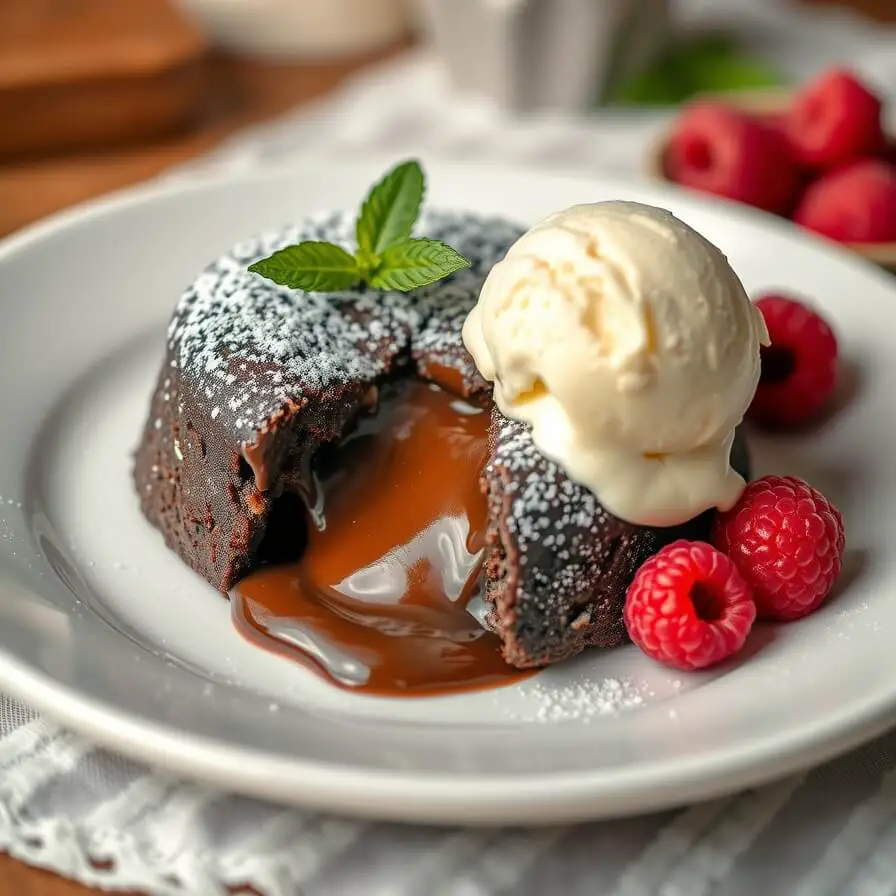
Serving chocolate lava cake is almost as fun as eating it. One of my favorite ways to present it is to place the warm cake on a small dessert plate, add a scoop of vanilla ice cream on the side, and sprinkle a few fresh raspberries around. The contrast of warm and cold, rich and tangy, instantly makes the dessert feel special.
For an extra touch, lightly dust the top with powdered sugar or cocoa powder. You can even drizzle a bit of chocolate or caramel sauce in a zigzag pattern on the plate—it makes a simple cake look restaurant-worthy. Personally, I like to serve it straight from the ramekin, letting guests cut into the cake themselves. Watching the molten chocolate flow is always a fun, dramatic moment!
Small garnishes like mint leaves or a few crushed nuts can add both color and texture. The key is to keep the presentation simple yet elegant, so the chocolate remains the star of the show.
Tips and Tricks to Make This Recipe Even Better
There are a few little things I’ve learned over the years that make this lava cake nearly foolproof:
- Don’t overbake: The center should jiggle slightly when you remove it from the oven. Even a minute too long will firm up the middle.
- Room temperature ingredients: Make sure your eggs and butter are at room temperature. This helps the batter combine more smoothly and keeps the texture light.
- Use high-quality chocolate: The better the chocolate, the more decadent your cake will taste. I usually go for chocolate with at least 60% cocoa content.
- Prep ramekins carefully: Butter and dust them with cocoa powder thoroughly to prevent sticking. I’ve had cakes stick before, and it’s heartbreaking when the molten center doesn’t come out neatly.
- Serve immediately: The molten center is at its peak right after baking. While you can let the cakes rest briefly, prolonged waiting will make the center firm.
Common Mistakes to Avoid
Even with a simple recipe like this, there are a few pitfalls that can sabotage your chocolate lava cake:
- Overmixing the batter: This can create a dense cake rather than a light, molten one. Fold the ingredients gently.
- Skipping buttering or dusting ramekins: Cakes can stick and break, losing that perfect flowing center.
- Baking at the wrong temperature: Too hot, and the edges will burn before the center is cooked; too low, and the cakes won’t rise or develop a crust.
- Using low-quality chocolate: It won’t melt the same way or produce the rich flavor you want.
- Waiting too long to serve: The molten effect is fleeting. Serve while warm for maximum wow factor.
How to Store It
Chocolate lava cakes are best eaten fresh, but if you need to store them:
- Unbaked batter: You can prepare the batter and keep it in the fridge for up to 24 hours. Bake just before serving.
- Baked cakes: Store in an airtight container in the fridge for up to 2 days. Reheat gently in the microwave for 15–20 seconds to regain some of the molten effect.
- Freezing: You can freeze unbaked cakes in their ramekins for up to a month. Thaw in the fridge before baking.
Frequently Asked Questions
Can I make chocolate lava cake in advance?
Yes! You can prepare the batter a day ahead and store it in the fridge. Bake right before serving for best results.
Can I make it dairy-free or vegan?
Absolutely. Substitute butter with coconut oil and use a plant-based chocolate. For eggs, flax eggs can work, but the center may be slightly less molten.
What if my lava cake doesn’t ooze?
This usually means it was slightly overbaked. Reduce the baking time by a minute or two next time, and ensure the center jiggles slightly before removing from the oven.
Can I use milk chocolate instead of dark chocolate?
Yes, but your lava cake will be sweeter and less intense. For a richer flavor, I recommend semi-sweet or bittersweet chocolate.
How do I serve lava cake elegantly for guests?
Place the warm cake on a small plate, add a scoop of ice cream, fresh berries, a drizzle of chocolate or caramel sauce, and a mint leaf for color. Keep it simple but visually appealing.

Chocolate Lava Cake Recipe
- Total Time: 30–40 minutes
- Yield: 4 1x
- Diet: Vegetarian
Description
This chocolate lava cake is a dessert lover’s dream: rich, decadent, and perfectly molten in the center. Its silky chocolate interior pairs beautifully with a scoop of vanilla ice cream, fresh berries, or whipped cream. Simple to make yet impressively indulgent, this cake is perfect for special occasions, dinner parties, or a cozy night in. The aroma of melting chocolate fills the kitchen and makes every bite a memorable experience.
Ingredients
- 4 oz (115 g) semi-sweet chocolate, high quality
- ½ cup (115 g) unsalted butter
- 2 large eggs
- 2 large egg yolks
- ¼ cup (50 g) granulated sugar
- 2 tbsp (15 g) all-purpose flour
- Pinch of salt
- 1 tsp espresso powder (optional)
Instructions
- Preheat oven to 425°F (220°C) and butter ramekins, dust with cocoa powder.
- Melt chocolate and butter together until smooth. Let cool slightly.
- Whisk eggs, yolks, and sugar until pale and thick.
- Fold chocolate mixture into eggs gently, then fold in flour until smooth.
- Divide batter among ramekins, filling three-quarters full.
- Bake 12–14 minutes, until edges are firm but centers jiggle slightly.
- Let rest 1–2 minutes, then invert onto plates. Serve immediately.
Notes
- Use high-quality chocolate for best flavor.
- Do not overbake; the center should be slightly jiggly.
- Pair with ice cream, fresh berries, or whipped cream.
- Prep Time: 15 minutes
- Cook Time: 12–14 minutes
- Category: Dessert
- Method: Baking
- Cuisine: American
Nutrition
- Serving Size: 4
- Calories: 380
- Sugar: 30g
- Sodium: 50mg
- Fat: 27g
- Saturated Fat: 16g
- Unsaturated Fat: 9g
- Trans Fat: 0g
- Carbohydrates: 32g
- Fiber: 4g
- Protein: 6g
- Cholesterol: 120mg