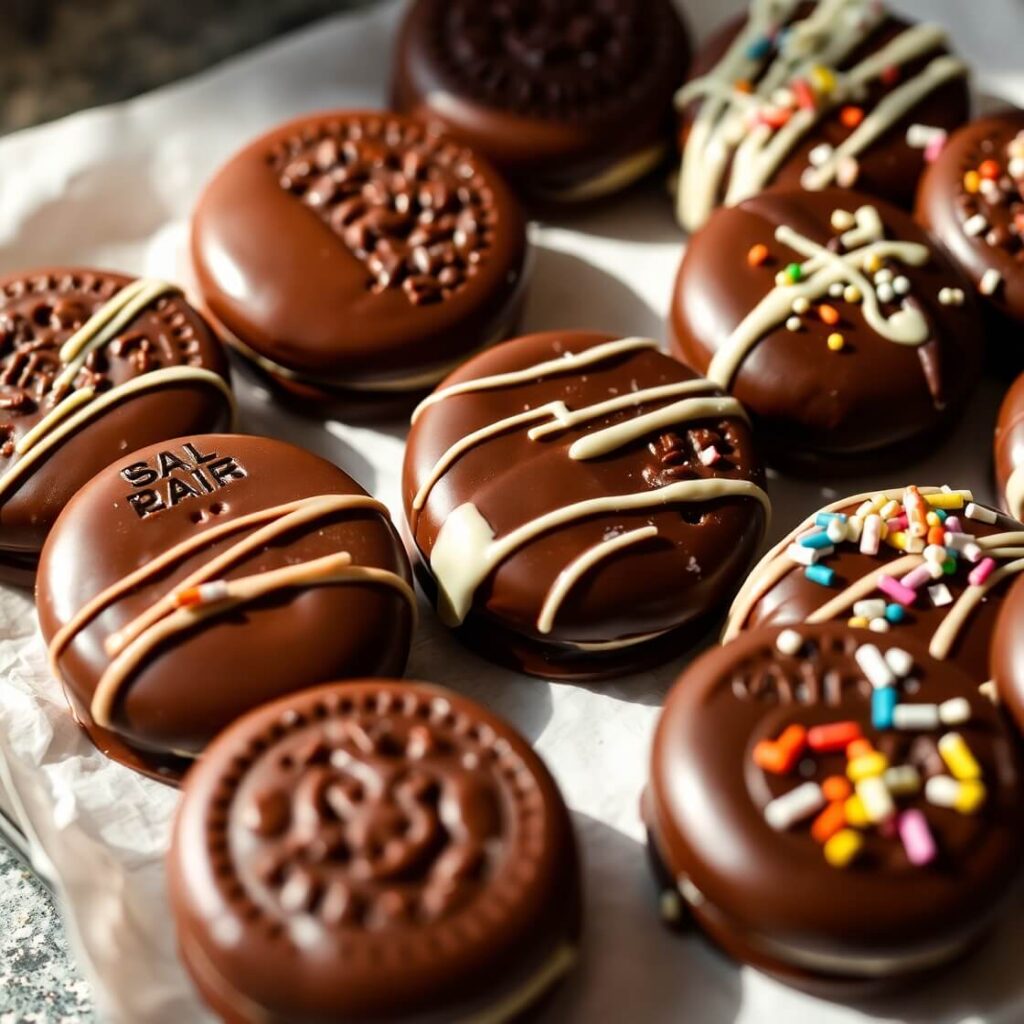
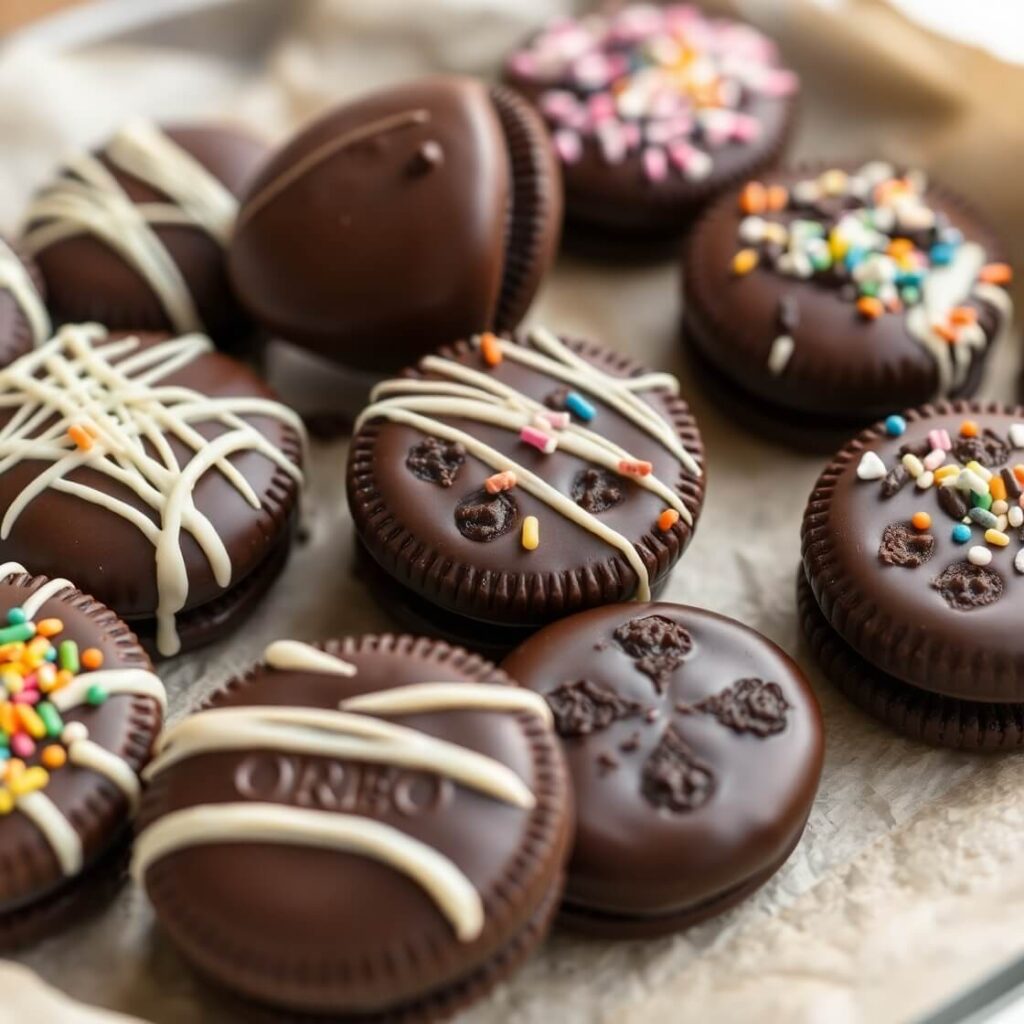
If you’ve ever craved a simple, indulgent treat that looks as good as it tastes, chocolate covered Oreos are the ultimate answer. I first made these for a small gathering at my home, hoping to impress my friends with something easy yet visually stunning. To my delight, they disappeared within minutes, and everyone asked for the recipe.
This treat combines the iconic crunch and creaminess of Oreos with a luscious, smooth chocolate coating. The best part? It’s surprisingly simple to make at home, and you can customize it with different types of chocolate, sprinkles, or drizzle patterns to match any occasion. Whether it’s a birthday, holiday, or just a lazy afternoon craving something sweet, chocolate covered Oreos make any moment special.
What I love about these treats is that they’re accessible for everyone—from a novice baker to someone with years of experience in the kitchen. You don’t need complicated tools or fancy ingredients. Just a little patience and the right chocolate, and you’ll have an irresistible snack that looks like it came straight from a bakery.
Why I Love This Recipe

There’s something almost magical about chocolate covered Oreos. The moment you bite into that crisp cookie with its creamy center, enveloped in smooth chocolate, it’s pure bliss. I love making them because they combine two of my favorite things—Oreos and chocolate—into one decadent bite.
People make this recipe not only for its taste but for its versatility and simplicity. You can dress them up for special events with colored chocolate or sprinkles, or keep them classic with a dark chocolate coating. They’re also great for gifting. Imagine presenting a box of perfectly coated, shiny chocolate Oreos at a friend’s party—they’re bound to leave a lasting impression.
The specialty of this recipe lies in the balance. The Oreo’s crunch, the creamy filling, and the chocolate coating together create an irresistible texture combination. Unlike store-bought treats, homemade chocolate covered Oreos allow you to control the sweetness and the chocolate type, whether milk, dark, or even white chocolate. For me, it’s this personal touch that makes the recipe so satisfying and fun to share.
Ingredients for Chocolate Covered Oreos
To make these delectable chocolate covered Oreos, you’ll need a few simple ingredients, all easy to find in your pantry or local store. The simplicity is what makes this recipe so inviting.
- Oreos – The classic choice. You can experiment with double-stuffed or flavored varieties if you want a unique twist.
- Chocolate – I prefer high-quality melting chocolate, either milk, dark, or white. Candy melts also work perfectly. You’ll need about 1 to 2 cups, depending on how many Oreos you plan to coat.
- Toppings (Optional) – Sprinkles, crushed nuts, or colored chocolate drizzle add a festive touch.
Every ingredient is intentionally simple. The goal here is to highlight the Oreo while giving it that luxurious chocolate coating. High-quality chocolate really elevates the treat.
How Much Time Will You Need
One of the reasons I adore this recipe is how quick it is. You can have chocolate covered Oreos ready in less than an hour if you’re focused, and most of that time is just letting the chocolate set.
- Preparation Time: 10-15 minutes
- Coating Time: 15-20 minutes
- Setting Time: 20-30 minutes
So overall, you’re looking at about 45-60 minutes from start to finish, which makes this an excellent choice for last-minute dessert ideas or a sweet afternoon project.
How to Make This Chocolate Covered Oreos
Here’s my step-by-step guide. I’ve written it in a detailed, reader-friendly style, so even if you’ve never dipped chocolate before, you’ll feel confident doing it.
Step – 1: Prepare your workspace. Line a baking sheet with parchment paper or a silicone mat. This is where your chocolate covered Oreos will rest while the coating hardens. Having everything ready in advance makes the process smoother.
Step – 2: Melt the chocolate. I use a double boiler method: place a heatproof bowl over a pot of simmering water, making sure the bowl doesn’t touch the water. Add the chocolate and stir gently until fully melted. Alternatively, you can microwave the chocolate in 30-second intervals, stirring between each interval to avoid burning.
Step – 3: Dip the Oreos. Using a fork or dipping tool, carefully dunk each Oreo into the melted chocolate. Turn it gently to coat completely. Lift the cookie out and let any excess chocolate drip back into the bowl.
Step – 4: Place the coated Oreo on the lined baking sheet. If you want, sprinkle toppings or drizzle contrasting chocolate on top immediately before the chocolate sets. This gives the Oreos a fun, decorative touch.
Step – 5: Let the chocolate set. Allow the cookies to sit at room temperature for 20-30 minutes until the chocolate hardens. For faster results, you can refrigerate them for 10-15 minutes.
Step – 6: Serve or store. Once the chocolate has fully set, your chocolate covered Oreos are ready to enjoy!
Substitutions
You can easily customize this recipe with substitutes that enhance flavor or accommodate dietary needs.
- Chocolate: If you prefer a lower-sugar option, use sugar-free chocolate. Vegan chocolate works well too for a dairy-free treat.
- Oreos: Gluten-free Oreos are a great alternative for those avoiding gluten. There are also flavored or mini Oreos for creative twists.
- Toppings: Instead of sprinkles, you can use crushed cookies, freeze-dried fruit, or edible glitter for a more sophisticated look.
Substitutions give you the flexibility to tailor this recipe to your preferences without losing any of its charm.
Best Side Dishes of Chocolate Covered Oreos
While these cookies are delicious on their own, pairing them with the right accompaniments can elevate your dessert experience. Here are my top three suggestions:
- Vanilla Ice Cream: The cold creaminess complements the chocolate and cookie perfectly.
- Hot Chocolate: Dipping a chocolate covered Oreo into a warm cup of cocoa is pure bliss.
- Fresh Berries: A side of strawberries or raspberries adds a fresh, tart contrast to the sweet treat.
Serving and Presentation Tips
Presentation can take these simple cookies from “delicious” to “wow!” in seconds. I love arranging chocolate covered Oreos on a pretty plate or in a decorative box when serving guests. For parties, placing them on a tiered dessert stand instantly makes them the centerpiece.
Drizzling contrasting chocolate over the cookies not only adds elegance but also gives a fun, professional look without much effort. You can mix dark chocolate over milk chocolate, or white chocolate over dark. Sprinkles, crushed nuts, or edible glitter on top provide texture and color, making them visually appealing for birthdays, holidays, or themed parties.
If I’m gifting them, I wrap each cookie individually in colorful foil or place them in mini cupcake liners inside a small box. It makes every cookie feel like a little present. Even simple touches, like a ribbon around the box, turn them into thoughtful, homemade gifts.
Tips and Tricks to Make This Recipe Even Better
Here’s where the magic happens. A few tweaks can transform these chocolate covered Oreos from great to unforgettable:
- Use good-quality chocolate. The smoother and creamier the chocolate, the more professional the finish will look and taste.
- Avoid overheating chocolate. Chocolate that gets too hot can seize, making it clumpy and unusable. Stir gently and melt slowly.
- Tap off excess chocolate. After dipping each Oreo, gently tap the fork against the bowl. This ensures a smooth, even coating without too much buildup.
- Decorate while chocolate is soft. Sprinkles, nuts, or drizzle designs stick best when the chocolate hasn’t hardened yet.
- Chill gently. If you refrigerate the Oreos to speed up setting, do it for short intervals. Prolonged refrigeration can cause condensation, which may make the chocolate appear streaky or dull.
Following these tricks makes the process easier, faster, and yields cookies that look and taste professionally made.
Common Mistakes to Avoid
Even simple recipes can have pitfalls if you’re not careful. Here’s what I’ve learned to avoid:
- Dipping too quickly. If the chocolate isn’t fully melted or smooth, the coating will be uneven. Take your time.
- Overcrowding the tray. Place Oreos with enough space so they don’t stick together while setting.
- Skipping parchment paper. Without it, chocolate can stick to surfaces and ruin the finish.
- Using low-quality chocolate. Cheap chocolate may taste waxy or not harden properly. It’s worth investing a little more for a perfect result.
- Ignoring temperature. Chocolate sets best at room temperature. If it’s too cold or too warm, the texture can be off.
Avoiding these common mistakes ensures your chocolate covered Oreos are smooth, glossy, and perfectly coated.
How to Store It
Storing chocolate covered Oreos correctly helps maintain their crispness and chocolate finish.
- Keep them in an airtight container at room temperature for up to one week.
- Avoid stacking cookies directly on top of each other unless you separate layers with parchment paper.
- If you live in a warmer climate, store them in the refrigerator. Bring them to room temperature before serving for the best flavor and texture.
- They can also be frozen for longer storage—place them in a single layer on a baking sheet first, then transfer to a freezer-safe container. Thaw at room temperature before serving.
Proper storage ensures your cookies stay fresh, crunchy, and visually appealing.
Frequently Asked Questions (FAQ)
Can I use white chocolate or dark chocolate instead of milk chocolate?
Absolutely! You can use any chocolate type. I often mix dark chocolate with a drizzle of white chocolate for a fun visual contrast.
Can I make chocolate covered Oreos ahead of time?
Yes, they can be made a day or two in advance. Store them in an airtight container at room temperature. Avoid refrigerating for long periods unless necessary.
Can I add toppings?
Yes, sprinkles, crushed nuts, or even a drizzle of contrasting chocolate work beautifully. Add them while the chocolate is still soft for best results.
How do I prevent chocolate from seizing?
Melt chocolate slowly over low heat or in 30-second microwave intervals, stirring frequently. Avoid contact with water, as even a few drops can make it clump.
Are there gluten-free options?
Yes! Use gluten-free Oreos, and this recipe remains completely gluten-free. You can also experiment with vegan chocolate for a dairy-free alternative.

Chocolate Covered Oreos
- Total Time: 50-60 minutes
- Yield: 20–25 1x
- Diet: Gluten Free
Description
Indulge in a treat that’s simple yet decadent. Chocolate covered Oreos are perfect for parties, gifts, or a sweet snack anytime. With a crisp cookie center, creamy filling, and smooth chocolate coating, they’re irresistible. Easy to make, versatile, and endlessly customizable, these cookies are a homemade delight that can rival anything from a bakery. Perfect for all ages, they’re a fun, satisfying project for anyone who loves chocolate.
Ingredients
- 20–25 Oreo cookies (classic or double-stuffed)
- 1–2 cups high-quality chocolate (milk, dark, or white)
- Optional toppings: sprinkles, crushed nuts, colored chocolate drizzle
Instructions
- Line a baking sheet with parchment paper.
- Melt chocolate using a double boiler or microwave in short intervals.
- Dip each Oreo into melted chocolate, coating completely.
- Let excess chocolate drip off before placing the cookie on the lined sheet.
- Add optional toppings immediately.
- Allow chocolate to set at room temperature for 20-30 minutes, or refrigerate briefly.
- Serve immediately or store in an airtight container.
Notes
- Tap excess chocolate off each cookie for smooth coating.
- Decorate while chocolate is soft for best results.
- Store cookies in layers separated by parchment paper to prevent sticking.
- Prep Time: 15 minutes
- Cook Time: 15 minutes
- Category: Dessert
- Method: No-bake / Dipping
- Cuisine: American
Nutrition
- Serving Size: 20-25
- Calories: 210
- Sugar: 20g
- Sodium: 95mg
- Fat: 12g
- Saturated Fat: 7g
- Unsaturated Fat: 4g
- Trans Fat: 0g
- Carbohydrates: 26g
- Fiber: 1g
- Protein: 2g
- Cholesterol: 5mg