There’s something timeless and nostalgic about banana ice cream. Whether it’s your first childhood memory of licking a cold scoop on a hot summer day or a comforting bowl shared with family on a weekend night, this dessert always seems to hit the right spot. I created this banana ice cream recipe during a stretch of sweltering summer afternoons when all I had were a bunch of overripe bananas and the craving for something cold, creamy, and satisfying—but without turning to the store-bought stuff filled with preservatives.
If you’ve ever hesitated about making ice cream at home, thinking you need fancy machines or a culinary degree, let me stop you right there. This banana ice cream recipe is beautifully simple, naturally sweet, and adaptable for just about any lifestyle. It’s the perfect combination of ripe bananas, creamy texture, and a subtle hint of vanilla that transforms an ordinary fruit into a scoop of frozen bliss. Keep reading, because once you try this once—you’ll never throw away ripe bananas again.
Why I Love This Recipe?
It all started with the bananas—those sad, spotty ones sitting on the counter that no one wanted to eat. But instead of tossing them out, I found a new way to turn them into something indulgent. This banana ice cream is not just a quick fix for ripe bananas—it’s a solution for anyone who wants a dessert that’s healthy, customizable, and genuinely satisfying.
The beauty of this recipe lies in its simplicity. No churner required, just a blender or food processor and a freezer. The natural sweetness of ripe bananas eliminates the need for added sugars. It’s creamy, it’s smooth, and it’s entirely plant-based if you choose. And the best part? You can build on it—throw in some chocolate chips, swirl in some peanut butter, or top it with a dash of cinnamon.
Unlike store-bought versions, which are often pumped full of stabilizers, artificial flavoring, and excess sugar, this banana ice cream offers a clean, real-food experience. It’s especially popular among kids, health-conscious eaters, and even those with dairy sensitivities. It’s the kind of dessert you don’t have to feel guilty about, and it keeps well in the freezer for days.
Whether you’re serving it in a cone, scooping it into a sundae bowl, or using it to top a warm brownie, this is one of those recipes you’ll return to over and over again.
Ingredients for Banana Ice Cream Recipe
What makes this banana ice cream so appealing is the simplicity of the ingredients. You don’t need to search far and wide for specialty items. Chances are, you already have most of these in your kitchen. And the hook? You only need one main ingredient—bananas.
Here’s what you’ll need to make the base:
- 4 ripe bananas – The riper, the better. Look for ones with plenty of brown spots. They’re sweeter and easier to blend.
- ¼ cup milk or plant-based milk – Optional, but helps make the texture smoother when blending.
- ½ teaspoon vanilla extract – Enhances the banana flavor and adds depth.
- Pinch of salt – Just a touch brings out the sweetness.
- Optional mix-ins or toppings:
- Mini chocolate chips
- Chopped nuts
- Peanut butter swirl
- Cinnamon or nutmeg
- Crushed cookies
The key is using bananas as the hero. Everything else is just there to enhance. That means fewer preservatives, no refined sugar, and more control over what goes into your dessert.
How Much Time Will You Need?
You’ll be surprised at how little time this recipe requires.
- Prep Time: 5 minutes (slicing bananas)
- Freezing Time: 2–3 hours (for sliced bananas)
- Blending Time: 5 minutes
- Additional Freezing Time (optional): 1–2 hours (for firmer ice cream)
So in total, you’ll need about 3 to 5 hours, depending on how soft or firm you want your ice cream. But hands-on time is less than 15 minutes, making it one of the easiest frozen treats you’ll ever make.
How to Make This Banana Ice Cream Recipe

Let’s break it down into manageable steps so you can follow this effortlessly in your kitchen.
Step – 1: Prep the Bananas
Peel and slice the ripe bananas into small coins. Lay them in a single layer on a baking sheet or plate lined with parchment paper. This helps them freeze evenly and prevents clumping. Place the tray in the freezer for 2–3 hours, or until the banana slices are completely frozen.
Step – 2: Blend the Frozen Bananas
Transfer the frozen banana slices into a high-speed blender or food processor. Blend on high. At first, the mixture will look crumbly—don’t worry, this is normal. Scrape down the sides and keep blending.
Add a splash (about ¼ cup) of milk or plant-based milk to loosen the mixture. Blend again until the consistency becomes smooth and creamy, like soft-serve ice cream.
Step – 3: Add Flavor
Now’s the time to enhance the base. Add vanilla extract and a pinch of salt. If you’re adding mix-ins like cinnamon, chocolate chips, or peanut butter, do it now and pulse gently so they’re evenly distributed.
Step – 4: Serve or Freeze
At this point, your banana ice cream is ready to eat as a soft-serve. If you prefer a firmer, scoopable texture, transfer it to an airtight container and freeze it for an additional 1–2 hours. Use an ice cream scoop warmed in water to serve.
Substitutions
If you want to switch things up or adapt the recipe to your dietary needs, there are plenty of easy substitutions.
- Bananas – While bananas are the main ingredient, you can blend in other frozen fruits like mango or avocado for a twist. Just keep banana as the dominant flavor for the creamiest results.
- Milk – Use almond, oat, coconut, or even cashew milk. If you’re not avoiding dairy, whole milk or cream can make it extra rich.
- Sweetener – If your bananas aren’t sweet enough, a teaspoon of maple syrup, honey, or agave can boost flavor without overpowering.
- Flavoring – Instead of vanilla, try almond extract, espresso powder, or even a few drops of mint extract for a fresh take.
With just a few tweaks, you can make this recipe suitable for paleo, vegan, or gluten-free diets. That’s the power of a banana base.
Best Side Dish of Banana Ice Cream Recipe
Want to turn your bowl of banana ice cream into a next-level dessert? Here are some delightful side dish ideas that pair beautifully:
- Warm Brownie or Blondie – The contrast of warm and cold is unbeatable.
- Granola Clusters or Coconut Crumble – Adds crunch and texture.
- Grilled Pineapple Slices – Sweet, juicy, and slightly caramelized—perfect match.
These side dishes elevate the banana ice cream into a complete, indulgent dessert that works for dinner parties, weekend treats, or cozy nights in.
Serving and Presentation Tips
There’s something incredibly satisfying about presenting a homemade dessert that looks just as good as it tastes. And with banana ice cream, a few thoughtful touches can completely elevate the experience.
Start by scooping the ice cream into chilled bowls or cups—this helps maintain its shape longer, especially in warm weather. For a soft-serve vibe, serve it straight from the blender into parfait glasses and top with a drizzle of nut butter or chocolate sauce.
If you’ve frozen it for a firmer scoop, use a warmed ice cream scoop for cleaner, round scoops. Garnish with thin banana slices, a sprinkle of chopped nuts, or even a light dusting of cinnamon. Want to get extra fancy? Serve in edible bowls made from chocolate-dipped waffle cones or hollowed-out mini coconuts.
It’s not just about presentation—it’s about creating a moment around dessert that makes it feel special, even when it’s made from the most humble of ingredients.
Tips and Tricks to Make This Recipe Even Better
The secret to taking banana ice cream from good to great lies in the little things—the subtle tweaks and careful prep that bring out maximum flavor and texture.
- Always use very ripe bananas – The darker the peel, the sweeter and more flavorful the ice cream will be.
- Freeze in single layers – This ensures the bananas don’t stick together, making them easier to blend.
- Pulse before blending – Start with a few pulses in the blender before going full speed. This helps break up the banana without overheating your machine.
- Add a bit of fat – A spoonful of peanut butter, coconut cream, or cashew butter adds richness and helps with scoopable texture.
- Rest before scooping – If freezing for later, let the ice cream sit at room temperature for 10 minutes before serving. This softens it up for smoother scoops.
These tiny adjustments can make a massive difference in flavor, texture, and overall enjoyment.
Common Mistakes to Avoid
Even though this recipe is beginner-friendly, a few simple missteps can take your banana ice cream off track. Here’s what to avoid:
- Using underripe bananas – They lack natural sweetness and make the ice cream bland.
- Over-blending – Too much blending can cause the mixture to become runny, especially if your machine heats up. Stop as soon as it turns creamy.
- Adding too much liquid – A little milk helps the blending process, but too much turns it into a smoothie.
- Freezing too hard – If you over-freeze, it may become icy. Store in a shallow container and cover tightly to avoid freezer burn.
- Not scraping the blender sides – Important to do frequently for even blending and smooth consistency.
Avoiding these mistakes means smoother scoops, better texture, and a much more enjoyable dessert every time.
How to Store It
Homemade banana ice cream stores beautifully with the right approach. After blending, transfer it to an airtight container. Smooth the top with a spatula and press a piece of parchment paper or plastic wrap directly onto the surface—this helps prevent ice crystals from forming.
Store in the freezer for up to 1 week for best flavor and texture. After that, it can become icy and lose its creaminess. Before serving, let it sit on the counter for 5–10 minutes to soften slightly and become scoopable again.
Pro tip: store in smaller containers or single-serve jars to avoid repeated thawing and refreezing.
FAQ
Can I make banana ice cream without any milk?
Yes! Milk is optional. It just makes blending easier. You can blend just frozen bananas until creamy—it will still be delicious.
How do I make it sweeter?
If your bananas aren’t sweet enough, add 1–2 teaspoons of honey, maple syrup, or agave during blending.
Can I use frozen bananas straight from the freezer?
Yes, but let them thaw for 2–3 minutes at room temperature first. This softens them slightly for easier blending.
Can I add protein powder?
Absolutely. Add a scoop during blending to turn your dessert into a post-workout treat. Choose a banana or vanilla flavor for best taste.
How do I make it vegan?
Use plant-based milk like almond or oat milk and avoid honey. The base recipe is already dairy-free and egg-free.
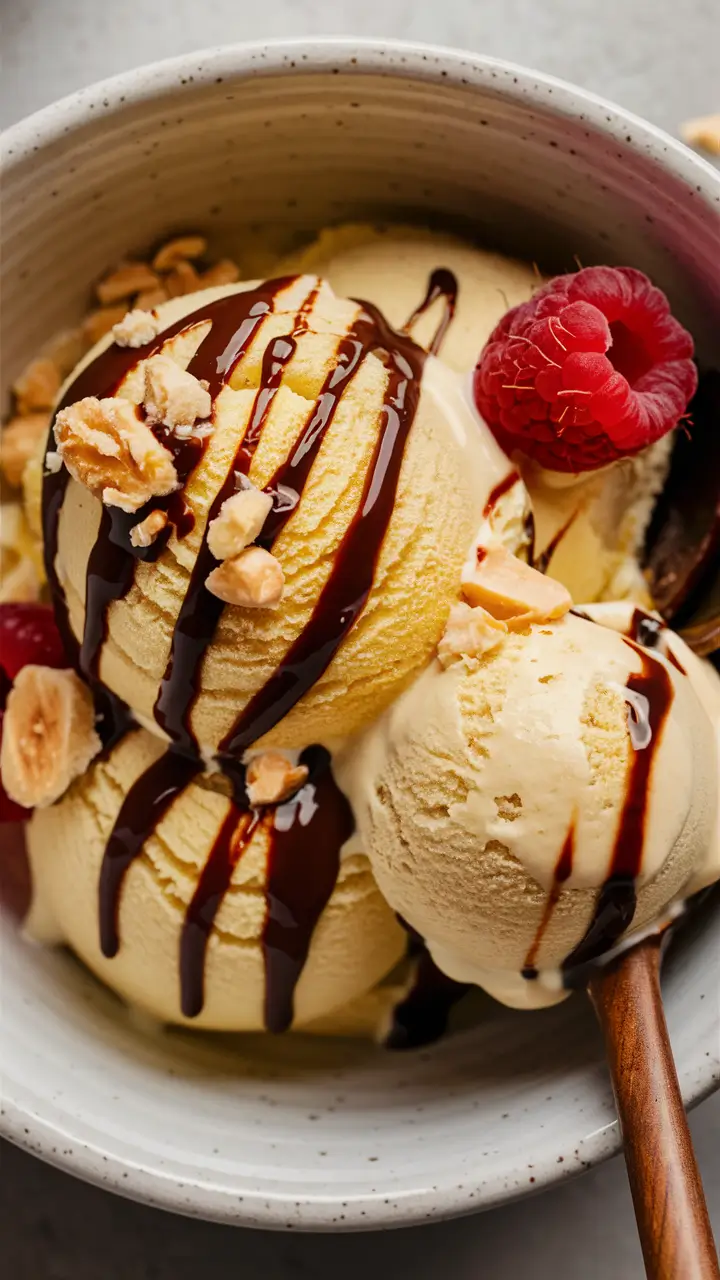
Banana Ice Cream Recipe
- Total Time: 3 hours (including freezing time)
- Yield: 4 servings 1x
- Diet: Vegan
Description
This banana ice cream recipe is the ultimate guilt-free dessert you’ll return to again and again. Made with just frozen ripe bananas and a few optional ingredients, it delivers the perfect balance of creamy texture and natural sweetness. No ice cream machine needed—just a blender and a little time. Whether you’re living dairy-free, looking for a healthier treat, or simply trying to use up ripe bananas, this quick frozen dessert is easy to whip up and even easier to customize. You’ll love its versatility and how satisfying it tastes, whether scooped solo or paired with toppings.
Ingredients
- 4 ripe bananas, sliced and frozen
- ¼ cup plant-based milk (optional)
- ½ tsp vanilla extract
- Pinch of salt
- Optional toppings: chocolate chips, chopped nuts, cinnamon, peanut butter
Instructions
-
Peel and slice bananas. Freeze for 2–3 hours until solid.
-
Add frozen banana slices to a blender or food processor. Blend until crumbly.
-
Add milk (if needed), vanilla, and salt. Blend until smooth and creamy.
-
Fold in any mix-ins like chocolate chips or peanut butter.
-
Serve immediately for soft-serve, or freeze for 1–2 hours for firmer texture.
-
Scoop and garnish as desired.
Notes
- For firmer scoops, freeze the ice cream in a shallow container.
- Add a splash of lemon juice if storing longer—it keeps flavor fresh.
- You can double or halve the recipe easily.
- Prep Time: 5 minutes
- Cook Time: 0 minutes
- Category: Dessert
- Method: Freezing, No-cook
- Cuisine: American
Nutrition
- Serving Size: 1 cup
- Calories: 120